
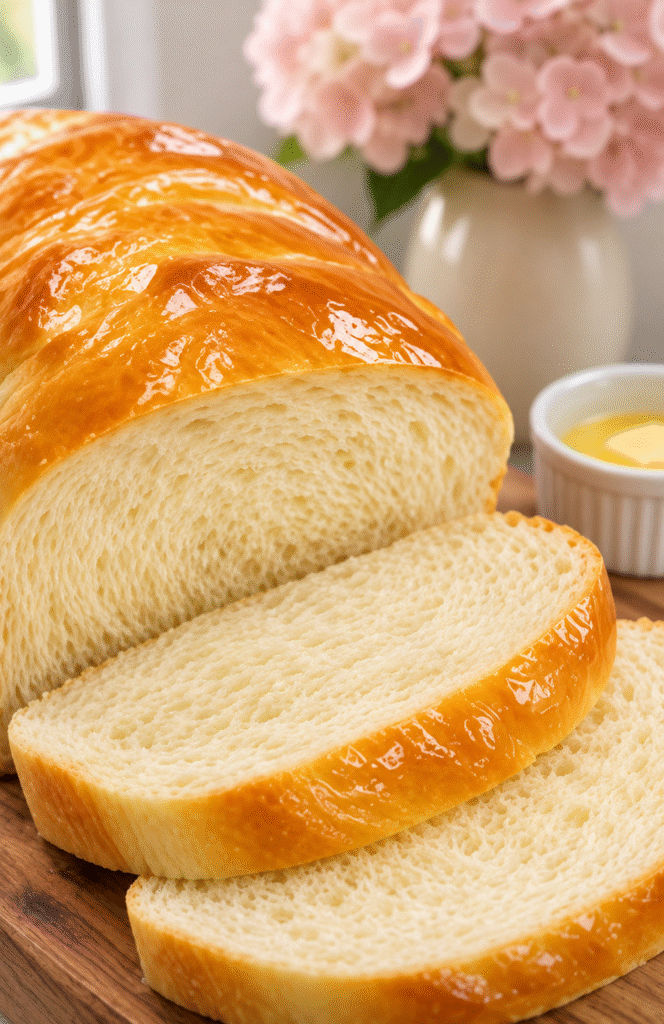
Soft & Fluffy Homemade Sandwich Bread brings together a tender crumb, a golden crust, and just enough sweetness to complement your favorite fillings. Milk, butter, and an egg enrich the dough, while a straightforward mixing and rising process keeps the recipe approachable.
This loaf works beautifully for everyday sandwiches, morning toast, grilled cheese, and French toast. Moreover, you only need one loaf pan and familiar pantry ingredients to make it.
Picture a quiet weekend morning with a loaf cooling on the counter and butter waiting beside the cutting board. A few thick slices can become breakfast, while the rest can carry you through several lunches. That everyday usefulness makes homemade sandwich bread especially appealing. You get the pleasure of baking something from scratch, along with a loaf that serves a practical purpose. Even the end pieces have a place: toast them until golden, spread them with butter, or save them for breadcrumbs. With a little planning around the rising time, this bread fits comfortably into an ordinary day.
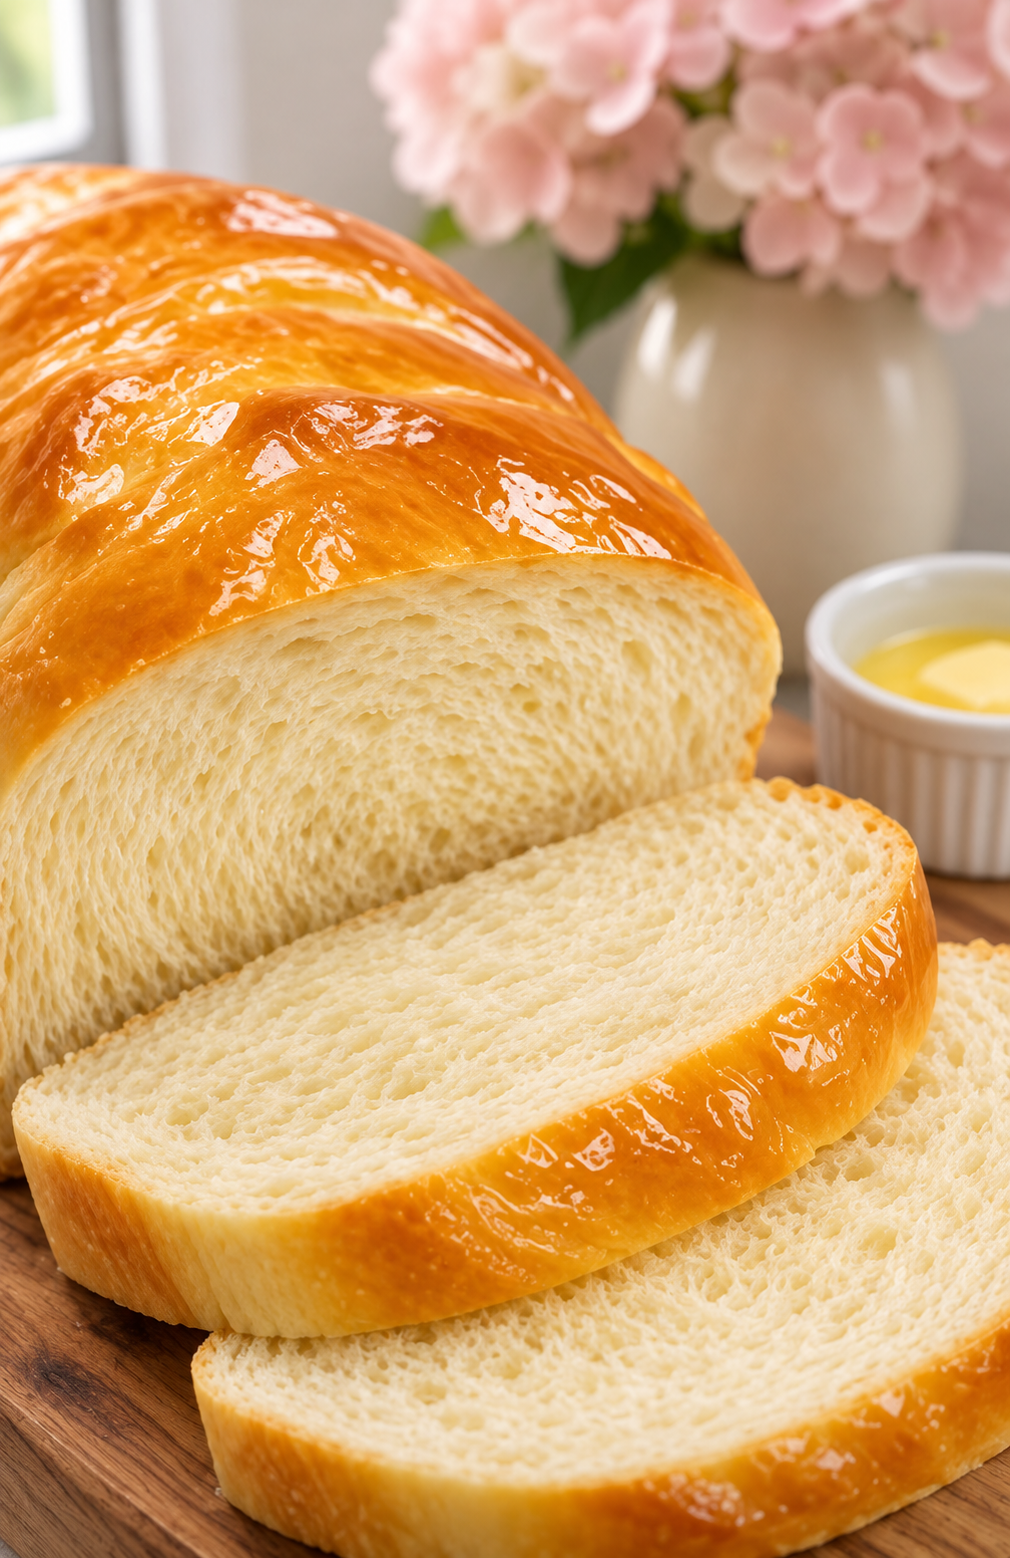
Soft & Fluffy Homemade Sandwich Bread
Equipment
- 9 x 5-inch loaf pan
- Large mixing bowl
- Measuring cups and spoons
- Kitchen scale Optional, for weighing flour
- Stand mixer with dough hook Optional; hand kneading also works
- Instant-read thermometer Optional, for checking liquid and loaf temperatures
- Pastry brush
- Wire cooling rack
- Serrated bread knife
Ingredients
- 3 1/2 cups all-purpose flour or bread flour, approximately 420 grams, plus a little more only if needed
- 2 1/4 teaspoons instant yeast
- 1 cup warm milk
- 1/4 cup warm water
- 3 tablespoons granulated sugar
- 3 tablespoons unsalted butter, melted and cooled until warm
- 1 large egg
- 1 1/2 teaspoons fine salt
- 1 tablespoon unsalted butter, melted, for brushing
- 1 teaspoon neutral oil, for greasing the bowl and loaf pan
Instructions
- Combine the warm milk, warm water, sugar, instant yeast, 3 tablespoons melted butter, and egg in a large bowl. Keep the liquids comfortably warm, approximately 100-110°F.
- Add the flour and salt. Stir until a soft, shaggy dough forms.
- Knead for 8-10 minutes by hand or 5-7 minutes with a dough hook, until smooth and elastic. Add extra flour only if needed, one tablespoon at a time, keeping the dough soft and slightly tacky.
- Lightly grease a bowl. Add the dough, turn to coat, cover, and let rise for 1-1 1/2 hours, or until doubled.
- Gently deflate the dough. Pat it into a rectangle, roll it into a snug loaf, and pinch the seam closed.
- Place seam-side down in a greased 9 x 5-inch loaf pan. Cover loosely and let rise for 30-45 minutes, until approximately 1 inch above the rim.
- Preheat the oven to 350°F. Bake for 30-35 minutes, until golden and approximately 190-195°F in the center. Tent loosely with foil if the top browns too quickly.
- Brush the warm loaf with 1 tablespoon melted butter. Cool in the pan for 10 minutes, then transfer to a wire rack and cool completely before slicing into approximately 12 slices.
Notes
Nutrition
What Makes This Sandwich Bread Soft
Milk, Butter, and Egg Enrich the Dough
Milk gives Soft & Fluffy Homemade Sandwich Bread a pleasantly tender texture and a mild richness. Meanwhile, its natural sugars help the crust develop color in the oven.
Butter adds flavor and softens the crumb. However, let the melted butter cool until comfortably warm before combining it with the yeast mixture. Hot butter can raise the temperature of the liquids more than you intend.
The egg contributes richness, color, and structure. Together, these ingredients create a dough that feels softer than a basic flour-and-water bread dough.
Sugar adds a gentle sweetness without turning the loaf into dessert bread. As a result, the finished slices suit both sweet spreads and savory fillings.
Finally, the butter brushing after baking helps soften the crust. Apply it while the loaf remains warm so it spreads easily across the surface.
Flour Choice and Careful Measuring Matter
Both all-purpose flour and bread flour work in this recipe. Bread flour generally creates a slightly chewier loaf with more structure, while all-purpose flour gives a tender, everyday sandwich texture.
Start with 3 1/2 cups of flour. For a useful weight reference, aim for approximately 420 grams, although cup measurements vary with your measuring method.
If you measure by volume, fluff the flour, spoon it into the measuring cup, and level the top. Otherwise, scooping directly from the bag can pack extra flour into each cup.
The dough should feel soft and slightly tacky after kneading. It should also hold its shape instead of flowing like batter.
Because flour absorbs liquid differently, you may need a small adjustment. If the dough remains excessively sticky after several minutes of kneading, add flour one tablespoon at a time. Stop as soon as you can handle it. Too much extra flour can produce a dense loaf.
Mixing and Kneading the Dough
Combine the Ingredients into a Soft Dough
Begin with warm milk and water that feel comfortably warm to the touch. Around 100-110°F provides a practical starting range for this method.
Combine the milk, water, sugar, instant yeast, cooled melted butter, and egg in a large bowl. Then add the flour and salt.
Instant yeast does not require a separate proofing step, so you can proceed directly with mixing. Stir until the flour absorbs the liquid and the mixture forms a shaggy dough.
At first, the dough may look rough and feel sticky. Give it a few minutes of kneading before deciding whether it needs more flour. As the flour hydrates and the dough develops strength, its texture should improve.
If you use a stand mixer, choose the dough hook and follow the manufacturer’s guidance for kneading speed. Stop occasionally to check the dough rather than relying entirely on the clock.
Knead Until Smooth and Elastic
Knead Soft & Fluffy Homemade Sandwich Bread for approximately 8-10 minutes by hand or 5-7 minutes with a stand mixer.
For hand kneading, press the dough away with the heel of your hand, fold it back, and rotate it slightly. Repeat this motion until the surface looks smoother and the dough feels elastic.
Use only a light dusting of flour on the counter. Alternatively, a dough scraper can help lift sticky dough without adding unnecessary flour.
To check development, stretch a small piece gently between your fingers. It should stretch into a thin membrane before tearing, although you do not need a flawless windowpane to make a good loaf.
The finished dough should feel supple and slightly tacky. If it feels stiff and dry, you likely added too much flour.
Next, shape it into a ball and place it in a lightly greased bowl. Turn it once to coat the surface, then cover the bowl to prevent drying during the first rise.
Rising, Shaping, and Baking
Let the Dough Rise and Shape It Tightly
Allow the dough to rise for approximately 1-1 1/2 hours, or until it doubles in size. However, use its appearance as your main guide.
A cool room can extend the rising time, while a warm kitchen can shorten it. Choose a comfortably warm spot away from direct heat.
Once the dough doubles, gently press it down to release large air pockets. Then turn it onto a lightly floured surface.
Pat it into a rectangle about as wide as the length of your loaf pan. Roll it into a snug log, starting from a short edge. Pinch the seam closed and tuck the ends underneath.
Place the log seam-side down in a greased 9 x 5-inch loaf pan. This shaping method helps Soft & Fluffy Homemade Sandwich Bread develop an even crumb and a rounded top.
Cover the pan loosely and let the loaf rise again. It should reach approximately 1 inch above the rim, usually within 30-45 minutes.
Bake Until Golden and Fully Set
Preheat the oven to 350°F toward the end of the second rise. Position a rack near the center so the loaf has room to expand.
Bake for 30-35 minutes. The top should develop a rich golden color, and the loaf should feel firm enough to hold its shape.
If the surface browns quickly, loosely tent it with foil for the remaining baking time. Meanwhile, continue baking until the center finishes cooking.
A thermometer offers a more reliable check than the hollow sound alone. Aim for approximately 190-195°F in the center, inserting the probe from the side if possible.
After baking, brush the warm top with the remaining tablespoon of melted butter.
Let the loaf rest in the pan for 10 minutes. Then transfer it to a wire rack. Allow it to cool completely before slicing, because the warm crumb can compress or turn gummy under the knife.
Serving and Storing Your Bread
Use the Loaf for Everyday Meals
Soft & Fluffy Homemade Sandwich Bread offers enough structure for sandwiches while keeping each bite tender. Slice it evenly with a serrated bread knife after it cools.
For lunch, try chicken salad, sliced cheese, hummus, or roasted vegetables. However, drain wet fillings and pat vegetables dry to help the bread hold together.
For grilled cheese, cut moderately thick slices and cook over medium-low heat. That slower approach gives the cheese time to melt while the outside develops a golden crust.
At breakfast, toast a slice and add butter, jam, nut butter, or a cooked egg. Slightly thicker slices also work well for French toast.
Because the bread has a mild sweetness, it pairs comfortably with both sweet and savory toppings. You can also cut leftover slices into cubes for croutons or a breakfast casserole.
For smaller sandwiches, cut each finished sandwich into halves or quarters after filling it.
Keep the Crumb Tender After Baking
Cool Soft & Fluffy Homemade Sandwich Bread completely before storing it. Otherwise, trapped warmth can create condensation inside the bag.
Keep the cooled loaf in an airtight bag or bread container at room temperature for about 2-3 days. In a hot, humid kitchen, freeze portions sooner for better quality.
Avoid routine refrigerator storage, which can make bread stale more quickly.
For longer storage, slice the loaf and place the slices in a freezer-safe bag. Separate portions with parchment if you want to remove individual slices easily. For best quality, use within about two months.
Toast frozen slices directly, or let them thaw at room temperature while still covered.
If the loaf starts to feel dry, turn it into toast, breadcrumbs, croutons, or French toast. However, discard the entire loaf if you notice mold.
For the softest eating texture, cut only the slices you need and keep the remaining loaf covered.
Ingredients
Yield: 1 loaf, approximately 12 slices
Prep time: 20 minutes
Rise time: 1 hour 30 minutes to 2 hours 15 minutes
Bake time: 30-35 minutes
Total time: Approximately 2 hours 20 minutes to 3 hours 10 minutes, plus cooling
- 3 1/2 cups all-purpose flour or bread flour, approximately 420 grams, plus a little more only if needed
- 2 1/4 teaspoons instant yeast
- 1 cup warm milk
- 1/4 cup warm water
- 3 tablespoons granulated sugar
- 3 tablespoons unsalted butter, melted and cooled until warm
- 1 large egg
- 1 1/2 teaspoons fine salt
- 1 tablespoon unsalted butter, melted, for brushing
- 1 teaspoon neutral oil, for greasing the bowl and loaf pan
Instructions
- Combine the warm milk, warm water, sugar, instant yeast, 3 tablespoons melted butter, and egg in a large mixing bowl. Keep the liquids comfortably warm, approximately 100-110°F.
- Add the flour and salt. Stir until a soft, shaggy dough forms.
- Knead for 8-10 minutes by hand or 5-7 minutes with a dough hook, until smooth and elastic. If excessive stickiness remains, add flour one tablespoon at a time, keeping the dough soft and slightly tacky.
- Lightly grease a bowl. Add the dough, turn to coat, cover, and let rise for 1-1 1/2 hours, or until doubled.
- Gently deflate the dough. Pat it into a rectangle, roll it into a snug loaf, and pinch the seam closed.
- Place seam-side down in a greased 9 x 5-inch loaf pan. Cover loosely and let rise for 30-45 minutes, until the dough reaches approximately 1 inch above the rim.
- Meanwhile, preheat the oven to 350°F. Bake for 30-35 minutes, until golden and approximately 190-195°F in the center. Tent loosely with foil if the top browns too quickly.
- Brush the warm loaf with 1 tablespoon melted butter. Cool in the pan for 10 minutes, then transfer to a wire rack and cool completely before slicing.
Frequently Asked Questions
Can I use active dry yeast instead of instant yeast?
Yes. Use the same amount of active dry yeast. First stir it into the warm water with a little of the measured sugar and let it stand for 5-10 minutes, until foamy. Then continue with the recipe. Rising may take longer.
Why did my sandwich bread turn out dense?
Common causes include too much flour, insufficient kneading, or a short rise. In addition, old yeast may struggle to lift the dough. Keep the dough soft, check its elasticity, and let it double before shaping.
Can I make this bread without a stand mixer?
Yes. Mix the ingredients in a large bowl, then knead by hand for approximately 8-10 minutes. A dough scraper helps manage initial stickiness. Avoid adding large amounts of flour simply to keep your hands clean.
Why does the recipe require complete cooling before slicing?
The crumb continues to set as the loaf cools. Cutting too early releases steam and compresses the tender interior. Consequently, a loaf that looks fluffy can develop gummy-looking slices if you cut it while hot.
Can I replace some of the flour with whole wheat flour?
Yes. Start by replacing 1/2 cup of the all-purpose flour with whole wheat flour. Because whole wheat flour absorbs more liquid, assess the dough after mixing and add a little extra milk if necessary. Expect a slightly heartier loaf.
Conclusion
Soft & Fluffy Homemade Sandwich Bread turns basic ingredients into a tender, versatile loaf with a golden, buttery crust. Careful flour measuring, thorough kneading, and patient rising help create slices that work for sandwiches, toast, and more.
Let the loaf cool completely, slice it with a serrated knife, and freeze any portions you will not use within a few days. With those simple habits, you can enjoy homemade bread throughout the week.




Leave a Reply