
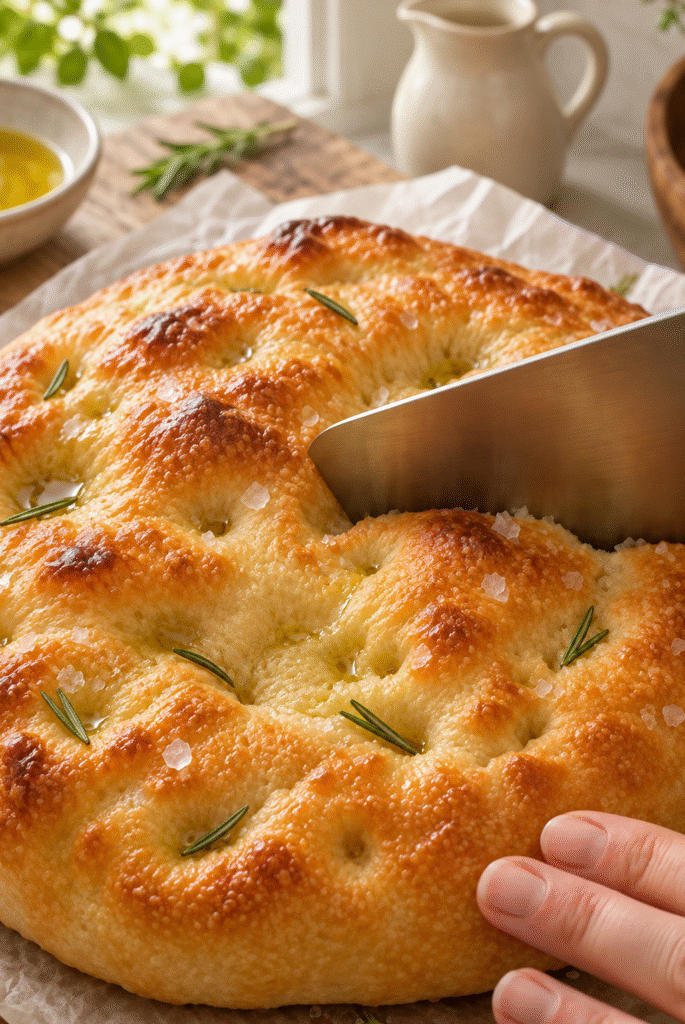
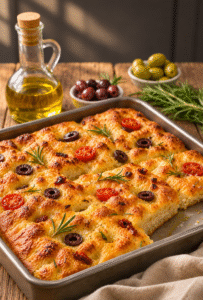
Single-Serve No-Knead Focaccia Bread gives you golden edges, a tender center, and a glossy olive oil crust without making a full tray. You only need a small bowl, a spoon, and a little patience while the dough rises. Then, a hot oven turns that sticky dough into a warm, fragrant bread with crisp corners and rosemary-scented dimples.
This recipe makes one small focaccia, enough for a generous individual serving or two modest side portions. Serve it with soup, slice it for a sandwich, or tear off warm pieces for dipping.
There's something especially appealing about a bread recipe that starts with just half a cup of flour. It fits those evenings when you want something warm alongside dinner without planning several meals around leftovers. You can stir the dough before starting another task, check its progress later, and bake it while you finish the rest of your meal. Meanwhile, the olive oil and rosemary bring that familiar bakery aroma into the kitchen. The small portion also makes the process approachable: one bowl, one little pan, and a fresh focaccia that you can enjoy while the edges still crunch.
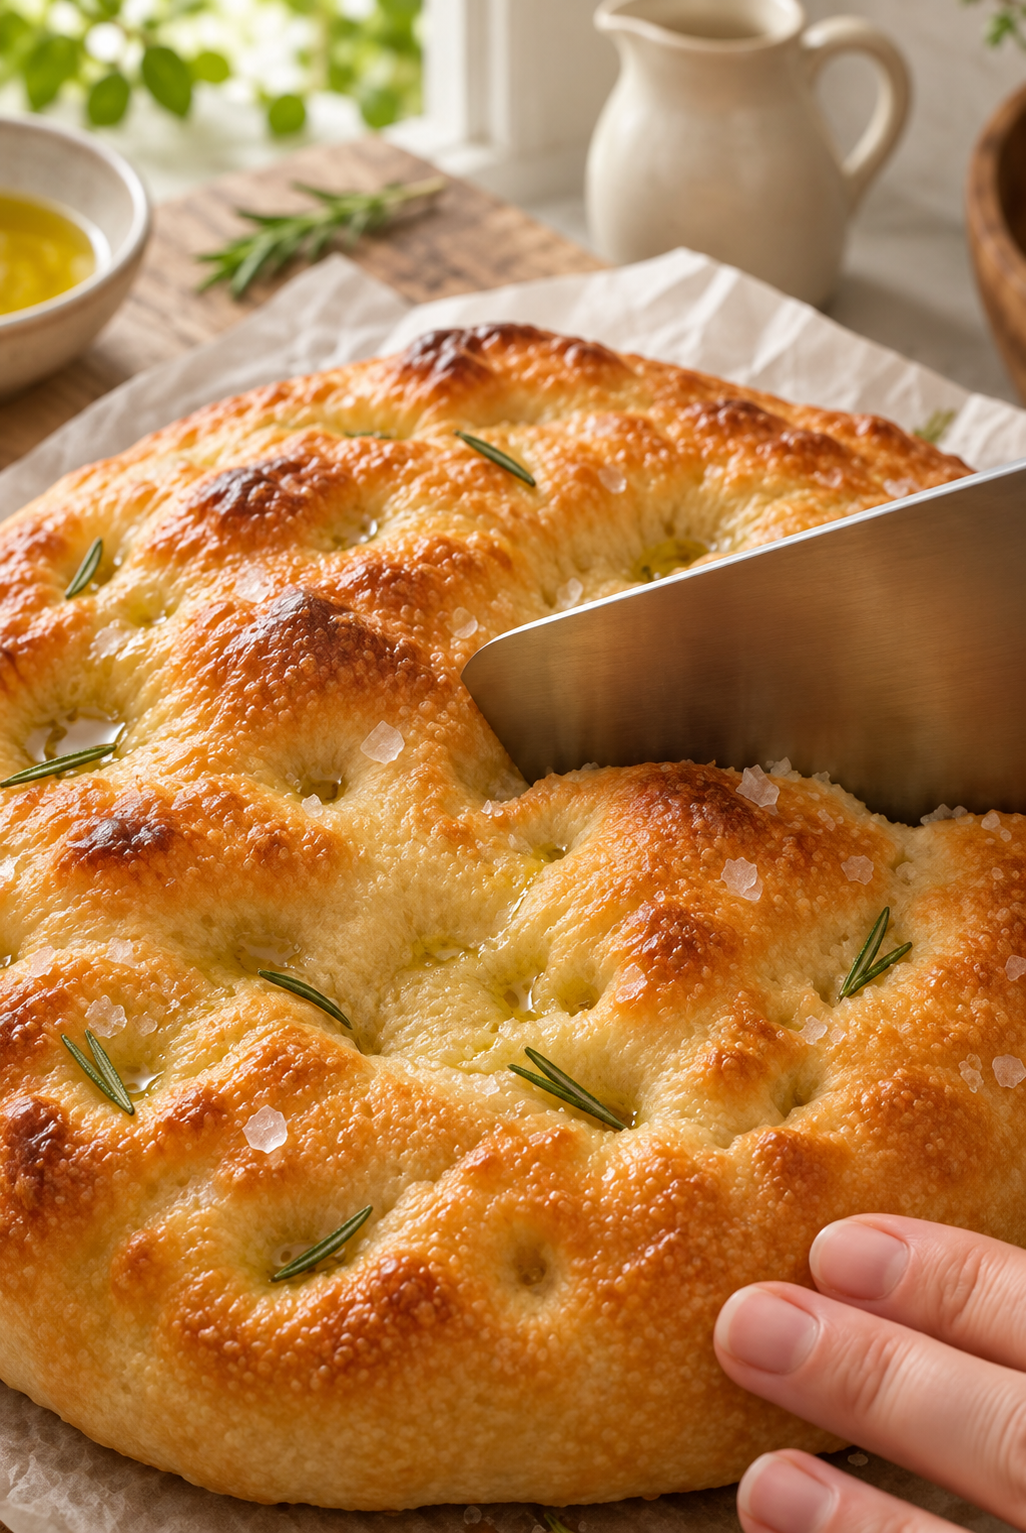
Single-Serve No-Knead Focaccia Bread
Equipment
- small mixing bowl
- Kitchen scale Recommended for measuring the flour.
- Measuring cups and spoons
- Spoon or flexible spatula
- 5-6-inch metal cake pan Alternatively, use a similarly sized baking dish rated for 425°F.
- Bowl cover
- Wire cooling rack
Ingredients
- 0.5 cup all-purpose flour or bread flour (65 g)
- 0.25 cup lukewarm water (60 ml)
- 0.25 teaspoon instant yeast
- 0.25 teaspoon granulated sugar
- 0.125 teaspoon fine salt
- 1 tablespoon olive oil, divided (15 ml)
- 0.5 teaspoon dried rosemary, optional
- 1 small pinch flaky sea salt (approximately 1/16 teaspoon)
Instructions
- Combine the lukewarm water, instant yeast, and sugar in a small bowl. Add the flour and fine salt. Stir until a sticky dough forms and no dry flour remains.
- Drizzle ½ teaspoon olive oil over the dough. Gently turn it with a spoon or spatula to coat the surface.
- Cover and let rise in a warm place for 60-90 minutes, or until puffy and nearly doubled. Allow more time in a cool kitchen.
- Coat a 5-6-inch metal cake pan or suitably sized oven-safe baking dish with 2 teaspoons olive oil.
- Gently transfer the dough to the pan. Turn it once to coat, then ease it toward the edges. If it resists stretching, let it rest for 10 minutes before trying again.
- Cover loosely and let rise for 20-30 minutes, or until relaxed and puffy. Meanwhile, preheat the oven to 425°F (220°C).
- Drizzle the remaining ½ teaspoon olive oil over the dough. Lightly oil your fingertips, press dimples across the surface, and sprinkle with the rosemary and flaky salt.
- Bake for 18-22 minutes, checking from 18 minutes onward, until the top and edges turn golden and the center sets. Allow extra time if your pan or oven requires it.
- Rest in the pan for 5 minutes, then transfer to a wire rack. Cool another 5-10 minutes before slicing and serving warm.
Notes
Nutrition
What Makes This Small Focaccia Work
A Wet Dough Creates a Tender Center
Single-Serve No-Knead Focaccia Bread starts with a very soft, sticky dough. The recipe combines 65 grams of flour with 60 milliliters of water, so the mixture will look wetter than ordinary sandwich bread dough. That consistency supports a light interior, although flour type, proofing, and handling all influence the final crumb.
Instead of kneading, stir until the flour absorbs the water and no dry patches remain. Then, give the dough time to rest and rise. During that rest, the flour hydrates and the dough develops structure.
Because the dough feels sticky, you may want to add more flour. However, extra flour can make this tiny batch noticeably heavier. Use lightly oiled fingers or an oiled spatula when you need to handle it.
Also, keep your expectations realistic. A small, same-day focaccia can develop lovely bubbles and a tender crumb, but every loaf will show a slightly different interior. You don't need enormous holes for delicious bread.
Olive Oil Builds Flavor and Crisp Edges
Olive oil plays several roles in this recipe. First, a thin coating helps keep the dough's surface supple during the first rise. Next, oil in the pan helps the bread release and encourages a crisp underside. Finally, a small drizzle over the top settles into the dimples and carries the rosemary flavor.
For clear measurements, divide the tablespoon of olive oil into three portions: ½ teaspoon for coating the dough, 2 teaspoons for the pan, and ½ teaspoon for the topping.
Choose an olive oil whose flavor you enjoy. Since the ingredient list stays short, its character comes through clearly.
Meanwhile, flaky salt adds little bursts of seasoning across the surface. Use only a small pinch, since the dough already contains salt. If you skip the rosemary, the olive oil and salt still give the focaccia plenty of flavor.
Choosing Ingredients and Equipment
Flour, Yeast, Water, and Seasoning
You can make Single-Serve No-Knead Focaccia Bread with all-purpose flour or bread flour. All-purpose flour creates a tender bite, while bread flour generally gives a little more chew. Both options suit this recipe.
For the most consistent result, weigh the flour. A half-cup measure can hold different amounts depending on how tightly you fill it. If you use measuring cups, spoon the flour into the cup and level the surface.
Instant yeast keeps the method straightforward. You can stir it into the water with the sugar and continue immediately; you don't need a separate foaming stage.
Use lukewarm water that feels comfortably warm rather than hot. Hot water can harm the yeast, while cool water slows the rise. Also, remember that room temperature affects the schedule, so watch the dough instead of relying only on the clock.
The sugar adds a small amount of sweetness without making the bread taste sweet. Meanwhile, the salt seasons the dough. Measure both carefully because even small changes matter in a batch this size.
A Small Pan Gives the Dough Support
Use a small metal baking pan for the crispest edges. A 5-inch round cake pan produces a thicker focaccia, while a 6-inch pan creates a thinner bread that may finish baking sooner.
Alternatively, choose a small oven-safe dish with a similar base area. Check that the dish can handle 425°F, especially if you use ceramic or glass.
The dough may not reach every edge immediately after you transfer it. That's fine. Let it relax for about 10 minutes, then gently ease it outward again if necessary.
Avoid forcing or tearing the dough. Also, don't use a much larger pan unless you want a very thin result. With only 65 grams of flour, this recipe needs a compact baking space.
You'll also need a mixing bowl, measuring spoons, a spoon or spatula, and a cover for proofing. A wire rack helps the underside stay crisp after baking.
Getting the Rise and Dimples Right
Let Puffiness Guide Both Rises
During the first rise, the dough should become puffy and approach double its starting volume. In a comfortably warm kitchen, that often takes 60-90 minutes. However, a cooler room may require longer.
Cover the bowl to prevent the surface from drying. Then, place it somewhere gently warm and away from drafts. Avoid direct heat or a hot oven, which can warm this small dough too quickly.
After the first rise, transfer the dough carefully into the oiled pan. Try to preserve some of the air rather than pressing everything flat.
Next, allow another 20-30 minutes for the second rise, or wait until the dough looks relaxed and noticeably puffy. The combined rises commonly take about 1½-2 hours, although conditions can extend that time.
If the dough shows little activity, give it more time before moving forward. Meanwhile, start preheating the oven during the second rise so the oven reaches its full temperature before baking.
Dimple Gently and Keep Toppings Light
Dimples give Single-Serve No-Knead Focaccia Bread its familiar appearance. They also create little pockets for olive oil and seasoning.
First, drizzle the reserved topping oil over the risen dough. Then, lightly oil your fingertips and press several deep indentations across the surface. Use a gentle downward motion rather than dragging your fingers through the dough.
You can press close to the bottom, but avoid repeatedly flattening the entire surface. The goal is to shape the bread while keeping some of its trapped air.
Next, scatter the rosemary and flaky salt evenly. If you use dried rosemary, crush it lightly between your fingers so the pieces distribute more easily.
Keep any additional toppings modest. A few thin olive slices or a light sprinkle of herbs can work well. However, heavy toppings and juicy vegetables can weigh down this small dough or leave damp areas. For your first batch, the simple rosemary version offers the clearest introduction to the method.
Baking, Serving, and Storing
Bake Until the Top and Bottom Turn Golden
Bake Single-Serve No-Knead Focaccia Bread in a fully preheated 425°F oven. Start checking around 18 minutes, then continue as needed until the top looks golden and the edges feel crisp.
Pan size and material influence the timing. A thinner loaf in a 6-inch metal pan may finish sooner, while a thicker loaf or ceramic dish may need additional time.
Look for several signs together: a golden surface, browned edges, and a center that feels set. If the top colors quickly but the middle still looks wet, loosely shield the surface with foil and continue baking.
Afterward, let the focaccia rest in the pan for 5 minutes. Then, loosen the edges and move it onto a wire rack. This step allows steam to escape instead of collecting underneath.
Wait another 5-10 minutes before slicing if you want cleaner cuts. Although warm bread smells tempting, cutting immediately can compress the soft interior and make it seem gummy.
Enjoy Fresh or Reheat for Crispness
This focaccia tastes best on the day you bake it. Serve it warm with tomato soup, a leafy salad, or a plate of roasted vegetables.
Alternatively, split it horizontally and add mozzarella, roasted peppers, or cooked chicken for a small sandwich. Let the bread cool a little longer before splitting so the crumb holds together.
If you have leftovers, cool them completely before placing them in an airtight container. Keep plain focaccia at room temperature for up to 2 days, although the crust will soften.
To restore some crispness, warm it in a 350°F oven for about 5-8 minutes. Check early because a small piece heats quickly. A microwave warms the center, but it usually softens the crust.
For longer storage, wrap the cooled focaccia tightly and freeze it for up to 2 months for best quality. Then, thaw and reheat it in the oven. Freeze individual pieces if you want to warm only part of the loaf.
Ingredients
Yield: 1 small focaccia, approximately 5-6 inches across
Prep time: 10 minutes
Rising time: approximately 1½-2 hours
Bake time: 18-22 minutes
Resting time: 10-15 minutes
- ½ cup (65 g) all-purpose flour or bread flour
- ¼ cup (60 ml) lukewarm water
- ¼ teaspoon instant yeast
- ¼ teaspoon granulated sugar
- ⅛ teaspoon fine salt
- 1 tablespoon (15 ml) olive oil, divided: ½ teaspoon for the dough, 2 teaspoons for the pan, and ½ teaspoon for the topping
- ½ teaspoon dried rosemary, optional
- 1 small pinch flaky sea salt, approximately ¹⁄₁₆ teaspoon
Instructions
- Combine the lukewarm water, instant yeast, and sugar in a small bowl. Add the flour and fine salt. Stir until a sticky dough forms and no dry flour remains.
- Drizzle ½ teaspoon olive oil over the dough. Gently turn it with a spoon or spatula to coat the surface.
- Cover the bowl and let the dough rise in a warm place for 60-90 minutes, or until puffy and nearly doubled. Allow more time in a cool kitchen.
- Coat a 5-6-inch metal cake pan or suitably sized oven-safe baking dish with 2 teaspoons olive oil.
- Gently transfer the dough to the pan. Turn it once to coat, then ease it toward the edges. If it resists stretching, let it rest for 10 minutes before trying again.
- Cover loosely and let the dough rise for 20-30 minutes, or until relaxed and puffy. Meanwhile, preheat the oven to 425°F (220°C).
- Drizzle the remaining ½ teaspoon olive oil over the dough. Lightly oil your fingertips, press dimples across the surface, and sprinkle with the rosemary and flaky salt.
- Bake for 18-22 minutes, checking from 18 minutes onward, until the top and edges turn golden and the center sets. Allow extra time if your pan or oven requires it.
- Rest the focaccia in its pan for 5 minutes, then transfer it to a wire rack. Cool another 5-10 minutes before slicing and serving warm.
Frequently Asked Questions
Why does my dough look so wet?
This recipe uses a high proportion of water, so a sticky, loose dough is expected. First, check that you measured 65 grams of flour and 60 milliliters of water. Then, use an oiled spatula to handle it. Avoid adding flour simply to make the dough feel like a kneadable bread dough.
Can I use active dry yeast instead?
Yes. Use the same ¼ teaspoon amount, but follow the package directions for hydration and water temperature. If the package recommends dissolving the yeast first, do that before adding the flour and salt. Also, allow extra rising time if the dough needs it.
Why did my focaccia turn out flat?
A large pan, insufficient rising time, or rough handling can produce a flatter loaf. For your next batch, use a 5-inch pan for more height and wait until the dough looks puffy before baking. Also, transfer it gently so you preserve some of the air from the first rise.
Can I prepare the dough the night before?
Yes. After mixing and coating the dough, cover it and refrigerate overnight. The next day, transfer it to the oiled pan and allow it to warm, relax, and become puffy before dimpling. Cold dough can take considerably longer than 30 minutes for this final stage.
Can I double the recipe?
Yes. Double every ingredient and use a pan with approximately twice the base area of your original pan to maintain a similar thickness. Keep watching the dough during proofing, and judge baking by color and doneness. A thicker loaf may need longer than the listed baking time.
Conclusion
Single-Serve No-Knead Focaccia Bread turns a small handful of pantry ingredients into a warm, satisfying bread with crisp edges and a tender center. Keep the dough sticky, give it time to puff, and use a compact pan for support. Then, finish with olive oil, rosemary, and flaky salt before baking until golden. Enjoy it fresh alongside dinner or use it to build a simple homemade sandwich.
Leave a Reply