
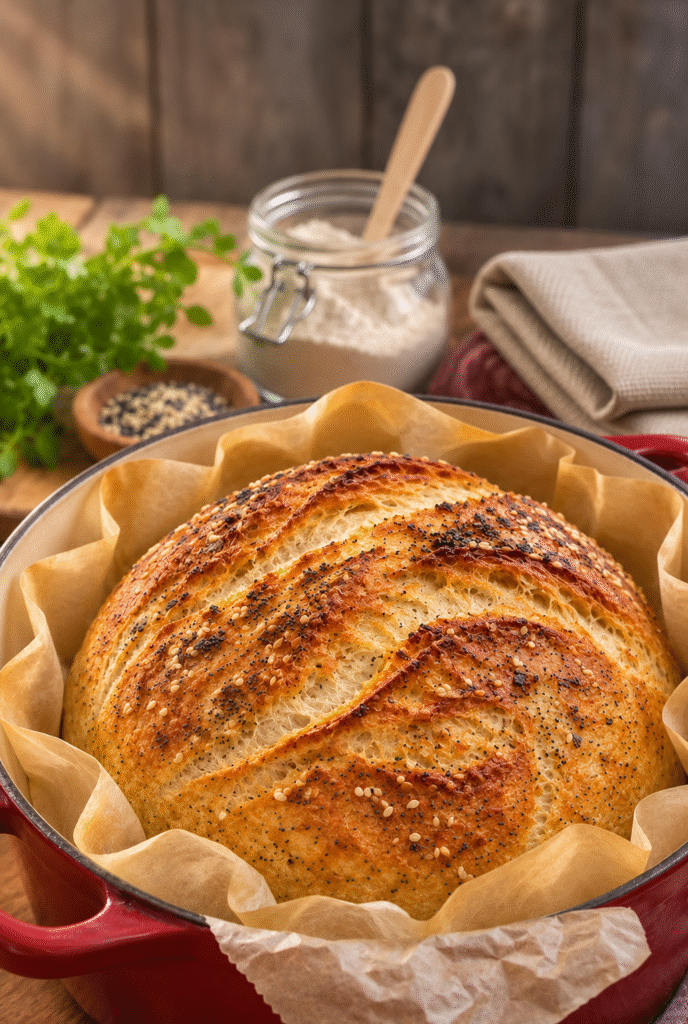
Simple Homemade No-Knead Bread gives you a deeply golden crust and a soft, chewy center with just flour, water, salt, and instant yeast. Stir the dough together in the evening, let it rise overnight, and bake it the next day. The dough will look loose and shaggy at first. By morning, it should look puffed and bubbly enough to shape into a rustic round loaf.
This is the kind of bread that fits into a regular evening. After dinner, while the kitchen is still warm, you can measure the flour, stir the dough with a wooden spoon, and cover the bowl before you finish the dishes. The next morning, check it while your coffee brews. If you see bubbles across the top and the dough has roughly doubled, you can shape it and start heating the oven. Later, when the loaf has cooled, cut a thick slice and try it with salted butter. Save a few slices for toast the following morning.
Allow 10 minutes of active prep, 8-12 hours for the first rise, 30-45 minutes for the shaped rest, and 40-45 minutes to bake. Preheat the Dutch oven during the shaped rest, then give the finished loaf at least 1 hour to cool. The recipe makes one round loaf, or 8-10 slices.
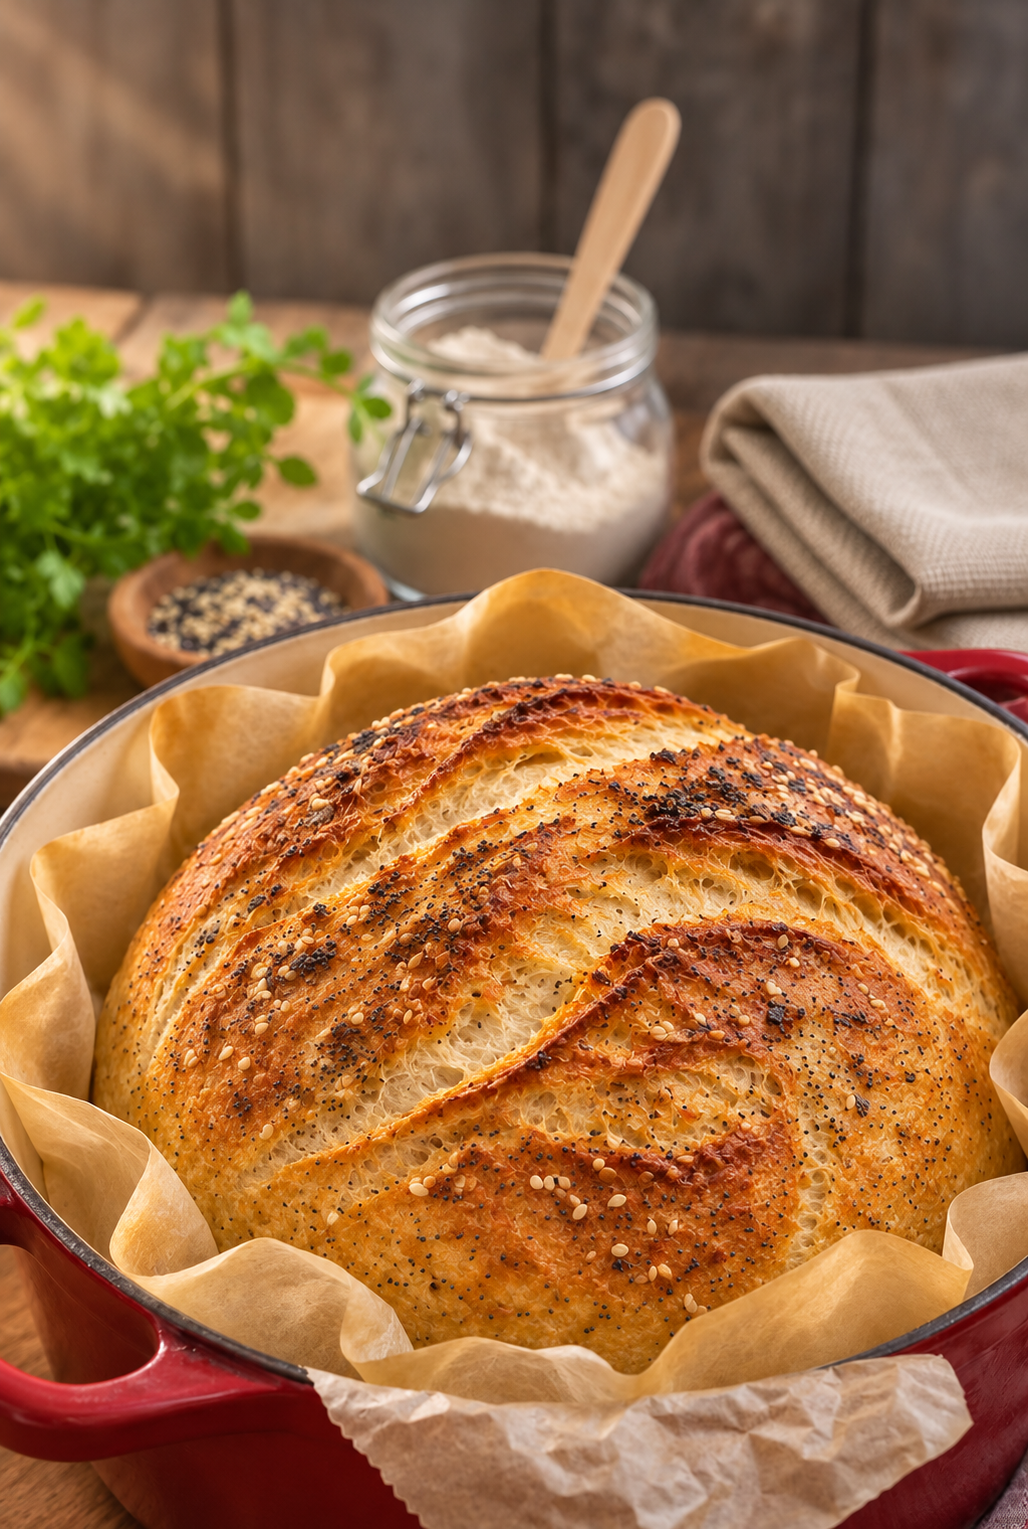
Simple Homemade No-Knead Bread
Equipment
- Large mixing bowl
- wooden spoon
- Dutch oven with lid Use cookware rated for 450°F and suitable for empty preheating.
- Parchment Paper Use parchment rated for 450°F.
- Sharp knife or bread lame
- Oven mitts
- Wire cooling rack
Ingredients
- 3 cups all-purpose flour or bread flour (375 g)
- 1½ cups lukewarm water (360 ml)
- 1 teaspoon salt
- ½ teaspoon instant yeast
- 1 teaspoon sugar, optional
Instructions
- In a large bowl, stir together the flour, salt, instant yeast, and sugar, if using.
- Pour in the lukewarm water and stir with a wooden spoon until a sticky, shaggy dough forms and no dry flour remains. Skip kneading.
- Cover the bowl with plastic wrap or a clean kitchen towel. Leave it at room temperature for 8-12 hours, until roughly doubled and bubbly.
- Scrape the dough onto a lightly floured surface. Gently fold the edges toward the center a few times to form a loose round, taking care to preserve the air in the dough.
- Place the dough seam-side down on parchment paper rated for 450°F. Cover loosely and rest for 30-45 minutes.
- During the shaped rest, put the covered Dutch oven in the oven and preheat to 450°F (230°C) for at least 30 minutes.
- Use oven mitts to set the hot pot on a heatproof surface. Lift the dough by the parchment, lower it into the pot, and score the top with a sharp knife or bread lame.
- Replace the lid and bake for 30 minutes.
- Remove the lid and bake for another 10-15 minutes, until the crust turns deeply golden brown.
- Transfer the loaf to a wire rack, remove the parchment, and let the bread cool for at least 1 hour before slicing.
Notes
Nutrition
Mixing a Shaggy Dough by Hand
Choose the flour and measure it carefully
All-purpose flour gives this Simple Homemade No-Knead Bread a tender interior with plenty of chew. Bread flour works in the same quantity and can give the loaf a slightly chewier bite. Either option works with the overnight schedule. Use whichever you already have for your first loaf so you can get a feel for the dough before changing anything.
If you have a kitchen scale, weigh out 375 grams of flour. For cup measurements, spoon flour into the cup and sweep a straight edge across the top. Scooping directly from the bag can pack extra flour into the cup. Since this recipe depends on a wet dough, that extra flour can make a noticeable difference. If the dough seems stiff on your first try, check how you measured the flour before adjusting the water on your next bake.
The teaspoon of sugar is optional. Leave it out for a four-ingredient loaf, or stir it into the dry ingredients if you want to use it. Instant yeast can go right into the flour with the salt and sugar.
Stir until the flour disappears
Pour in the lukewarm water and stir with a wooden spoon. Drag the spoon along the bottom and sides of the bowl a few times. Dry flour likes to hide underneath the sticky mass, especially if you stir only in the center. Once you see an evenly moistened dough, you can stop.
Expect the dough to cling to the spoon and slump back into the bowl. Its surface may look rough, with little folds and ridges left from stirring. That loose texture gives you a useful reference point for the next morning. After the rise, the dough should look fuller and more aerated, and you may see strands stretching as you scrape it out of the bowl.
Choose a bowl with enough room for the dough to double. If you use a clear bowl, you can mark the starting level on the outside with a piece of tape. That makes it easier to judge the rise at a glance, especially when the dough spreads sideways as well as upward.
Reading the Overnight Rise and Shaping the Loaf
Look for bubbles and growth
Cover the bowl and leave it at room temperature for 8-12 hours. The exact time depends on how warm your kitchen is. In a warmer room, start checking around the 8-hour mark. In a cooler room, give the dough time to reach the fuller, bubbly stage near the end of the window. Look for roughly double the starting volume and bubbles across the surface.
For an easy schedule, mix the dough around 9 p.m. and look at it around 7 a.m. That gives it about 10 hours. If it still looks low and dense, check again later. If it looks airy and has grown substantially, move on to shaping. The clock tells you when to look. The dough tells you when to proceed.
A sheet of plastic wrap helps keep the surface moist through the long rise. A clean kitchen towel also works in a kitchen where the dough's surface stays soft. If you regularly find a dry skin on top, try covering the bowl more snugly next time.
Fold gently and let the round rest
Lightly flour the counter and scrape the dough out of the bowl. A flexible scraper helps release the sticky edges, but a spoon works too. With lightly floured hands, lift one edge of the dough and fold it toward the center. Repeat around the dough a few times until it forms a loose round. Gentle handling helps preserve the air pockets that developed overnight.
Set the dough seam-side down on parchment paper rated for 450°F. Cover it loosely and let it rest for 30-45 minutes while the Dutch oven heats. The dough may relax and widen a little on the parchment. A loose round is fine for this style of bread. If it clings to your fingers as you shape it, dust your hands lightly with flour and keep the folds quick. A heavy coating on the counter can leave dry streaks where the folds meet.
Baking for a Crisp, Golden Crust
Heat the Dutch oven during the final rest
Put the Dutch oven and its lid in the oven and heat to 450°F (230°C). Allow at least 30 minutes for the preheat. Start as soon as you set the dough on the parchment so the pot can heat while the dough rests. Use a Dutch oven with a pot, lid, and knob rated for that temperature and follow its manufacturer's instructions for preheating.
Set a heatproof trivet near the oven before you take out the pot. With dry oven mitts, move the pot onto the trivet and lift the lid. Use the edges of the parchment to lower the dough into the pot. Then score the top with a sharp knife or bread lame. A single slash gives the dough a place to open as it expands. The reference loaf has a speckled crust. The base recipe below makes a plain loaf with the same rustic shape.
Bake covered first, then uncover to brown
Return the covered pot to the oven and bake for 30 minutes. As the dough heats, it releases moisture. The lid holds that steam around the loaf while it expands. After 30 minutes, remove the lid with oven mitts and continue baking for another 10-15 minutes.
Check the color at the 10-minute mark of the uncovered bake. Look for a rich golden-brown crust, with deeper color along the raised edges of the score. If most of the surface still looks pale, give it the remaining few minutes. The ridges can darken faster than the rest of the loaf, so look at the whole surface when judging the color.
Once the crust reaches the color you want, lift the loaf out of the pot and move it to a wire rack. Slide the parchment out from under it so air can reach the bottom. A rack keeps the underside from sitting against a solid surface while steam escapes.
Cooling, Slicing, and Serving
Give the center time to set
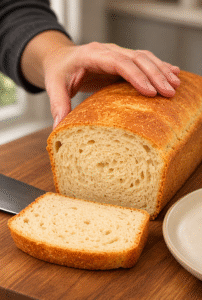
Wait at least 1 hour before you slice the bread. As it cools, moisture moves through the loaf and the crumb firms up. If you cut too soon, the center can cling to the knife or compress under it. With a fully cooled loaf and a serrated knife, you can slice through the crust with a gentle sawing motion and keep the soft interior intact.
For toast and sandwiches, cut slices of similar thickness so they brown evenly. For soup, cut thicker pieces that can stand up to dipping. If you're serving bread at the table, start by slicing only what you expect to eat. You can then store the remaining portion as a larger piece, with less of the soft interior exposed.
If you want warm bread with dinner, cool the loaf first and then toast or briefly warm the slices you plan to serve. That gives you a warm slice with a center that holds together under butter or a spread.
Keep the crust crisp and freeze extra slices
Once the loaf has cooled completely, store it in a paper bag or wrap it in a clean kitchen towel for the first day. Either allows some airflow and helps preserve the crust. A sealed bag retains more moisture and can help keep the slices soft, though the crust will soften too. A quick turn in the toaster brings back some crispness.
If you have half a loaf left over, slice it before freezing so you can take out only what you need. Separate the slices with small pieces of parchment if you want them to release easily. Store them in a freezer bag and press out excess air before closing it. For a quick breakfast, toast individual slices straight from the freezer.
The mild flavor works with both sweet and savory toppings. Try salted butter and jam on the first day, then use thicker slices for tomato toast or grilled cheese. Once the bread starts to firm up, cut the last few slices into cubes and toast them for croutons.
Ingredients
- 3 cups (375 g) all-purpose flour or bread flour
- 1½ cups (360 ml) lukewarm water
- 1 teaspoon salt
- ½ teaspoon instant yeast
- 1 teaspoon sugar, optional
Instructions
- Mix the dry ingredients. In a large bowl, stir together the flour, salt, instant yeast, and sugar, if using.
- Add the water. Pour in the lukewarm water and stir with a wooden spoon until a sticky, shaggy dough forms and no dry flour remains. Skip kneading.
- Let the dough rise. Cover the bowl with plastic wrap or a clean kitchen towel. Leave it at room temperature for 8-12 hours, until roughly doubled and bubbly.
- Shape the loaf. Scrape the dough onto a lightly floured surface. Gently fold the edges toward the center a few times to form a loose round, taking care to preserve the air in the dough.
- Rest the dough. Place it seam-side down on parchment paper rated for 450°F. Cover loosely and rest for 30-45 minutes.
- Preheat the Dutch oven. During the rest, put the covered Dutch oven in the oven and preheat to 450°F (230°C) for at least 30 minutes.
- Transfer and score. Use oven mitts to set the hot pot on a heatproof surface. Lift the dough by the parchment, lower it into the pot, and score the top with a sharp knife or bread lame.
- Bake covered. Replace the lid and bake for 30 minutes.
- Bake uncovered. Remove the lid and bake for another 10-15 minutes, until the crust turns deeply golden brown.
- Cool before slicing. Transfer the loaf to a wire rack, remove the parchment, and let the bread cool for at least 1 hour.
Frequently Asked Questions
Why is my no-knead dough so sticky?
This recipe uses 1½ cups of water for 3 cups of flour, so the dough should feel quite sticky. Use a scraper and lightly flour your hands and counter when shaping. If you add flour by the handful, you can end up with a heavier loaf and floury folds.
Can I use active dry yeast instead of instant yeast?
Yes. For an overnight rise, you can use ½ teaspoon of active dry yeast and dissolve it in some of the recipe's lukewarm water before mixing. Count that water as part of the 1½ cups. Check for bubbles and roughly doubled volume before shaping, since the rise can take longer.
Can I bake this bread without a Dutch oven?
Yes, if you have another heavy oven-safe pot with a fitted lid. Check that the pot, lid, and any handles or knobs can handle 450°F and that the manufacturer permits empty preheating. You need enough space inside for the loaf to expand without touching the lid.
Why does the inside look gummy when I slice it?
First, check how long the loaf cooled. Give it at least an hour on a rack so the crumb has time to set. If you waited and the center still seems gummy, look at the crust. A pale loaf may need the full 15 minutes of uncovered baking the next time you make it.
Can I add seeds like the ones in the photo?
Yes. For a similar speckled finish, lightly mist the shaped dough with water and sprinkle a little sesame and poppy seed over the top before scoring. Use a light layer so the seeds stay visible without burying the crust.
Conclusion
For your first loaf of Simple Homemade No-Knead Bread, mix the dough after dinner and check it over breakfast. Once it has roughly doubled and looks bubbly, fold it into a round and let it rest while the Dutch oven heats. Bake it covered for 30 minutes, then uncover it until the crust turns deep golden. Give the loaf a full hour on the rack before cutting that first slice.
Leave a Reply