
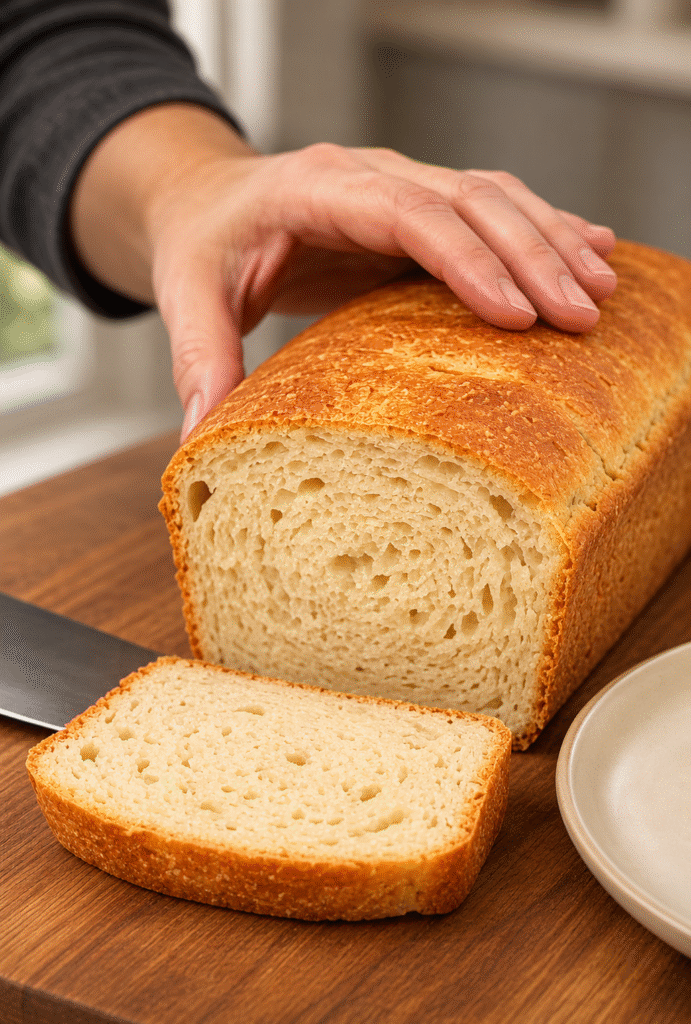
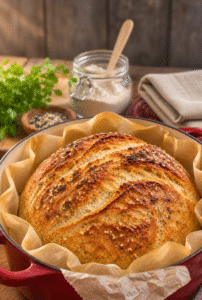
A can of navy beans, four eggs, and a little baking powder are all you need to make this 3-Ingredient Navy Bean Bread. The beans blend into a smooth batter that bakes into a small golden loaf with a moist, tender center. It takes about 10 minutes to get into the oven, and once it cools, you can slice it for toast, small sandwiches, or a bowl of soup.
This is the sort of loaf I'd reach for when lunch needs one more thing and there's a can of beans in the cupboard. I like the idea of keeping the batter plain so the same loaf can go in several directions. One slice could get butter and cracked pepper beside a bowl of tomato soup. Another could turn into a quick lunch with mashed avocado and a squeeze of lemon. And if there are only a couple of slices left, I'd freeze them individually so I can pull out just what I need the next time I want toast.
What to Expect From Navy Bean Bread
A golden crust and a soft, compact crumb
The first thing you'll notice when you cut into the loaf is how moist the center is. Puréed beans make up most of the batter, so the slices have a fine, tender crumb. The eggs help it hold together, and baking powder gives it a modest rise. Expect a small loaf with enough structure to slice once it cools. The exact height and color can vary with the pan, oven, and how much liquid the beans retain after draining.
The loaf tastes mild, with a little earthiness from the beans and a subtle egg flavor. Browning gives the end slices a slightly deeper flavor than the slices in the middle. If you like soft bread alongside soup, serve it plain. If you want a crisp edge for a spread or a sandwich, toast it first. The contrast between the warm, crisp surface and the tender center is one of the nicest things about this loaf.
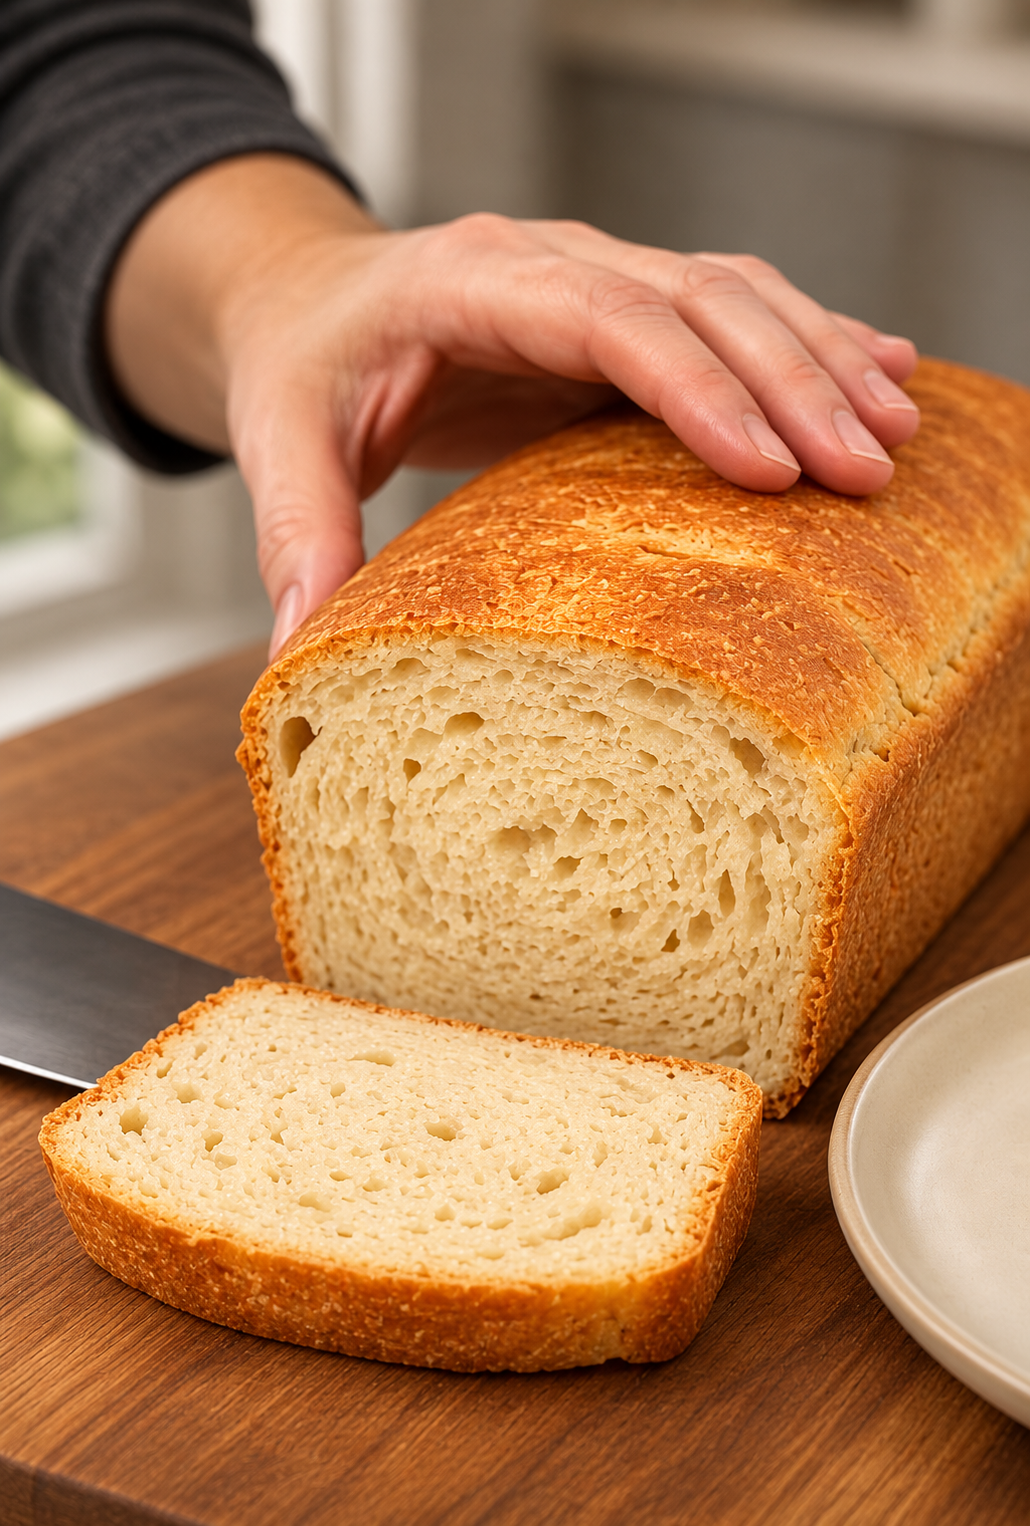
3-Ingredient Navy Bean Bread
Equipment
- 8-by-4-inch loaf pan
- Parchment Paper
- Fine mesh strainer
- Blender or food processor
- spatula
- Wire cooling rack
- Serrated knife
Ingredients
- 1 15-oz can navy beans, drained, rinsed, and patted dry
- 4 large eggs
- 2 teaspoons baking powder
- 1 pinch salt, optional
- 1/4 teaspoon dried herbs, such as thyme or Italian seasoning, optional
Instructions
- Preheat the oven to 350°F (175°C). Line an 8-by-4-inch loaf pan with parchment paper.
- Drain and rinse the navy beans thoroughly. Pat them dry with paper towels or a clean kitchen towel.
- Add the navy beans and eggs to a blender or food processor.
- Blend until smooth and creamy, scraping down the sides as needed.
- Add the baking powder and any optional salt or herbs. Pulse briefly to combine.
- Pour the batter into the prepared pan and smooth the top.
- Bake for 35-45 minutes, until the top is golden, the center feels firm, and a toothpick inserted in the middle comes out clean.
- Cool in the pan for 10 minutes. Transfer to a wire rack and cool completely.
- Cut into about 8 slices and toast if desired.
Notes
Nutrition
One small loaf with several uses
An 8-by-4-inch pan gives you about eight slices. Because the loaf is compact, the slices work especially well for open-faced sandwiches. A single slice can hold a spoonful of chicken salad, some sliced cucumber, or a layer of ricotta with roasted tomatoes. For a closed sandwich, toast two slices lightly and choose a filling that spreads without much pressure.
Navy beans and eggs both contribute protein. Dividing the loaf into eight slices gives you roughly 5 grams per slice, depending on the beans you use and how you cut it. To make a more substantial meal, serve a couple of slices with a filling or side you already enjoy. Hummus and vegetables make a quick lunch, and a slice alongside a bowl of chicken and vegetable soup is handy for soaking up the last spoonfuls of broth.
How to Get a Smooth Batter
Drain and dry the beans first
Start with a standard 15-ounce can of navy beans. That weight includes the canning liquid, so use the beans left after draining. Empty the can into a fine-mesh strainer and rinse the beans under running water. Shake the strainer gently to release water trapped at the bottom. Then tip the beans onto a clean kitchen towel or paper towels and blot their surface.
This step takes a minute and helps keep extra water out of the batter. The eggs already provide enough liquid for blending. If a few beans split as you dry them, that's fine. Their skins and centers will all go into the blender. If you use a no-salt-added can, you can add the optional pinch of salt. If your beans already taste well seasoned after rinsing, you can keep the loaf plain or season the individual slices when you serve them.
Blend the beans and eggs before adding baking powder
Put the beans and eggs in a blender or food processor and blend until the mixture looks even and creamy. Stop and scrape down the sides if whole beans cling above the blade. Then blend again. The easiest way to check is to lift a little batter with a spatula. It should look smooth, with no obvious chunks of bean. A few tiny flecks from the skins are fine.
Once the batter is smooth, sprinkle in the baking powder. Add the optional salt or dried herbs at this stage, then pulse just until everything is evenly mixed. A small pinch of dried rosemary, thyme, or Italian seasoning can give the loaf a savory flavor that goes well with soup. Set up your lined pan before this final pulse so you can pour the batter straight in. Use a spatula to scrape the blender and smooth the top, especially around the corners where the batter tends to settle unevenly.
How to Bake, Cool, and Slice the Loaf
Check the center before taking it out
Heat the oven to 350°F (175°C) and line an 8-by-4-inch loaf pan with parchment. Leave a little paper overhanging two sides so you can lift the loaf once it has rested. Bake on the center rack and start checking after 35 minutes. The top should look golden, and the center should feel firm. Insert a toothpick into the thickest part of the loaf. If you see wet batter on it, give the loaf a few more minutes and check again. Most loaves will take 35 to 45 minutes.
Pan size affects how the loaf bakes. A larger loaf pan spreads the same amount of batter into a shallower layer and can shorten the baking time. If a 9-by-5-inch pan is what you have, start checking a few minutes earlier and expect shorter slices. In either pan, use the center of the loaf to judge doneness. The edges can brown before the middle finishes baking.
Give the crumb time to set
Let the loaf sit in the pan for 10 minutes. Then lift it out by the parchment and set it on a wire rack. If the parchment comes away easily, peel it back so air can circulate around the sides. Let the loaf cool completely before cutting. A warm loaf feels softer, and the knife can drag through the center or pull pieces away from a slice. Once cool, the crumb holds together more neatly.
Use a serrated knife and a light sawing motion. For eight even portions, cut the loaf in half first, cut each half in half again, and divide each quarter into two slices. For toast, aim for slices thick enough to lift easily after crisping. If you're serving the loaf with soup, you can cut thicker pieces and offer the ends to anyone who likes a little more crust.
How to Serve and Store Navy Bean Bread
Toast it for breakfast, lunch, or dinner
Start with butter and a pinch of flaky salt if you want to taste the bread on its own. For breakfast, top a toasted slice with mashed avocado, lemon juice, and cracked pepper. If you prefer something milder, spread it with cream cheese and add thin cucumber slices. Both toppings work best if you let the toast stand for a moment after it comes out of the toaster so the surface stays crisp.
For lunch, try an open-faced sandwich with tuna salad, hummus, or leftover roasted chicken. Thinly sliced vegetables sit more securely on the small slices than large pieces do. At dinner, warm slices in a skillet and serve them alongside tomato soup, a chopped salad, or a bowl of chili. For a quick garlic toast, rub a cut clove of garlic over the hot surface and add a little olive oil. If you're using an ordinary toaster, choose a gentle setting the first time so you can see how quickly your slices brown.
Refrigerate the loaf or freeze individual slices
Once the loaf has cooled, transfer it to an airtight container and refrigerate it for up to four days. If you plan to use it for lunches, slice it ahead and put a small piece of parchment between slices if they stick together. You can also refrigerate the remaining loaf in one piece and cut off a slice as needed.
For longer storage, freeze individual slices for up to two months. Lay the slices flat until firm, then pack them in a freezer bag, or separate them with parchment before freezing so you can remove one at a time. Toast a slice from frozen using your toaster's frozen setting if it has one. You can also warm it in a skillet over moderate heat, flipping it so both sides have a chance to crisp. For a soft sandwich, let a slice thaw in the refrigerator and add the filling just before serving.
Ingredients
- 1 can (15 oz) navy beans, drained, rinsed, and patted dry
- 4 large eggs
- 2 teaspoons baking powder
- 1 pinch salt, optional
- ¼ teaspoon dried herbs, such as thyme or Italian seasoning, optional
Instructions
- Preheat the oven to 350°F (175°C). Line an 8-by-4-inch loaf pan with parchment paper.
- Drain and rinse the navy beans thoroughly. Pat them dry with paper towels or a clean kitchen towel.
- Add the navy beans and eggs to a blender or food processor.
- Blend until smooth and creamy, scraping down the sides as needed.
- Add the baking powder and any optional salt or herbs. Pulse briefly to combine.
- Pour the batter into the prepared pan and smooth the top.
- Bake for 35-45 minutes, until the top is golden, the center feels firm, and a toothpick inserted in the middle comes out clean.
- Cool in the pan for 10 minutes. Transfer to a wire rack and cool completely.
- Cut into about 8 slices and toast if desired.
Prep time 10 minutes · Bake time 35-45 minutes · Total time 45-55 minutes, plus cooling · Yield 1 small loaf, about 8 slices
Frequently Asked Questions
Can I use navy beans I cooked myself?
Yes. Start with about 1½ cups of fully cooked navy beans as a practical substitute for a drained 15-ounce can. Drain them well, let them cool, and pat them dry before blending.
Can I use another white bean?
Great Northern beans are a reasonable substitute because they also have a mild flavor. Use the same drained amount and check the center before removing the loaf from the oven. Different beans can produce a slightly different crumb.
Why is the center still wet after baking?
The loaf may need more time, or the beans may have carried extra liquid into the batter. If a toothpick picks up wet batter, return the loaf to the oven for a few minutes and check again. Once it passes the toothpick test, cool it fully before slicing.
Can I use baking soda instead of baking powder?
Use baking powder for this recipe. The batter contains no added acid such as lemon juice or vinegar, so baking soda alone would behave differently and could leave an unpleasant taste.
Can I make this without eggs?
The eggs provide much of the structure in this three-ingredient loaf. For an egg-free version, use a bean bread recipe developed with a different binder and ingredient ratio.
Conclusion
With one can of beans and a few minutes at the blender, you can make a small loaf that works for toast, lunch, or a simple side. Dry the beans well, blend the batter until smooth, and let the loaf cool fully for clean slices. Try the first slice toasted with butter, then freeze any extras for another day.
Leave a Reply