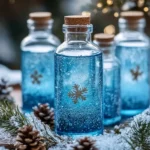
Winter Sensory Bottles
Create mesmerizing winter sensory bottles using simple materials for a calming and decorative experience.
Print
Pin
Servings: 1 bottle
Ingredients
Main Ingredients
- 1 bottle Clear plastic or glass bottle with a screw-top Ensure the bottle is clean and dry.
- 3/4 cup Distilled water Best for preventing cloudiness.
- to taste Glitter (silver, white, blue) Use varying amounts for a beautiful effect.
- 1 tablespoon Clear glue or glycerin Optional; used for slowing down the glitter.
- few drops Food coloring Optional; for added color.
- to taste Fake snow or cotton balls For texture in the sensory bottle.
- several Small winter-themed decorations (miniature pinecones, snowflakes, etc.) To enhance the winter theme.
Instructions
Preparation
- Clean your bottle to ensure it is clean and dry.
- Gather all materials for easy access.
Create the Sensory Liquid
- Fill the bottle about 3/4 full with distilled water.
- Mix in a tablespoon of clear glue or glycerin for a thicker liquid.
- If desired, add a drop or two of food coloring for a subtle hue.
Add Winter Elements
- Sprinkle in varying amounts of silver, white, or blue glitter.
- Toss in fake snow or a few cotton balls for added texture.
- Place small winter-themed decorations into the bottle.
Final Touches
- Tightly secure the cap to prevent any spills.
- Gently shake the bottle and watch the mesmerizing movement of glitter and snow.
Notes
Experiment with different color combinations of glitter and food coloring to match your decor. Adding a few drops of essential oil (like peppermint) can enhance the sensory experience.
Nutrition
Serving: 1g