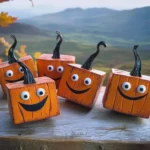
Pumpkin Magnets
Create adorable pumpkin magnets to celebrate the fall season using simple materials and easy steps, perfect for crafters of all ages.
Print
Pin
Servings: 10 magnets
Ingredients
Materials
- 1 pack Air-dry clay or polymer clay
- 1 bottle Orange acrylic paint
- 1 bottle Green paint (or green clay)
- 10 pieces Small round magnets
- 1 bottle Craft glue
- 1 piece Paintbrush
- 1 piece Rolling pin or old bottle
- 1 piece Tweezers or small tool for detailing (optional)
- to taste Glitter or embellishments for added charm Optional
Instructions
Preparation
- Start by taking a small amount of orange clay and kneading it until it's soft and pliable.
- If you’re using air-dry clay, you might want to work quickly to prevent it from drying out.
Shaping
- Roll the clay into a ball and gently flatten it to create a pumpkin shape.
- Use your fingers or a tool to create ridges around the sides for added texture.
Adding the Stem
- Take a small piece of green clay or use green paint to form a stem and attach it to the top of your pumpkin.
- Ensure it’s securely attached and shaped to your liking.
Drying
- If using air-dry clay, place your pumpkins on a flat surface and let them dry completely.
- For polymer clay, follow the manufacturer’s instructions for baking in an oven.
Painting
- Once dry, paint your pumpkins in the desired shades and add details like shadows or highlights if desired.
- Let the paint dry before proceeding.
Attaching Magnets
- Use craft glue to attach small round magnets to the back of each pumpkin.
- Let the glue set according to the manufacturer’s instructions.
Notes
Consider experimenting with different colors, adding glitter, or painting faces on your pumpkins for variation. Supervise younger children during crafting.
Nutrition
Serving: 1g