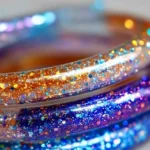
DIY Glitter Tube Bracelets
A fun and imaginative craft project to create unique and colorful bracelets using glitter and plastic tubes.
Print
Pin
Servings: 1 bracelet
Ingredients
Craft Materials
- 1 each Clear plastic tubes (e.g., straws or small containers)
- 1 set Fine glitter (variety of colors)
- 1 bottle Clear craft glue
- 1 length Thin elastic string or cord Cut to size
- 1 each Scissors
- 1 each Small funnel (optional) For easier pouring of glitter
- optional Beads or charms for decoration For personalizing the bracelet
Instructions
Preparation
- Choose a flat, clean surface to prevent mess.
- Lay down some newspaper or a disposable tablecloth to catch stray glitter.
Filling the Tubes
- Using a small funnel, carefully pour glitter into your plastic tube, varying colors to create striking patterns.
- Experiment with layering different colors for a unique effect.
Sealing the Tube
- Apply a thin layer of clear craft glue around the edges of the tube opening.
- Cap the tube securely to prevent glitter from escaping.
Measuring and Cutting the String
- Cut a length of elastic string about twice the size of your wrist to allow for tying knots.
Assembling the Bracelet
- Thread the string through the capped glitter tube.
- If desired, add beads or charms onto the string before forming the bracelet.
Tying the Knot
- Tie both ends of the elastic string together securely, ensuring the bracelet fits comfortably.
Final Touch
- Wear your glitter tube bracelet proudly, or gift it to someone special!
Notes
Experiment with color combinations and shapes. Use non-toxic glitter for safety, especially for children.
Nutrition
Serving: 1g