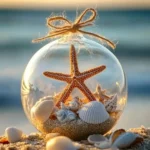
Beach in a Glass Coastal Ornament
Craft a stunning centerpiece that encapsulates the serenity of the ocean with this DIY Beach in a Glass Coastal Ornament.
Print
Pin
Servings: 1 ornament
Ingredients
Materials Needed
- 1 clear glass container Clear glass container or jar Choose an appropriate size
- 1 cup Sand (beach sand or craft sand) Use either beach sand or craft sand
- to taste Small shells or sea glass Shells or sea glass for decoration
- 2-3 Miniature figurines e.g., beach chairs, umbrellas
- a few drops Blue food coloring (optional) For a marine effect
- as needed cup Water To fill the container
- 1 Tweezers or small tools For precise placement of items
- optional Dried flowers or small pebbles For added texture
Instructions
Preparation
- Clean your glass container thoroughly to ensure clarity.
- Dry the inside completely before starting.
Creating the Ornament
- Pour a layer of sand into the bottom of the container, about 1 inch thick.
- Use your fingers to spread it evenly; consider the texture and aesthetics.
- Arrange small shells and sea glass on top of the sand layer.
- Use tweezers for precise placement. Think about balance and composition.
- If desired, add a second layer of colored sand or another texture.
- Sprinkle in a few drops of blue food coloring for a marine effect.
- Slowly pour water into the container until it reaches the desired level.
- Avoid disturbing the sand or decorative items. Watch how the light filters through!
- Add more shells or figurines on the water’s surface if needed.
- Seal the container if you plan to keep it for a long time.
Notes
Personalization tips include using shells or sea glass collected from family vacations. Experiment with food coloring for unique looks. Consider various container shapes for aesthetic variety.
Nutrition
Serving: 1g