
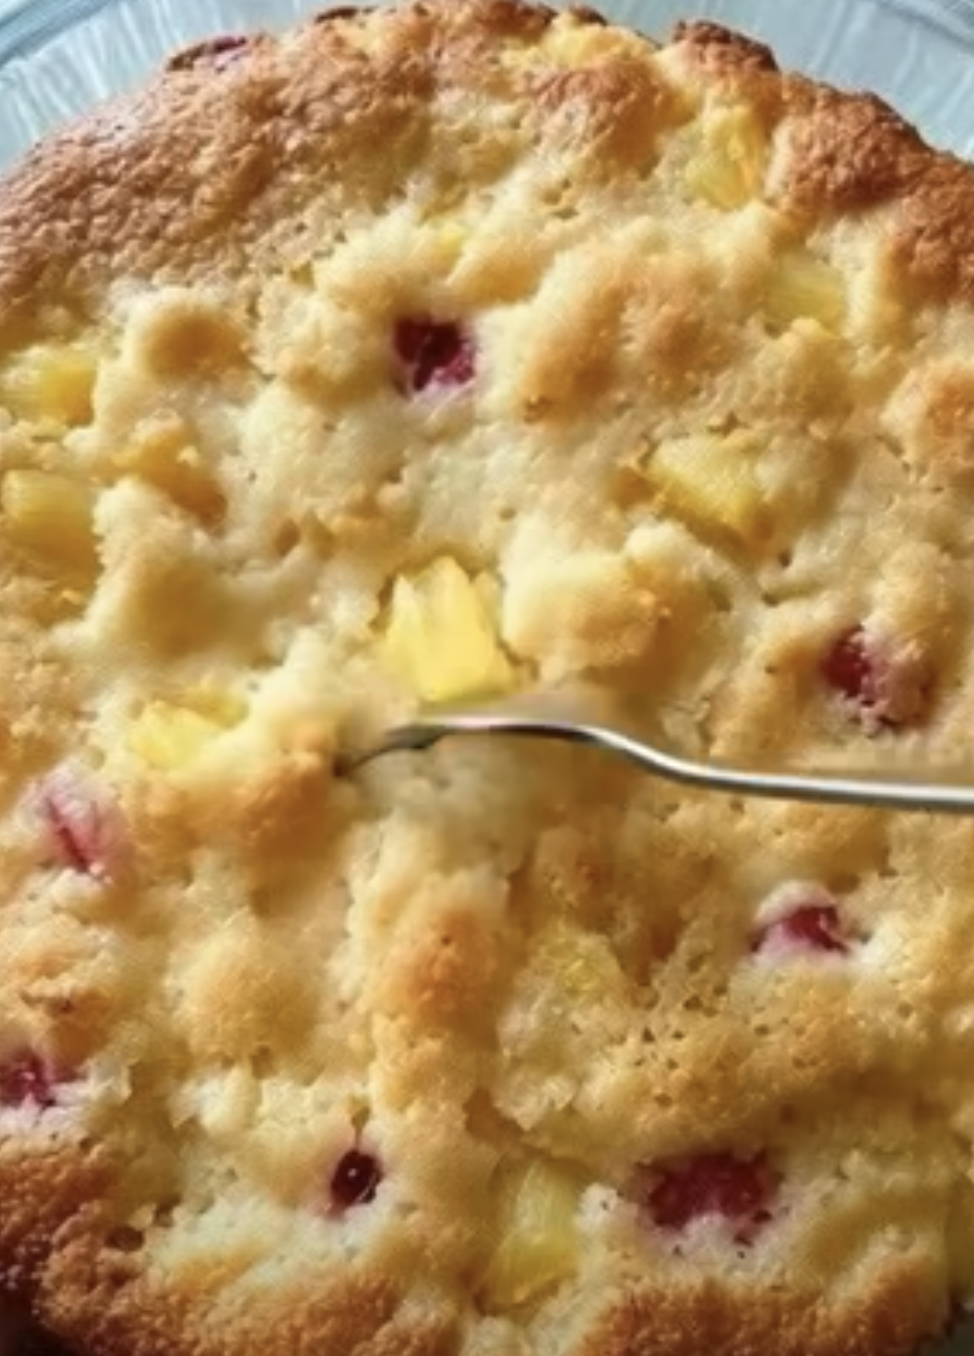
Mini Cuppa Cake is a nostalgic, old-fashioned dessert that proves simple ingredients can create incredible comfort. This charming bake is also known as a “Cuppa Cuppa Cake” because it relies on just one cup of flour and one cup of sugar, making it wonderfully easy to remember and even easier to prepare. Mini Cuppa Cake bakes into a soft, self-saucing dessert with a golden top and a fruit-studded base that tastes like pure vintage comfort.
Because Mini Cuppa Cake uses pantry staples and canned fruit cocktail, it feels approachable and forgiving. There is no creaming, no complicated mixing, and no special equipment required. Everything comes together in one bowl and bakes into a warm, spoonable cake that pairs beautifully with vanilla ice cream or whipped cream. If you love old-school desserts that feel cozy, reliable, and deeply satisfying, Mini Cuppa Cake belongs in your recipe collection.
Below is a short personal story that captures why this recipe continues to be so beloved.
A Vintage Dessert With Timeless Appeal
How Mini Cuppa Cake Became a Family Favorite
I first encountered Mini Cuppa Cake through an old handwritten recipe card tucked into a box of family favorites. The name alone felt charming and comforting. When I finally baked it, the simplicity surprised me. One bowl, one pan, and no draining the fruit. As it baked, the kitchen filled with a warm, buttery aroma that felt instantly familiar. When served warm with ice cream, the cake was soft, saucy, and comforting in a way only vintage desserts can be. Since then, Mini Cuppa Cake has become my go-to when I want something nostalgic and effortless.
Why This Recipe Still Works Today
Mini Cuppa Cake works because it respects balance. The sugar sweetens the fruit juices, the self-rising flour provides structure, and the butter melts into the batter to create a tender crumb. As it bakes, the fruit sinks slightly, forming a natural sauce beneath the cake layer. The result feels intentional, even though the method could not be simpler.
Understanding the Simple Ingredients
Why Self-Rising Flour Matters
Self-rising flour gives Mini Cuppa Cake its lift without requiring additional leavening. Because it already contains baking powder and salt, it keeps the ingredient list short and the method easy. This flour creates a light cake layer that rises gently above the fruit as it bakes.
If you only have all-purpose flour, you can still make this dessert by adding baking powder and salt. However, self-rising flour preserves the vintage simplicity that defines Mini Cuppa Cake.
The Role of Sugar and Butter
Granulated sugar sweetens both the cake and the fruit juices. As the cake bakes, the sugar dissolves into the liquid from the fruit cocktail, creating a syrupy base. This is what gives Mini Cuppa Cake its signature self-saucing texture.
Butter adds richness and moisture. Dividing the butter between greasing the pan and mixing into the batter ensures flavor throughout the dessert while preventing sticking.
Equipment
- Mixing Bowl
- 9-inch pie dish or cake pan
- spoon or spatula
Ingredients
- 0.25 cup unsalted butter, divided
- 1 cup self-rising flour
- 1 cup granulated sugar
- 15 oz fruit cocktail in juice, not drained
Instructions
- Preheat oven to 350°F and grease a 9-inch pan with part of the butter.
- Mix flour, sugar, and remaining butter until just combined.
- Fold in fruit cocktail with its juice and pour into prepared pan.
- Bake 35–40 minutes until golden and set.
- Serve warm with ice cream or whipped cream.
Notes
Nutrition
The Magic of Fruit Cocktail
Why the Juice Stays In
One of the defining features of Mini Cuppa Cake is that the fruit cocktail is not drained. The juice becomes part of the batter, creating steam and moisture during baking. This moisture allows the fruit to soften further and helps form the sauce beneath the cake.
The combination of cherries, peaches, pears, and grapes delivers balanced sweetness and texture. Each bite feels varied and interesting, which keeps the dessert from feeling flat.
Easy Fruit Substitutions
While fruit cocktail is classic, Mini Cuppa Cake adapts beautifully to other fruits. Canned peaches, pears, or mixed berries work well. Fresh fruit also works, though you may need to add a splash of juice or water to maintain moisture.
This flexibility makes the recipe useful year-round and perfect for using what you already have.
Mixing the Batter the Vintage Way
Why Overmixing Is Not Needed
Mini Cuppa Cake follows a rustic, old-fashioned mixing method. The flour, sugar, and butter are stirred just until combined. This light hand keeps the cake tender and prevents toughness.
Once the fruit is folded in, the batter looks loose and uneven. That texture is exactly right. During baking, everything settles into place naturally.
Preparing the Baking Dish
Greasing the baking dish with butter adds flavor and prevents sticking. A 9-inch pie dish or round cake pan works perfectly. The shallow depth allows even baking and helps the top turn golden without drying out.
Pouring the batter directly into the prepared pan keeps cleanup minimal and honors the simplicity of this recipe.
Baking for the Perfect Texture
What to Look for in the Oven
As Mini Cuppa Cake bakes, the top turns golden while the fruit bubbles gently underneath. A toothpick inserted into the cake portion should come out mostly clean, though some moisture from the fruit is normal.
Baking time usually ranges from thirty-five to forty minutes. Checking near the end ensures the cake stays moist and tender.
Cooling Slightly Before Serving
Letting the cake rest for a few minutes allows the sauce to settle. Serving warm highlights the contrast between the soft cake and the syrupy fruit layer.
Mini Cuppa Cake tastes best warm, but it also holds well at room temperature.
Serving Mini Cuppa Cake the Classic Way
Ice Cream or Whipped Cream
A scoop of vanilla ice cream melts into the warm cake, creating a creamy sauce that complements the fruit. Whipped cream offers a lighter option while still adding richness.
Both toppings enhance the vintage feel of the dessert and make it feel complete.
Casual or Crowd-Friendly
Mini Cuppa Cake works beautifully for casual family desserts, potlucks, or last-minute gatherings. It slices easily but also spoons well, depending on preference.
Because it uses simple ingredients, it feels welcoming and unpretentious.
Storage and Reheating Tips
Keeping Leftovers Fresh
Store leftover Mini Cuppa Cake covered in the refrigerator for up to three days. The sauce thickens slightly as it chills, which many people enjoy.
Reheating gently in the microwave or oven restores warmth and softness.
Make-Ahead Friendly
This cake can be baked earlier in the day and reheated before serving. The flavors deepen as it rests, making it even more comforting.
Easy Variations to Try
Adding Warm Spices
A pinch of cinnamon or nutmeg adds warmth and depth. These spices pair especially well with fruit cocktail and enhance the vintage flavor profile.
Turning It Into a Mini Dessert
Baking the batter in individual ramekins creates personal-sized Mini Cuppa Cakes. Reduce baking time slightly and watch for golden tops.
Frequently Asked Questions
Can I use all-purpose flour?
Yes, but add baking powder and salt to mimic self-rising flour.
Should I drain the fruit?
No, the juice is essential for the sauce.
Can I reduce the sugar?
You can slightly reduce it, but the sauce will be less rich.
Is this cake very sweet?
It is balanced, not overly sweet.
Can I freeze it?
Freezing is possible, but texture is best fresh or refrigerated.
Conclusion: A Dessert That Feels Like Home
Mini Cuppa Cake delivers exactly what its name promises. It is simple, nostalgic, and comforting in every bite. With minimal effort and humble ingredients, it creates a warm, self-saucing dessert that feels timeless. Whether served to family or friends, Mini Cuppa Cake always brings a sense of ease and familiarity that never goes out of style.
Leave a Reply