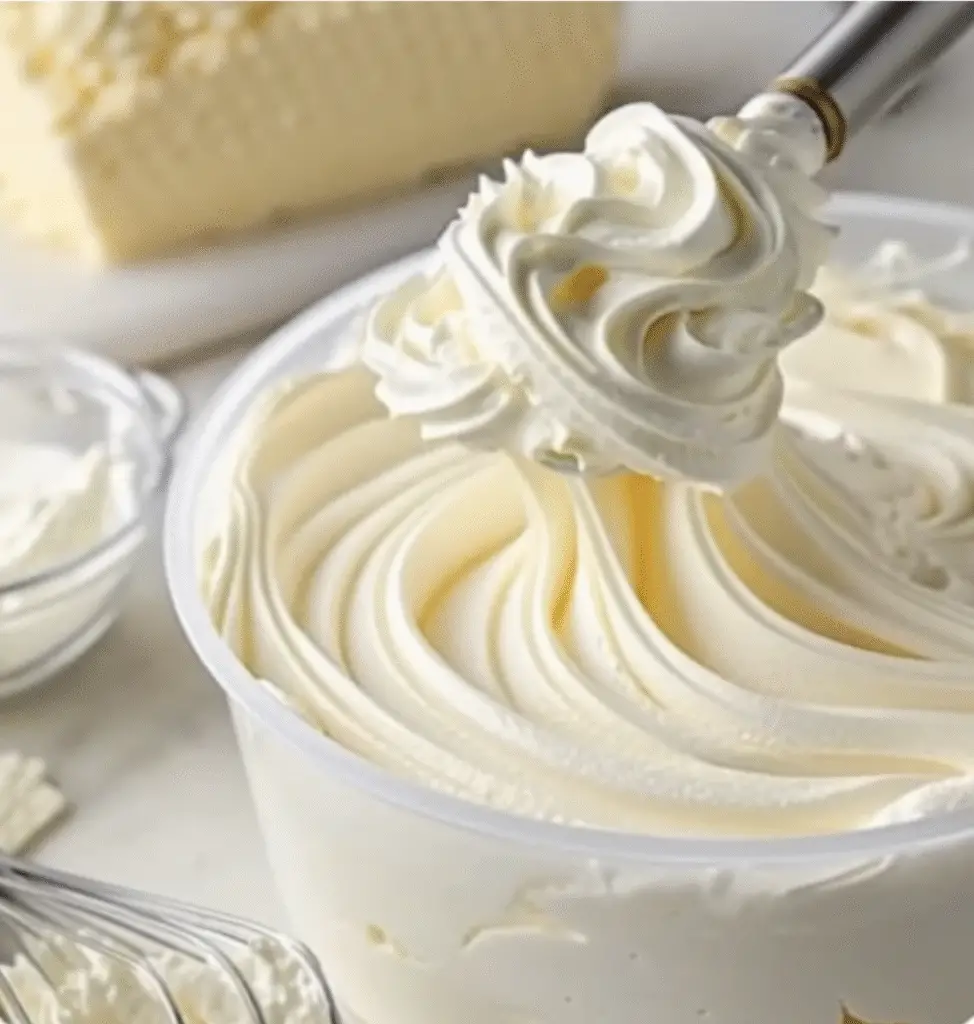
Dreamy 5 Minute Frosting is the kind of recipe every home baker needs in their back pocket. It comes together fast, uses simple ingredients, and delivers a smooth, fluffy texture that spreads like a dream. Whether you are frosting cupcakes for a birthday, finishing a sheet cake for a potluck, or just upgrading a boxed mix, this frosting gives bakery-style results without stress. Because it balances cream cheese richness with buttery sweetness, it works with almost any cake flavor.
Even better, Dreamy 5 Minute Frosting fits perfectly into busy schedules. You do not need special skills, fancy tools, or hours of prep time. Instead, you get reliable results in minutes. As a result, it is ideal for beginners and experienced bakers alike. Once you make it, you will likely skip store-bought frosting for good.
I first started making this frosting during a week when everything felt rushed. A last-minute family gathering popped up, and I needed something quick but still homemade. I remember pulling softened butter and cream cheese from the counter while the oven preheated. I expected something basic. Instead, the frosting turned out so smooth and balanced that everyone asked for the recipe. Since then, it has become my default frosting for celebrations, casual baking days, and even late-night dessert cravings. It reminds me that simple recipes often become the most loved.
What Makes Dreamy 5 Minute Frosting So Special
A Perfect Balance of Flavor and Texture
Dreamy 5 Minute Frosting stands out because it strikes a perfect balance. The cream cheese adds a slight tang, while the butter brings richness and structure. Together, they create a frosting that feels indulgent but not heavy. Unlike overly sweet frostings, this one stays smooth and balanced, even when you use the higher end of powdered sugar.
Because the ingredients blend so quickly, the texture turns fluffy without feeling airy or unstable. As a result, it spreads cleanly and holds its shape. This makes it ideal for both simple swirls and smooth cake finishes. In addition, the frosting stays creamy at room temperature for a reasonable amount of time, which helps during decorating.
Another advantage is consistency control. By adjusting the powdered sugar and milk or cream, you can easily make it thicker or softer. Therefore, it adapts well to different desserts. Whether you need a firm frosting for piping or a softer one for spreading, Dreamy 5 Minute Frosting delivers.
Why Speed Matters in Home Baking
Quick recipes often feel like compromises. However, Dreamy 5 Minute Frosting proves that speed does not mean sacrificing quality. Because the ingredients are already soft and familiar, they combine fast and evenly. This saves time and reduces cleanup, which matters on busy days.
Additionally, fast frosting encourages spontaneous baking. You can decide to make cupcakes after dinner and still finish before bedtime. Because of this, the recipe fits into real life rather than requiring special planning. That ease often leads to more homemade desserts and fewer store-bought shortcuts.
Ingredients That Make It Foolproof
Simple Pantry Staples You Already Have
One reason Dreamy 5 Minute Frosting works so well is its straightforward ingredient list. Cream cheese and butter form the base, both softened to ensure smooth blending. Powdered sugar sweetens and thickens the frosting, while vanilla extract adds warmth and depth.
Milk or cream remains optional, but it plays an important role. A small amount loosens the texture and makes the frosting extra smooth. Because you add it gradually, you stay in control. This flexibility helps prevent frosting that feels too stiff or too loose.
Since these ingredients are common, you rarely need a special shopping trip. That convenience makes the recipe reliable and repeatable. Over time, it becomes second nature.
Choosing the Right Cream Cheese and Butter
For best results, use full-fat cream cheese. Reduced-fat versions contain more water, which can affect texture. Similarly, unsalted butter gives you better control over flavor. Salted butter can work, but it may slightly alter the balance.
Softening matters more than temperature labels. The cream cheese and butter should press easily under your finger without melting. When they reach this stage, they whip smoothly and avoid lumps. Therefore, taking a few minutes to soften properly saves time later.
Step-by-Step Guide to Perfect Results
Beating the Base Smoothly
Start by placing the softened cream cheese and butter into a mixing bowl. Using an electric mixer, beat them together until fully smooth. This step sets the foundation. If you rush here, small lumps may remain.
Because the base determines final texture, take an extra moment to scrape the bowl. This ensures even mixing. Once the mixture looks creamy and unified, you are ready for the next step.

Equipment
- Mixing Bowl
- electric mixer
- spatula
Ingredients
- 8 oz cream cheese, softened
- 1 cup unsalted butter, softened
- 3-4 cups powdered sugar, sifted
- 1 tsp vanilla extract
- 1-2 tbsp milk or cream (optional)
Instructions
- Beat the softened cream cheese and butter together in a mixing bowl until smooth and creamy.
- Add powdered sugar gradually, one cup at a time, mixing on low speed until incorporated.
- Mix in the vanilla extract and add milk or cream if a smoother texture is desired.
- Increase mixer speed and beat for 1–2 minutes until fluffy and smooth.
- Use immediately or chill briefly for a firmer frosting before spreading or piping.
Notes
Nutrition
Adding Sweetness Gradually
Next, add powdered sugar one cup at a time. Mixing on low speed helps avoid mess and keeps the frosting smooth. Gradual addition also prevents graininess.
As the sugar incorporates, the frosting thickens. At this stage, you can taste and adjust. Some prefer a lighter sweetness, while others enjoy a firmer finish. Because the recipe allows flexibility, you can stop at three cups or continue to four.
Flavoring and Adjusting Texture
Once most of the sugar is in, add the vanilla extract. This step rounds out the flavor. If the frosting feels too thick, add milk or cream one tablespoon at a time. This small adjustment makes a big difference.
Afterward, increase the mixer speed and beat for one to two minutes. The frosting becomes fluffy and smooth. Air incorporates evenly, creating that dreamy texture the recipe promises.
Using or Chilling the Frosting
At this point, Dreamy 5 Minute Frosting is ready to use. Spread it immediately on cakes or cupcakes for a soft finish. Alternatively, chilling it briefly firms the texture, which helps with piping.
Because it sets slightly in the fridge, it also works well for layered cakes. Once chilled, it holds clean edges and smooth surfaces.
Creative Ways to Customize the Frosting
Flavor Variations That Feel Special
Dreamy 5 Minute Frosting serves as a neutral base for endless variations. Swapping part of the vanilla for almond extract creates a bakery-style flavor. Citrus zest adds brightness, especially for spring and summer desserts.
For chocolate lovers, sift in cocoa powder along with the powdered sugar. This transforms the frosting into a rich chocolate version without extra effort. Similarly, folding in a swirl of fruit jam adds color and flavor.
Because the base remains stable, these additions blend smoothly. As a result, you can experiment confidently.
Lightening and Coloring Options
If you prefer a lighter texture, folding in whipped topping creates an airy finish. This variation feels especially nice on cupcakes and chilled desserts. Food coloring also works well, allowing you to match themes or holidays.
Since the frosting starts neutral, colors appear vibrant. Gel colors work best because they do not thin the mixture. Add gradually until you reach the desired shade.
Best Desserts to Pair With Dreamy 5 Minute Frosting
Cakes, Cupcakes, and Beyond
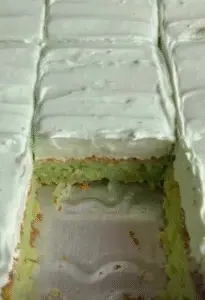
This frosting pairs beautifully with classic vanilla, chocolate, and red velvet cakes. It also complements carrot cake, banana cake, and pumpkin desserts. Because of the slight tang from cream cheese, it balances sweet batters well.
Cupcakes benefit from its smooth piping ability. Swirls hold their shape without crusting. Sheet cakes spread easily, making them ideal for casual gatherings.
Beyond cakes, Dreamy 5 Minute Frosting works as a filling for sandwich cookies or a topping for brownies. Its versatility extends far beyond traditional uses.
Make-Ahead and Storage Tips
You can make this frosting ahead of time and store it in the refrigerator. Keep it covered to prevent drying. When ready to use, let it soften slightly and re-whip for best texture.
Leftover frosted desserts store well in the fridge for several days. Because the frosting remains stable, it maintains flavor and structure over time.
Frequently Asked Questions
Can I make Dreamy 5 Minute Frosting without an electric mixer?
Yes, but it requires more effort. Use very soft butter and cream cheese, then mix vigorously until smooth.
How sweet is this frosting?
The sweetness depends on how much powdered sugar you use. Three cups create a balanced flavor, while four cups make it sweeter and firmer.
Can I freeze this frosting?
Yes. Freeze it in an airtight container for up to one month. Thaw in the fridge and re-whip before using.
Is this frosting good for piping decorations?
Absolutely. Chill it slightly for firmer consistency, then pipe as desired.
Can I use it on warm cakes?
Let cakes cool first. Warm surfaces can cause the frosting to melt and slide.
Conclusion
Dreamy 5 Minute Frosting proves that great desserts do not need complicated techniques or long prep times. With simple ingredients and a fast method, it delivers smooth, fluffy results every time. Because it adapts to different flavors and textures, it works for nearly any dessert.
Once you try it, this frosting quickly becomes a staple. It saves time, tastes homemade, and brings confidence to everyday baking. Whether you bake often or only on special occasions, Dreamy 5 Minute Frosting belongs in your recipe collection.


Leave a Reply