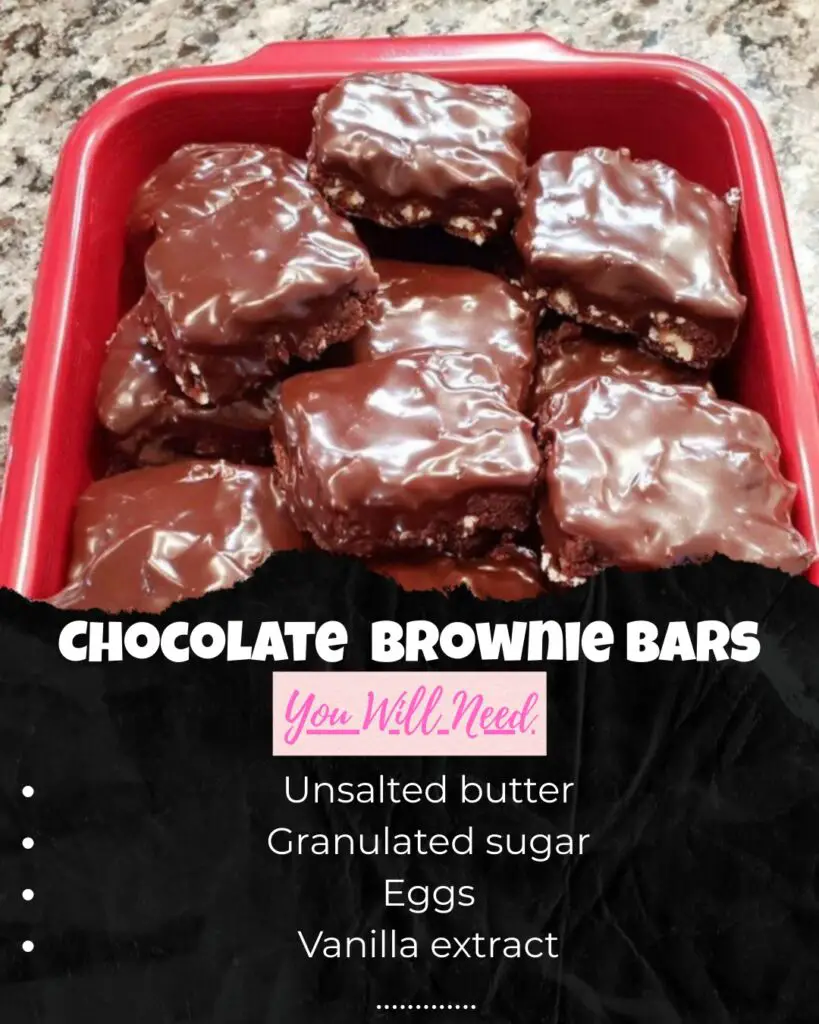
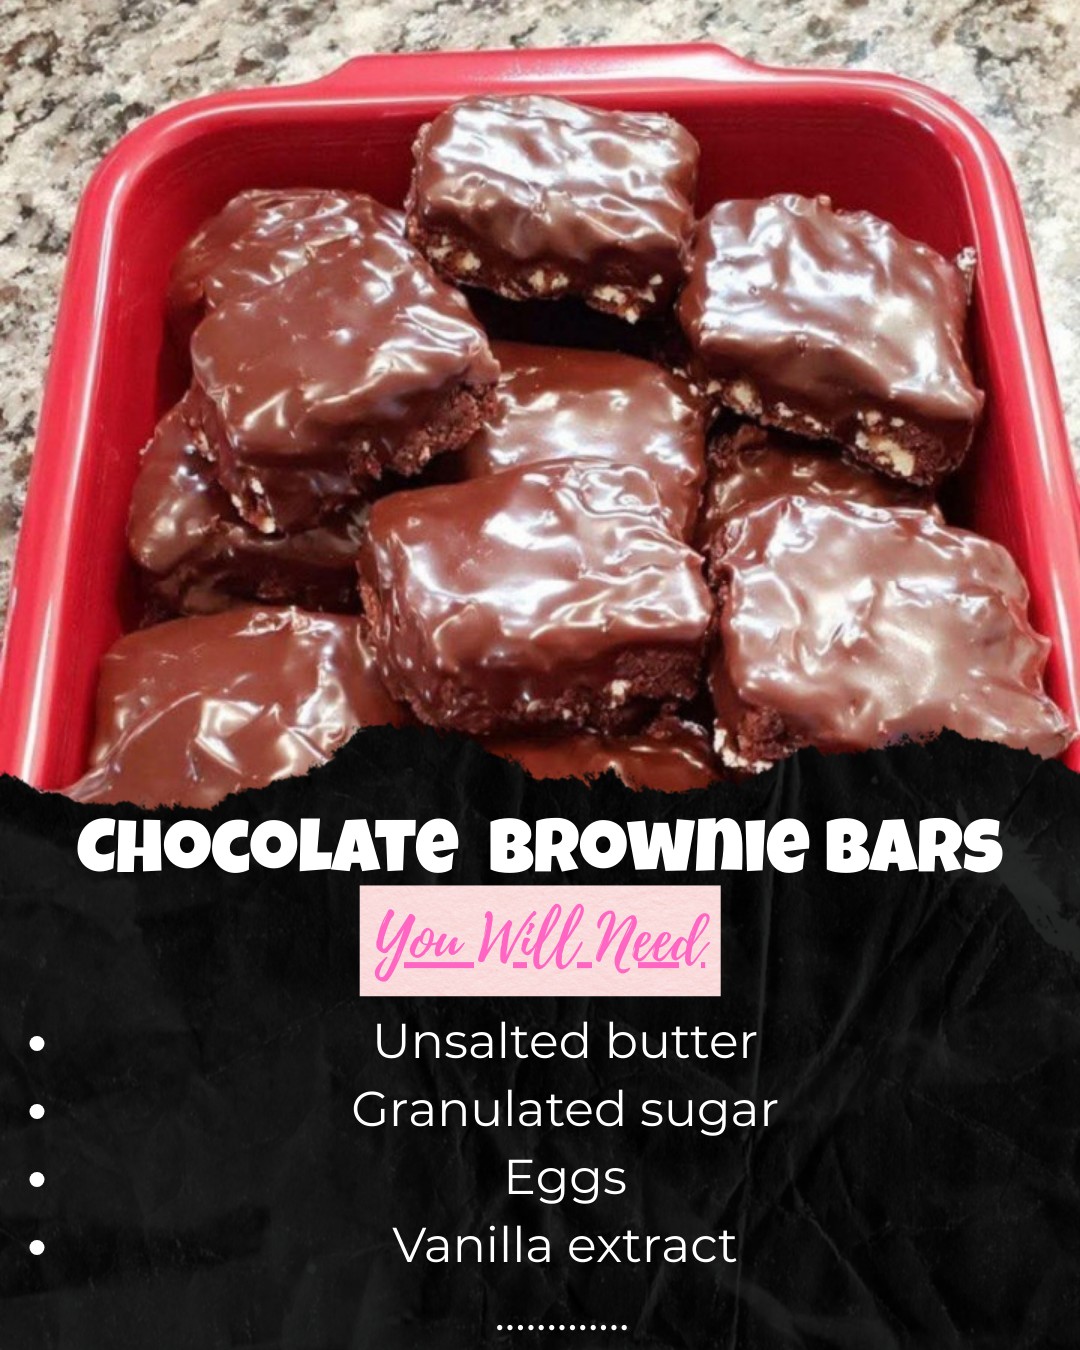
Chocolate-Covered Brownie Bars bring together two irresistible desserts: rich, fudgy brownies and a smooth, glossy chocolate shell. Because this recipe dips dense brownie squares into melted chocolate, every bite delivers a double hit of flavor and texture. Since these bars are simple to prepare and easy to share, they work beautifully for parties, gifting, or satisfying late-night cravings. With deep cocoa richness and a satisfyingly firm coating, Chocolate-Covered Brownie Bars instantly become a go-to treat whenever you want something decadent.
Ingredients
For the Brownie Base
- 1/2 cup unsalted butter, melted
- 1 cup granulated sugar
- 2 large eggs
- 1 1/2 tsp vanilla extract
- 3/4 cup all-purpose flour
- 1/2 cup cocoa powder
- 1/4 tsp salt
- 1/2 cup chocolate chips or chopped nuts (optional)
For the Chocolate Coating
- 12 oz semi-sweet or dark chocolate
- 1–2 tsp coconut oil (optional, improves shine and smoothness)
Tools You’ll Need
- Mixing bowl
- Whisk and spatula
- 8×8 or 9×9-inch baking pan
- Parchment paper
- Microwave-safe bowl or double boiler
- Knife for slicing
- Fork for dipping
Instructions
- Melt butter and whisk it with sugar until combined. Stir in eggs and vanilla until glossy.
- Fold in flour, cocoa powder, and salt just until mixed. Add chocolate chips or nuts if using.
- Pour batter into a parchment-lined baking pan. Bake at 350°F until the center is just set.
- Cool completely before slicing to ensure clean cuts.
- Melt chocolate with coconut oil if using. Dip brownie squares into the chocolate and let excess drip away.
- Place coated bars on parchment paper and refrigerate 10–15 minutes until the coating hardens.
The first time I made a version of these bars, I wanted something decadent yet easy enough to whip together on a weeknight. The brownies emerged from the oven fragrant and deeply chocolatey, and dipping each square into melted chocolate made them feel instantly special. Sharing them with friends revealed how quickly they disappear; every batch vanished long before the evening ended. Since then, these bars have become a favorite dessert for celebrations because they look impressive while remaining wonderfully simple. Each time I prepare them, I’m reminded of how effortless recipes can still create the most memorable treats.
Equipment
- Mixing Bowl
- Whisk and spatula
- 8×8 or 9×9 inch baking pan
- Parchment Paper
- Microwave-safe bowl or double boiler
- knife
- fork
Ingredients
- 1/2 cup unsalted butter, melted
- 1 cup granulated sugar
- 2 large eggs
- 1 1/2 tsp vanilla extract
- 3/4 cup all-purpose flour
- 1/2 cup cocoa powder
- 1/4 tsp salt
- 1/2 cup chocolate chips or chopped nuts (optional)
- 12 oz semi-sweet or dark chocolate
- 1-2 tsp coconut oil (optional)
Instructions
- Whisk melted butter and sugar together. Stir in eggs and vanilla until glossy.
- Fold in flour, cocoa powder, and salt until just combined. Add chocolate chips or nuts if desired.
- Pour batter into a parchment-lined 8×8 or 9×9 inch pan and bake at 350°F until the center is just set.
- Cool brownies completely, then slice into bars or squares.
- Melt chocolate with coconut oil if using. Dip brownie pieces and let excess drip off.
- Place on parchment paper and chill 10–15 minutes until the chocolate sets.
Notes
Nutrition
Creating the Ultimate Fudgy Brownie Texture
Why Fudgy Brownies Work Best
Because these bars receive a chocolate coating, the brownie base must stay dense and moist. Fudgy brownies support the coating without crumbling, giving each bar a satisfying bite. Melted butter binds the batter smoothly, and the combination of sugar and eggs creates a glossy mixture that gives brownies their signature chewy center. Avoiding overmixing preserves this texture, ensuring the brownies bake up decadent rather than cakey. As a result, the bars hold their shape beautifully during dipping and chilling.
Balancing Cocoa for Rich Flavor
Cocoa powder provides deep chocolate flavor without making the brownies heavy. Using a generous amount enhances richness, while a touch of vanilla keeps the flavor warm and rounded. If you want even more intensity, a small handful of chocolate chips folded into the batter adds pockets of melted chocolate throughout the brownies. As the bars cool and set, these elements blend into a fudgy, satisfying base that pairs perfectly with the smoother chocolate coating.
Mastering the Chocolate Coating
Melted Chocolate Techniques
Dipping brownies successfully begins with properly melted chocolate. A microwave-safe bowl works well as long as you heat in short bursts and stir often. A double boiler offers more control, reducing the risk of burning. Adding coconut oil helps the chocolate flow smoothly, creating a thin, even shell with a glossy finish. Because the coating firms quickly, work efficiently and place each dipped square onto parchment paper to avoid sticking.
Ensuring a Perfect Chocolate Shell
The key to a crisp, clean coating lies in letting excess chocolate drip away before setting the bar down. This prevents thick puddles from forming underneath. Chilling the bars briefly allows the coating to firm without becoming brittle. When you bite into a finished square, the outer layer gives way to the soft, rich brownie beneath. This contrast makes the bars feel luxurious while still being easy to transport or package for gifting.
Serving and Presentation Ideas
Creative Ways to Serve the Bars
Chocolate-Covered Brownie Bars shine at parties, dessert tables, and special occasions because they hold up well at room temperature. Arrange them in neat rows on a platter or stack them in layers separated by parchment. If you want an elevated display, dust a bit of cocoa powder across the platter or drizzle extra melted chocolate over the tops of the bars once they’re set. Because they travel well, they make excellent treats for potlucks or homemade gift boxes.
Flavor Variations for Fun Twists
These bars welcome creative customization. Adding crushed peppermint during the holidays gives them a festive crunch. A sprinkle of flaky sea salt enhances richness and balances sweetness. Replacing some of the chocolate with white chocolate creates striking contrast, while swirling peanut butter or caramel into the batter adds indulgent layers. Each variation offers a new experience while preserving the recipe’s core appeal.
Make-Ahead, Storage, and Freezing Tips
Preparing in Advance
Chocolate-Covered Brownie Bars adapt effortlessly to busy schedules. The brownie base can be baked a day ahead and sliced once fully cooled. Dipping the bars just before serving ensures the coating remains crisp and shiny. Because the brownies keep their texture when refrigerated, they remain fresh for several days without drying out. This makes them ideal for events where convenience matters.
Storing and Freezing Options
Store the bars in an airtight container, separating layers with parchment paper to prevent sticking. They stay fresh in the refrigerator for up to five days. For longer storage, freeze in airtight containers for up to two months. Thaw in the refrigerator before serving so condensation doesn’t soften the chocolate shell. These methods maintain both texture and flavor, allowing you to enjoy perfect brownie bars anytime cravings strike.
FAQ
Can I use boxed brownie mix?
Yes. Choose a fudgy-style mix and bake in an 8×8 or 9×9 pan.
How do I prevent brownies from crumbling while dipping?
Chill them before cutting and dipping. Cold brownies stay firm.
Can I use milk chocolate instead of dark?
Yes. Any chocolate that melts smoothly will work.
How do I make the chocolate coating shinier?
Add 1–2 teaspoons of coconut oil while melting.
Can I double the recipe for a crowd?
Absolutely. Use a larger pan or bake two batches.
Conclusion
Chocolate-Covered Brownie Bars deliver everything dessert lovers crave: rich, fudgy centers wrapped in smooth chocolate shells. Because the recipe uses simple ingredients and straightforward steps, it creates impressive results without extra effort. Whether you’re preparing treats for a celebration, sharing them with friends, or enjoying them as a personal indulgence, these bars always satisfy. With endless customization options and reliable results, they easily become a dessert you’ll return to again and again.

Leave a Reply