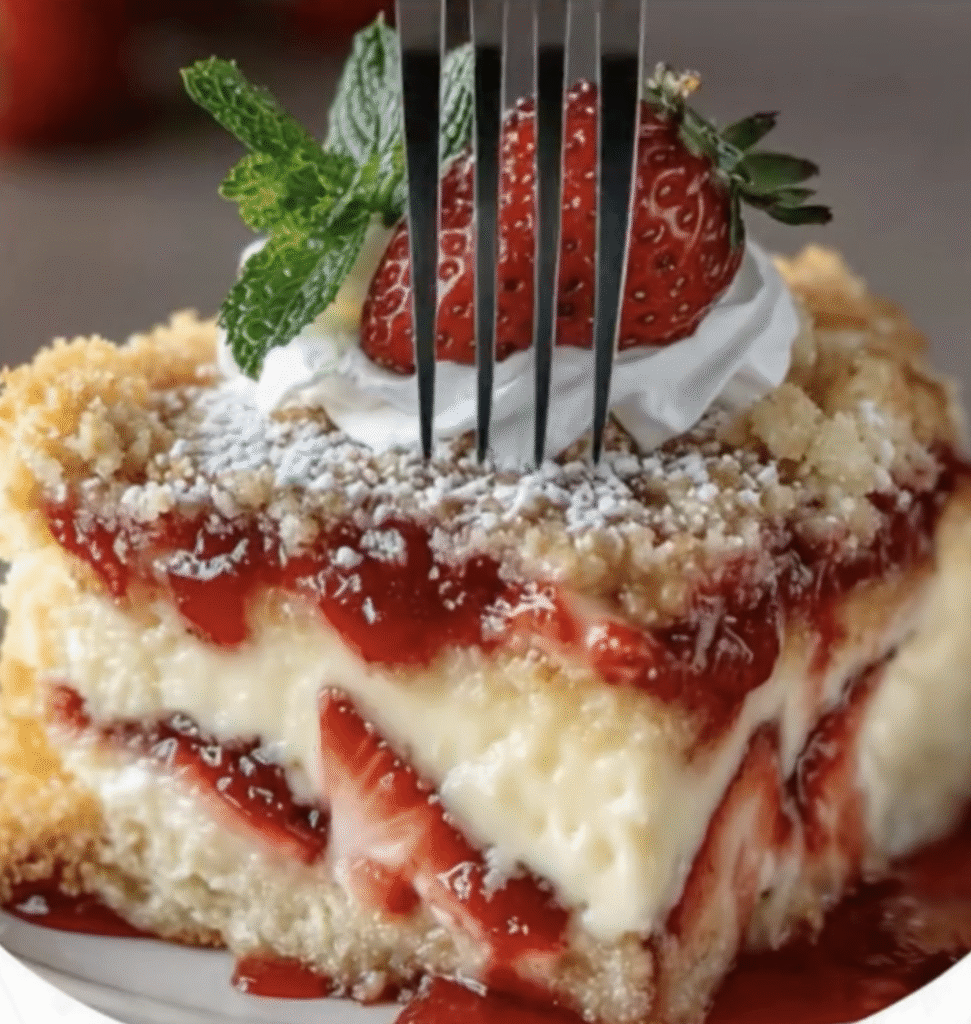
I have such a soft spot for recipes that feel indulgent but ask so little of us — the ones that make you look like a baking pro with barely any cleanup. This Strawberry Cheesecake Dump Cake is exactly that kind of magic. 💕
It’s creamy, fruity, buttery, and completely irresistible — everything we love about strawberry cheesecake but so much easier. All you do is “dump,” layer, and bake. The result? A golden, bubbly dessert that’s part cheesecake, part cobbler, and 100% comfort.
Before we dig into this sweet treasure, make sure to subscribe to get my newest dessert recipes straight to your inbox — perfect for anyone who loves cozy, crowd-pleasing treats! 🍓✨
Why You’ll Love This Strawberry Cheesecake Dump Cake
I promised you easy and decadent — here’s proof!
- Fuss-free prep. No mixer or springform pan needed.
- Perfectly balanced. Sweet strawberries meet tangy cream cheese and buttery cake.
- Family-friendly. A guaranteed hit with kids and adults.
- Customizable. Works with blueberries, raspberries, or even canned pie filling.
- Make-ahead friendly. Delicious warm, room temperature, or chilled.
What Does It Taste Like?
Imagine layers of silky cheesecake melting into warm strawberries and buttery cake topping — like your favorite strawberry cobbler met a creamy New York cheesecake. Each spoonful has a mix of textures: soft, rich, jammy, and crisp around the edges. 🍰🍓
Ingredients You’ll Need
For the Cheesecake Base
- 1 (8 oz) package cream cheese, softened
- ½ cup granulated sugar
- 1 teaspoon vanilla extract
For the Fruit Layer
- 4 cups fresh or frozen strawberries, sliced
- ½ cup granulated sugar (adjust depending on sweetness)
- 1 tablespoon lemon juice
For the Topping
- 1 box yellow or white cake mix (dry, not prepared)
- ½ cup unsalted butter, melted
Optional Garnishes
- Whipped cream or powdered sugar for serving
- Fresh mint leaves or extra strawberries for presentation
Tools You’ll Need
- 9×13-inch baking dish
- Mixing bowls
- Whisk or spoon
- Spatula
- Measuring cups and spoons
Step-by-Step: How to Make Strawberry Cheesecake Dump Cake
Step 1: Preheat and Prepare
Preheat your oven to 350°F (175°C). Grease a 9×13-inch baking dish with butter or non-stick spray.
Step 2: Make the Cheesecake Layer
In a medium bowl, beat the softened cream cheese, ½ cup sugar, and vanilla until smooth. Spread evenly over the bottom of your prepared dish — this is your creamy foundation.
Step 3: Add the Strawberries
In another bowl, combine the sliced strawberries, ½ cup sugar, and lemon juice. Stir until juicy and glossy. Spoon the fruit mixture evenly over the cream cheese layer.
Step 4: Add the Cake Mix
Sprinkle the dry cake mix evenly over the strawberries — don’t mix it in! That’s the “dump” magic that creates a golden, slightly crisp top.
Step 5: Drizzle with Butter
Pour melted butter evenly over the dry cake mix, covering as much as possible. This buttery drizzle helps the topping bake into a rich, golden crust.
Step 6: Bake to Perfection
Bake for 40–45 minutes, or until the top is golden brown and the edges are bubbly. The smell? Heavenly. Let it rest 10–15 minutes before serving.
What to Serve with It
- A scoop of vanilla ice cream — it melts right into the warm fruit.
- A dollop of fresh whipped cream for extra creaminess.
- A mug of coffee or sweet tea for that cozy afternoon moment.
Tips for the Best Dump Cake
- Use cold butter if you prefer a crispier topping.
- Frozen strawberries? No problem! Don’t thaw — just extend bake time by 5–10 minutes.
- Want extra cheesecake flavor? Swirl an extra ounce or two of cream cheese on top before baking.
- Don’t overbake. Pull it out when the top is golden but the middle is still a bit gooey — it’ll firm as it cools.
Storage & Make-Ahead
- Refrigerate: Store leftovers covered for up to 3 days.
- Reheat: Warm single portions in the microwave for 20–30 seconds.
- Freeze: Once fully cooled, wrap tightly and freeze for up to 2 months.
Frequently Asked Questions
Can I use canned pie filling instead of fresh strawberries?
Yes! One (21-oz) can of strawberry pie filling works perfectly if you’re in a hurry.
Can I make this gluten-free?
Absolutely — use a gluten-free cake mix and check that your other ingredients are certified gluten-free.
What other fruits can I use?
Try blueberries, cherries, or peaches — all delicious variations!
Do I need to refrigerate it?
Yes, because of the cream cheese layer. Chill leftovers and serve cold or gently rewarmed.
Nutritional Information (Per Serving, Approx.)
- Calories: 360
- Fat: 18g
- Carbohydrates: 44g
- Protein: 4g
- Sugar: 31g
- Fiber: 1g


Leave a Reply