Before we dive in—thank you for being here! I always get a little giddy when I share sensory play ideas, because I know just how much joy and creativity they can spark in little ones. This project in particular is simple, inexpensive, and full of opportunities for exploration. Whether you’re a parent looking for a rainy-day activity, a teacher planning a classroom station, or a caregiver wanting to engage curious hands, this shaving cream sensory bin is a winner.
And if you’d love to keep easy, hands-on ideas like this coming your way, don’t forget to subscribe to get the latest activities sent right to your inbox.
What Is a Shaving Cream Sensory Bin?
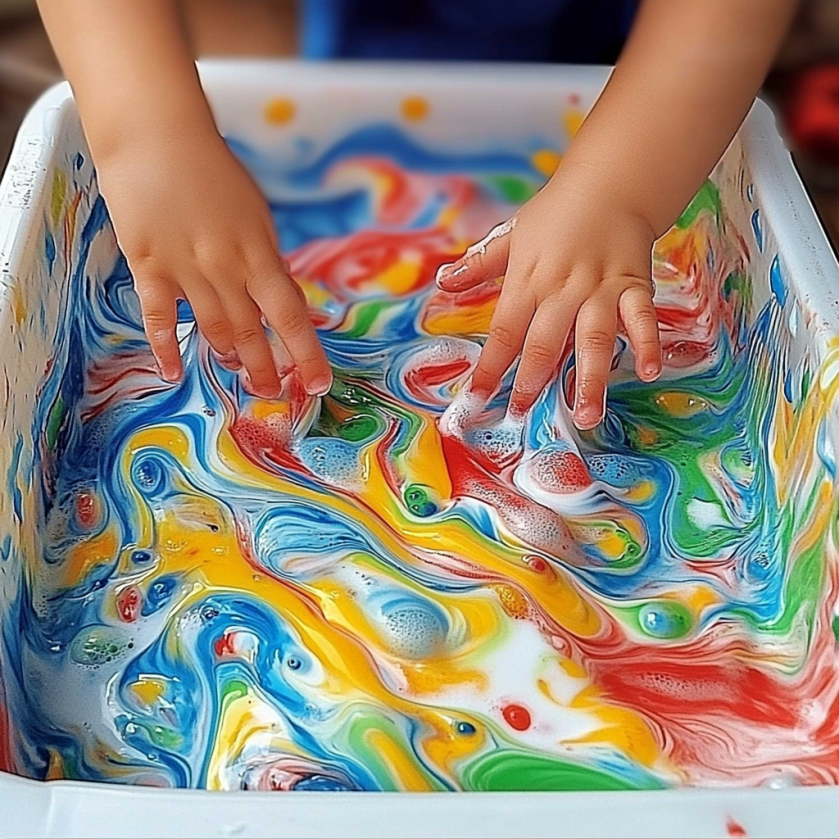
A shaving cream sensory bin is exactly what it sounds like—a big container filled with fluffy shaving foam, transformed into a colorful, tactile play space. With just a few squirts of food coloring and some simple mixing tools, kids get to explore textures, colors, and patterns while strengthening their fine motor skills.
It’s a classic sensory activity that feels almost magical: soft, squishy, swirly, and endlessly customizable.
Why You’ll Love This Activity
- Easy setup: You only need three core ingredients.
- Budget-friendly: Most items you already have at home.
- Open-ended play: Kids can explore textures, colors, letters, or even frozen foam.
- Educational benefits: Supports sensory development, creativity, and early literacy if you add letters.
- Messy in the best way: Contained mess that washes right off!
What Does It Feel Like?
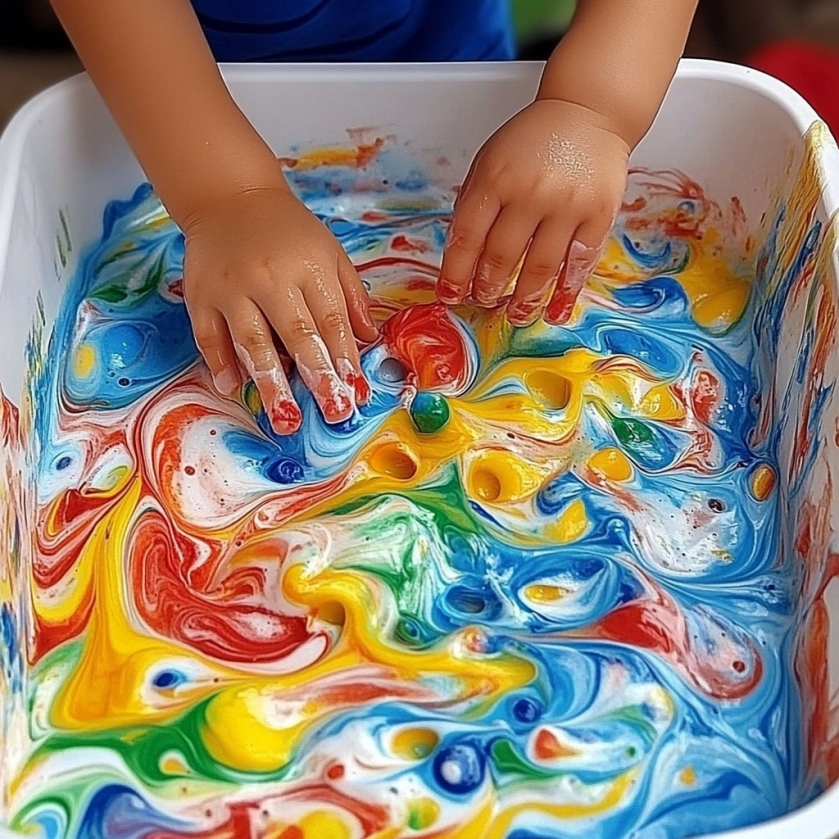
Think of fluffy clouds that kids can swirl into tie-dye rainbows! The shaving foam is smooth and airy, while the food coloring adds vibrant splashes of color. If you freeze the foam beforehand, you get an added icy surprise—cool, crumbly textures that slowly soften into squishy foam.
It’s a full sensory experience: soft to touch, colorful to see, and fun to smell (that fresh, clean shaving cream scent is oddly satisfying!).
Benefits of Sensory Bins
- Stimulates creativity: Kids love experimenting with mixing colors.
- Supports emotional regulation: Sensory play can be calming and grounding.
- Boosts motor skills: Scooping, swirling, and squeezing strengthen little muscles.
- Encourages exploration: Provides a safe space to play and learn without rules.
Ingredients You’ll Need
- A large plastic tub
- Shaving foam (NOT gel)
- Food coloring
- Mixing tools: spoons, craft sticks, or paint brushes
- Optional add-ins: glitter, foam letters, small toys
Tools You’ll Want Nearby
- Apron or old shirt (for the kids—and maybe you too!)
- Towels or wipes for quick cleanup
- A tray or plastic mat to catch spills
- Freezer-safe container if you want to try frozen foam
Fun Additions & Substitutions
- Glitter: Adds sparkle and shimmer to the foam.
- Foam letters/numbers: Sneak in literacy play.
- Nature finds: Try leaves or small twigs for a seasonal twist.
- Frozen version: Freeze the foam overnight for an icy texture surprise.
Step-by-Step Directions
- Fill the tub: Spray a generous layer of shaving foam into your large bin. Smooth it with a spoon if you like a flat canvas.
- Add color: Drop food coloring onto the foam’s surface—one color or several for a rainbow effect.
- Swirl and mix: Use spoons, sticks, brushes, or hands to mix the colors. Encourage kids to create marbled patterns or blend fully.
- Play and explore: Let kids scoop, pat, spread, and swirl until their imagination takes over.
What to Serve Alongside This Activity
Since this isn’t edible (important note: keep it away from little mouths!), “serving” here means pairing it with other activities. Try:
- A bin of warm soapy water for washing hands/toys afterward.
- A set of alphabet or number foam pieces for hidden “treasure hunts.”
- Storytime afterward with a color or rainbow-themed book.
Tips for the Best Experience
- Use a shallow bin so kids can reach easily.
- Set this up outside for easier cleanup on sunny days.
- Have kids wear clothes you don’t mind getting messy.
- Supervise play to ensure foam isn’t ingested.
- Keep a damp towel close by for quick hand wipes.
Storage & Cleanup
- Cleanup is easy! Scoop foam into a trash bag, rinse the bin, and wipe down surfaces.
- Don’t store for later use—the foam breaks down quickly. Just enjoy it fresh and make more when needed.

General Info
- Age Range: Best for ages 3+ (with supervision).
- Time Needed: 5 minutes prep, unlimited playtime!
- Mess Level: Medium (but washes off easily).
FAQs
Can I use shaving gel instead of foam?
Not really—foam is light and airy, while gel won’t whip up the same way.
Is it safe if my toddler accidentally eats some?
Shaving cream is NOT edible, so keep this for kids old enough to understand not to taste it. Always supervise play.
Can I use natural food coloring?
Yes! Just note that natural dyes may not be as vibrant.
Does it stain?
Food coloring may leave light stains on hands, but it washes off in a day or two.
Conclusion
This shaving cream sensory bin is anything but boring!! It’s the kind of activity that feels like magic the first time kids swirl colors through fluffy foam—and honestly, it never loses its charm. With just a few simple supplies, you can create a hands-on adventure full of creativity, learning, and giggles.
If your kids loved this, check out my other colorful play ideas featuring everyday items. And I’d love to see how your bin turned out—leave a comment below or share your photos on Pinterest!

Shaving Cream Sensory Bin
Equipment
- Large plastic tub
- Craft sticks or paint brushes
- Hands for mixing
- Spoon (optional) to smooth the surface
Ingredients
- Shaving foam
- Food coloring
- 1 Large plastic tub
- Something to mix with (craft stick, paint brush, or hands)
Instructions
- Start by filling your large plastic tub with a generous layer of shaving cream. Smooth it out with the back of a spoon if desired.
- Drop food coloring onto the surface of the shaving foam. Be creative with color choices!
- Use spoons, sticks, or hands to mix and swirl colors into a marbled effect. Enjoy exploring textures and colors!
Leave a Reply