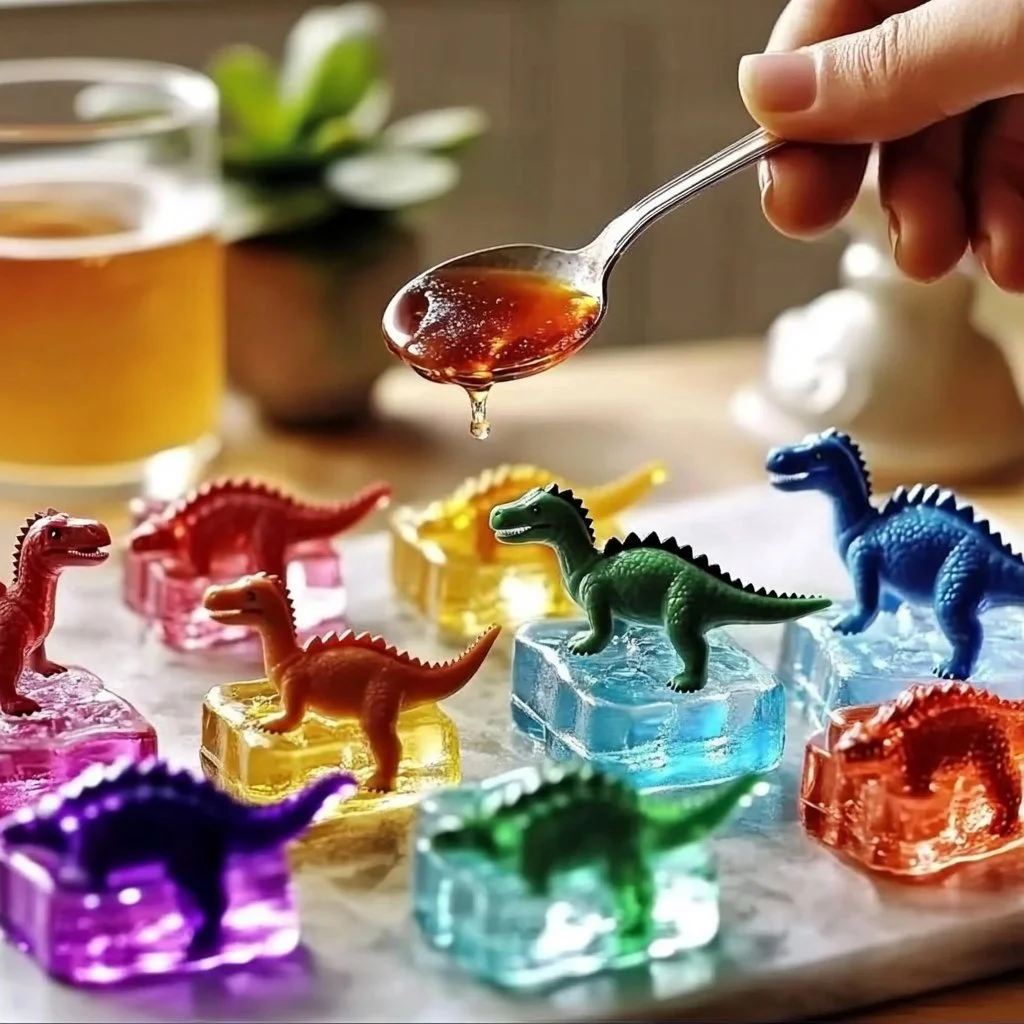
Ice excavation is a fun and exciting DIY project that combines artistry with science, perfect for both kids and adults. Whether you’re looking to entertain children at a birthday party or simply want to unleash your inner creative genius, this captivating activity offers endless possibilities for imagination and exploration. Picture bright, vibrant colors frozen in blocks of ice, just waiting to be revealed! This sensory-rich experience allows participants to discover different textures, shapes, and colors as they excavate hidden treasures. Plus, it’s a fantastic way to educate children about melting and temperature in a hands-on manner. Get ready to dig in and create an unforgettable moment, as we guide you through this engaging ice excavation project!
Why You’ll Love This Ice Excavation
- Educational Fun: Teach kids about melting, temperature, and the states of matter.
- Sensory Experience: Engage multiple senses with colors, textures, and temperatures.
- Customizable: Personalize the ice with various toys, colors, or themes.
- Physical Activity: Encourage movement and coordination while excavating.
- Perfect for All Ages: Suitable for toddlers to adults, fostering teamwork and creativity.
Materials
- Tap water or colored water (food coloring optional)
- Small toys or treasures (plastic animals, beads, mini figures)
- Large plastic or silicone molds
- Salt or sugar (for melting)
- Tools for excavation (mini shovels, spoons, or paintbrushes)
- A tray or container to catch melted water
Step-by-Step Instructions
1. Prepare the Ice
- Fill molds: Pour tap water into your molds. If you’re using colored water, add a few drops of food coloring to create vibrant hues.
- Add treasures: Drop small toys or treasures into the water-filled molds.
- Freeze: Place the molds in the freezer for several hours or overnight until completely frozen.
2. Set Up the Excavation Station
- Remove ice: Once frozen, run warm water over the outside of the molds for a few seconds to help release the ice.
- Create a workspace: Place the ice blocks in a shallow tray to catch any melting water.
3. Start Excavating
- Tools in hand: Hand out excavation tools to participants. Spoons, brushes, and mini shovels work great.
- Digging time: Encourage users to gently chip away at the ice, revealing the hidden treasures inside.
4. Experience the Melting
- Add salt or sugar: To speed up the melting process, sprinkle salt or sugar on the ice, making it more fascinating to observe the changes.
- Observe & discuss: Talk about what happens when ice melts and how temperature changes affect the ice.
Tips & Variations
- Seasonal themes: Change the colors or toys to match holidays (e.g., snowflakes for winter or flowers for spring).
- Different sizes: Use smaller molds for individual projects or larger molds for group activities.
- Add scents: Introduce aromatic elements by using flavored water, such as fruit-infused ice.
Frequently Asked Questions
Q: How long does it take for the ice to freeze?
A: About 4-6 hours, but for best results, freeze overnight.
Q: What if I don’t have special molds?
A: Any container (like bowls or cups) can work. Just ensure they are flexible enough for easy removal.
Q: Can I use liquid other than water?
A: Yes! You can use juice or non-toxic, edible liquids for additional fun and flavor.
Q: What’s the best way to store leftover ice?
A: Store it in an airtight container in the freezer and use it within a week.
Serving Suggestions or Pairings
- Pair the excavation activity with refreshing drinks, like lemonade or iced tea.
- Serve light snacks like fruit or popcorn to keep energy levels high.
- For added fun, have a themed party where the excavation is part of games or storytelling.
Final Thoughts
Ice excavation is a delightful and engaging DIY project that promises creativity and fun for everyone involved. Not only does it spark curiosity and learning, but it also fosters teamwork and imaginative play. We encourage you to try this at home and share your unique creations with us! Have you done a variant of ice excavation? Leave a comment below and let us know your favorite twist or any tips you’d like to share!

Ice Excavation Activity
Ingredients
Main Ingredients
- 4 cups Tap water or colored water (use food coloring for vibrant hues) Colored water is optional; use food coloring if desired.
- 3-5 pieces Small toys or treasures Examples include plastic animals, beads, or mini figures.
- 1 large Large plastic or silicone molds Use molds that are flexible for easy removal.
- to taste Salt or sugar To enhance the melting process.
- as needed Tools for excavation (mini shovels, spoons, or paintbrushes) Any tool that can help excavate the ice.
- 1 tray A tray or container to catch melted water This will help keep the area clean.
Instructions
Preparation
- Fill molds by pouring tap water or colored water into them. If you’re using colored water, add a few drops of food coloring.
- Drop small toys or treasures into the water-filled molds.
- Place the molds in the freezer for several hours or overnight until completely frozen.
Set Up the Excavation Station
- Once frozen, run warm water over the outside of the molds for a few seconds to help release the ice.
- Place the ice blocks in a shallow tray to catch any melting water.
Start Excavating
- Distribute excavation tools to participants, using spoons, brushes, and mini shovels.
- Encourage participants to gently chip away at the ice to reveal the hidden treasures inside.
Experience the Melting
- To speed up the melting process, sprinkle salt or sugar on the ice.
- Discuss what happens when ice melts and how temperature changes affect it.


Leave a Reply