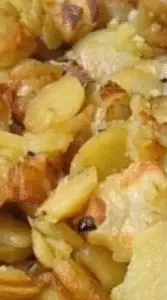
First things first — thank you for being here! 💛 Whether you’ve been following my recipes for years or just stumbled in looking for some cozy inspiration, I’m so glad you found this one. These Stuffing Balls are a personal favorite — crisp on the outside, tender and herby on the inside, and filled with all the nostalgic flavors of traditional stuffing, but with a fun little twist!
If you’d love to get my newest recipes and kitchen tips straight to your inbox (before they hit the blog), make sure to subscribe for free email updates. I promise, it’s all delicious and zero spam!
Why You’ll Love These Stuffing Balls
I promised you comfort food with a little creativity, and here’s proof! These stuffing balls take everything we adore about classic stuffing — buttery bread, sautéed onions, fragrant herbs — and turn it into the perfect bite-sized side dish. They’re versatile, make-ahead friendly, and absolutely crowd-approved.
✨ Here’s why these are irresistible:
- Crispy, golden outsides with soft, flavorful centers.
- A fun, hand-held version of a holiday classic.
- Perfect for Thanksgiving, Christmas, or even weeknight dinners.
- Great for using up leftover bread or stuffing mix!
- Freezer-friendly and easy to make ahead.
What Do Stuffing Balls Taste Like?
Think of your favorite stuffing — buttery, herby, savory — now imagine that same flavor but with a light, crispy crust. The moment you bite in, the inside is tender and aromatic with hints of sage, thyme, and rosemary. Every bite delivers that cozy “holiday kitchen” feeling, even if it’s the middle of spring!
Benefits of This Recipe
These little golden bites are more than just delicious — they’re practical, too!
- Perfect for leftovers: A smart way to repurpose day-old bread.
- Customizable: Add sausage, cranberries, or cheese for fun twists.
- Kid-friendly: Easy to eat and loved by all ages.
- Make ahead: Prep, chill, and fry just before serving.
Ingredients
For about 12–15 stuffing balls, you’ll need:
Base Mixture
- 4 cups day-old bread cubes (or fresh, lightly toasted)
- 1 cup cooked onion, finely chopped
- 1 cup celery, finely chopped
- 2 cloves garlic, minced
- ½ cup butter (1 stick)
- 2 tsp fresh sage, chopped (or 1 tsp dried)
- 1 tsp thyme
- ½ tsp rosemary
- ½ tsp salt (adjust to taste)
- ¼ tsp black pepper
- ½–¾ cup chicken or vegetable broth
- 1 large egg (for binding)
Optional Add-Ins
- ½ cup cooked sausage, crumbled
- ¼ cup dried cranberries (for a touch of sweetness)
For Coating & Frying
- 1 cup all-purpose flour
- 2 eggs, beaten
- 1 cup breadcrumbs or panko
- Oil for frying (vegetable or canola oil works best)
Tools You’ll Need
- A large skillet for sautéing
- A mixing bowl
- A baking sheet or tray
- Tongs or a slotted spoon for frying
- Paper towels (for draining excess oil)
Ingredient Additions & Substitutions
- 🧀 Cheesy version: Add ½ cup shredded cheddar or mozzarella before forming the balls.
- 🥦 Veggie boost: Mix in finely chopped mushrooms or spinach.
- 🌾 Gluten-free option: Use gluten-free bread and flour.
- 🧈 Oven-baked version: Skip frying and bake at 375°F (190°C) for 20–25 minutes until golden.
Step-by-Step Instructions
Step 1: Prepare the Vegetables
In a skillet, melt the butter over medium heat. Add onions and celery, cooking until soft and translucent — about 5–7 minutes. Stir in garlic, sage, thyme, and rosemary. Let them cook another 1–2 minutes until your kitchen smells absolutely amazing! Remove from heat and cool slightly.
Step 2: Make the Stuffing Mixture
In a large bowl, combine the bread cubes, sautéed vegetables, salt, and pepper. Pour in broth a little at a time until the mixture is moist but not soggy. Add the egg and any optional mix-ins like sausage or cranberries. Stir gently to combine.
Step 3: Shape the Balls
Scoop out portions (about 2 tablespoons each) and roll into firm, even balls. If the mixture feels too dry, add a splash of broth; if it’s too wet, add a few more bread crumbs.
Step 4: Coat for Frying
Set up three bowls: one with flour, one with beaten eggs, and one with breadcrumbs. Roll each stuffing ball in flour, then dip in egg, then coat with breadcrumbs. This creates that signature crispy shell!
Step 5: Fry or Bake
To fry: Heat oil to 350°F (175°C). Fry the balls in small batches until golden brown and crisp, about 3–4 minutes. Drain on paper towels.
To bake: Place on a parchment-lined tray and bake at 375°F for 20–25 minutes, turning once halfway.
What to Serve With Stuffing Balls
These beauties go with almost everything! Try pairing them with:
- Roast turkey or chicken
- Mashed potatoes and gravy
- Cranberry sauce
- A fresh garden salad or roasted vegetables
They also make an amazing party appetizer — serve with a creamy dipping sauce like garlic aioli or ranch.
Tips for Perfect Stuffing Balls
- Use day-old bread — it soaks up flavor without turning mushy.
- Don’t overmix; keep a light hand for a tender texture.
- Chill formed balls for 15 minutes before frying for better shape.
- Fry in small batches so the oil stays hot and the crust stays crisp.
Storage & Reheating
- Fridge: Store leftovers in an airtight container up to 3 days.
- Freezer: Freeze (cooked or uncooked) up to 2 months.
- Reheat: Bake at 350°F for 10 minutes or air-fry until crispy again.
Frequently Asked Questions
Can I make these ahead of time?
Yes! You can shape and refrigerate the stuffing balls a day ahead, then fry or bake them fresh when ready to serve.
Can I air-fry them?
Absolutely! Air fry at 375°F (190°C) for 10–12 minutes, turning halfway for even crispiness.
What kind of bread works best?
Use slightly stale or day-old white, sourdough, or whole wheat bread. Avoid soft sandwich bread — it can get too mushy.
Nutritional Information (Per Serving, 1 Ball)
Approximate values:
- Calories: 120 kcal
- Protein: 3 g
- Fat: 7 g
- Carbohydrates: 11 g
- Fiber: 1 g
- Sodium: 160 mg


Leave a Reply