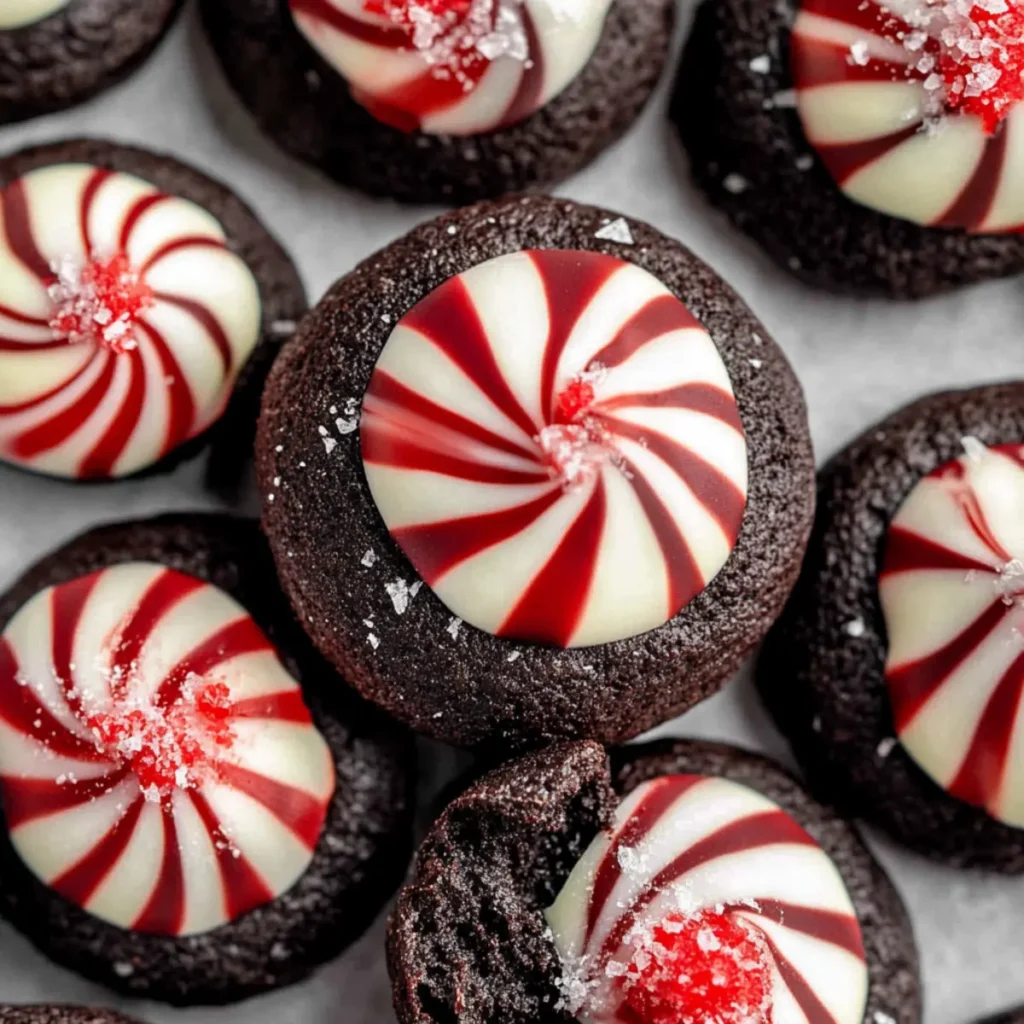
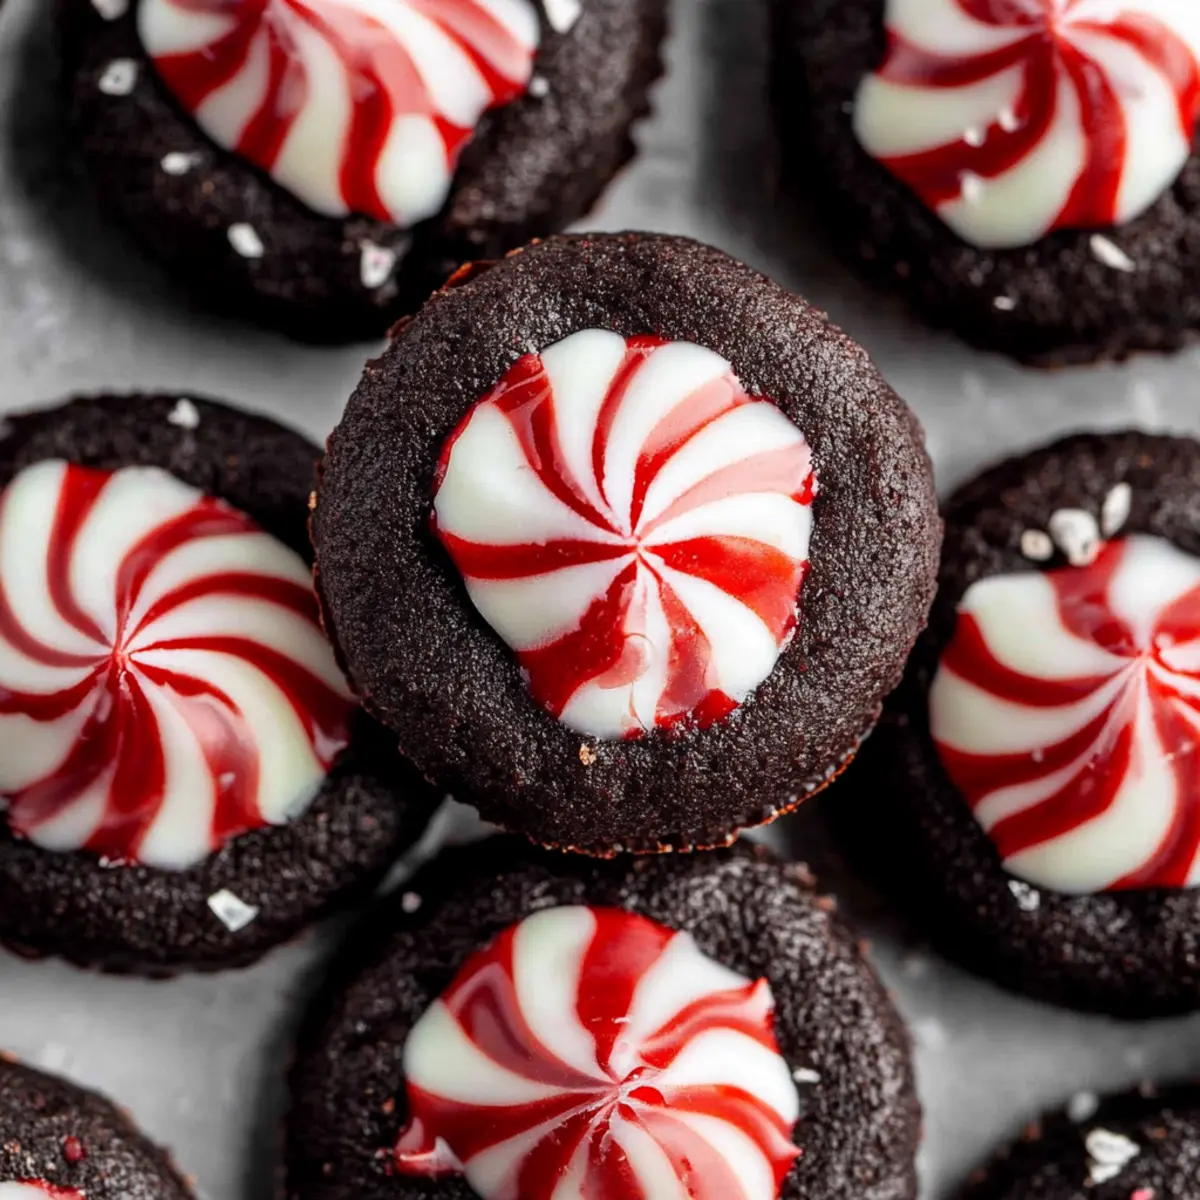
There’s nothing quite like the festive scent of chocolate and peppermint wafting through the air during the holidays. Each time I bake my favorite Chocolate Peppermint Blossoms, I’m transported back to cozy family gatherings, where laughter fills the room and sweet treats are abundant. These fudgy, chewy cookies don’t just look delightful; they deliver a perfect blend of rich dark chocolate and a refreshing pop of peppermint from the center of a Candy Cane Hershey Kiss.
Best of all, this recipe is incredibly easy and quick, making it suitable for both baking novices and seasoned pros looking to spice up their cookie collection. With a simple list of ingredients and straightforward steps, you’ll have a platter of festive goodies ready to impress guests at your next holiday gathering or cozy night in with a warm mug of cocoa. So, let’s dive in and create these irresistible holiday treats that are sure to become a new tradition!

Why are Chocolate Peppermint Blossoms so special?
Chewy, fudgy goodness: Each bite delivers an irresistible combination of rich chocolate and cooling peppermint.
Festive appeal: With their vibrant colors and unique flavor, these cookies are a holiday showstopper.
Quick and easy: Perfect for busy bakers, you’ll whip these up in no time.
Crowd-pleaser: They’re a delightful treat for cookie swaps and gatherings that everyone will love.
Customizable: Feel free to experiment with different Hershey Kiss flavors for a personalized twist! Whether you’re making these for yourself or to share, these cookies will become a festive favorite.
Chocolate Peppermint Blossoms Ingredients
The perfect blend of chocolate and peppermint awaits!
For the Cookie Dough
- All-Purpose Flour – Provides structure and stability; measure accurately to avoid excess flour.
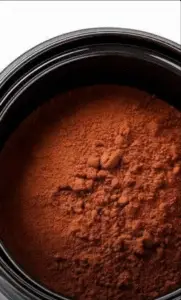
- Cocoa Powder (Dutch process) – Adds rich chocolate flavor; regular cocoa powder isn’t recommended for acidity balance.
- Baking Powder – Helps cookies rise; essential for a fluffy texture.
- Baking Soda – Further aids in leavening; works best with Dutch process cocoa.
- Salt – Enhances overall flavor; balances sweetness.
- Unsalted Butter (softened) – Contributes to moisture and richness; ensure it’s softened for mixing ease.
- Light Brown Sugar – Adds moisture and a slight caramel flavor; packed tightly in measuring cup for accuracy.
- Granulated Sugar – Provides sweetness and helps with texture; used for rolling the dough balls for added crunch.
- Egg Yolks – Bind ingredients together and add richness; use large eggs at room temperature.
- Vanilla Extract – Enhances flavor complexity; pure extract is recommended.
For the Center
- Candy Cane Hershey Kisses (frozen) – Centerpiece of the cookie; freezing keeps their shape during baking.
How to Make Chocolate Peppermint Blossoms
-
Prep Kisses: Unwrap 34 Candy Cane Hershey Kisses and freeze them for 30 minutes. This nifty step ensures they hold their shape when baked into the warm cookie center.
-
Preheat Oven: Set your oven to 350°F (175°C) and prepare your baking sheets with parchment paper. This ensures the cookies bake evenly and don’t stick!
-
Mix Dry Ingredients: In a bowl, whisk together the all-purpose flour, Dutch process cocoa powder, baking powder, baking soda, and salt. This blend creates the perfect foundation for your fudgy cookies!
-
Cream Sugars and Butter: In a separate bowl, cream together softened butter, light brown sugar, and granulated sugar until the mixture is light and fluffy. This step adds wonderful moisture and texture to your dough!
-
Add Wet Ingredients: Beat in egg yolks and vanilla extract until combined and fluffy. The egg yolks enhance the richness of your Chocolate Peppermint Blossoms!
-
Combine Mixtures: Gradually add the dry ingredients to the wet mixture, stirring until just combined. Be careful not to overmix; you want a lovely, fudgy texture.
-
Form Cookies: Scoop dough into 34 equal portions, roll them into balls, and coat in granulated sugar before placing on your baking sheets. This gives them a delightful sugary exterior!
-
Bake: Bake for 7-8 minutes, or until the cookies look set but still soft. They will continue to firm up as they cool!
-
Add Kisses: Immediately after removing the cookies from the oven, gently press a frozen Kiss into the center of each cookie. Watch those sugary centers melt just a bit!
-
Cool: Allow cookies to cool on the baking sheets until the Kisses are set, maintaining their shape for that delightful holiday presentation.
Optional: Sprinkle with crushed candy canes for an extra festive touch!
Exact quantities are listed in the recipe card below.
Make Ahead Options
These delightful Chocolate Peppermint Blossoms are perfect for meal prep, allowing busy home cooks to enjoy homemade treats with minimal last-minute fuss! You can prepare the cookie dough ahead of time and refrigerate it for up to 3 days. Just scoop the dough into balls, roll them in granulated sugar, and store them in an airtight container. When you’re ready to bake, simply preheat your oven and bake the dough balls directly, pressing a frozen Kiss on top right after they come out of the oven. By prepping the dough in advance, you’ll save valuable time while still enjoying freshly baked cookies just as delicious as if you made them all at once!
Storage Tips for Chocolate Peppermint Blossoms
Room Temperature: Store cookies in an airtight container for up to 3 days to maintain their delightful chewiness and flavor.
Fridge: If you prefer, you can refrigerate your Chocolate Peppermint Blossoms in an airtight container for up to 5 days; just let them come to room temperature before enjoying.
Freezer: For longer storage, freeze the cookies in a single layer, then transfer to a freezer-safe container for up to 2 weeks. Thaw before serving for the best taste.
Reheating: To revive the cookies, microwave for 10-15 seconds or warm them in the oven at 300°F (150°C) for a few minutes. This will soften them and enhance their delicious minty chocolate flavor!
What to Serve with Chocolate Peppermint Blossoms?
These delicious cookies are a festive treat that can elevate your holiday celebrations even further.
-
Hot Cocoa: A rich, creamy mug of hot cocoa pairs perfectly, enhancing the chocolate notes in the cookies while the warmth contrasts with the cool peppermint burst.
-
Vanilla Ice Cream: The smooth, creamy texture of vanilla ice cream creates a delightful balance with the chewy cookie, turning your dessert into an indulgent pairing for any occasion.
-
Peppermint Tea: A soothing cup of peppermint tea complements the cookie’s flavor, providing a refreshing contrast to the luscious chocolate and enriching your holiday experience.
-
Fresh Berries: Bright, tart strawberries or raspberries add a pop of freshness that balances the sweetness of the cookies, making for a beautifully vibrant dessert setting.
-
Chewy Caramel Squares: Enjoy a heavenly encounter with rich, chewy caramel squares that echo the cookie’s sweetness while adding a silky, luscious texture contrast in every bite.
-
Nutty Charcuterie Board: A platter of assorted nuts, dried fruits, and cheeses balances the sweet and chocolatey flavors, making your dessert table more inviting.
-
Mulled Wine: This warm, spiced drink offers a cozy complement to the minty undertones, wrapping you in festive cheer while you enjoy your cookies.
-
Chocolate Dipped Pretzels: The salty crunch of pretzels dipped in chocolate serves as a delightful contrast to the sweet cookies, adding varied textures to your spread.
Embrace these suggestions as they beautifully amplify the joyous experience of indulging in your Chocolate Peppermint Blossoms!
Expert Tips for Chocolate Peppermint Blossoms
-
Measure Flour Correctly: Ensure you’re measuring accurately by using the spooning method or a kitchen scale. Incorrect flour measurement can lead to dry cookies.
-
Freeze the Kisses: For ideal results, freeze your Candy Cane Hershey Kisses ahead of time. This step prevents them from melting too much during baking.
-
Don’t Overmix Dough: When combining dry and wet ingredients, mix until just combined. Overmixing can lead to tough cookies instead of the desired fudgy texture.
-
Cool on the Sheet: Allow cookies to sit on the baking sheet for a few minutes before transferring them. This helps the Kisses maintain their shape within the warm, chewy cookie.
-
Add a Crunch: Consider rolling the cookie dough balls in crushed candy canes or sprinkles before baking for an extra festive touch to your Chocolate Peppermint Blossoms.
Chocolate Peppermint Blossoms Variations
Customize your cookies by exploring these delightful twists that will make your kitchen smell heavenly!
- Minty Chocolate Boost: Add a few drops of peppermint extract to the dough for an extra minty zing.
- Gluten-Free: Use a 1:1 gluten-free flour blend to accommodate gluten sensitivities without sacrificing taste.
- Nutty Delight: Fold in chopped walnuts or pecans for a crunchy texture that complements the fudginess of the cookie.
- Different Kisses: Swap out Candy Cane Kisses for milk chocolate, dark chocolate, or even peanut butter Kisses for a unique flavor twist.
- Dairy-Free Option: Substitute unsalted butter with coconut oil and use dairy-free chocolate kisses for a vegan-friendly treat.
- Spicy Kick: Add a pinch of cayenne pepper to the dough for a surprising, tasty heat that contrasts perfectly with the sweetness.
- Zesty Citrus: Grate some orange or lemon zest into the dough for a refreshing citrus flavor that complements the chocolate and peppermint.
- Chewy Oatmeal: Mix in a half-cup of rolled oats into the dough for added texture and a wholesome touch to your Christmas cookies.

Chocolate Peppermint Blossoms Recipe FAQs
How do I choose the right cocoa powder for Chocolate Peppermint Blossoms?
It’s essential to use Dutch process cocoa powder for this recipe, as it adds a rich, non-acidic chocolate flavor, ensuring your cookies maintain the perfect texture. Regular cocoa powder is not recommended due to its acidity, which can affect the leavening agents.
How should I store my Chocolate Peppermint Blossoms for optimal freshness?
Store your cookies in an airtight container at room temperature for up to 3 days. If you’d like to keep them longer, refrigerate them for up to 5 days, letting them reach room temperature before enjoying. For extended storage, freeze the cookies in a single layer, then transfer them to a freezer-safe container or bag for up to 2 weeks. Make sure to thaw them before serving for the best chocolate-peppermint flavor!
Can I freeze Chocolate Peppermint Blossoms? If so, how?
Absolutely! To freeze your cookies, let them cool completely first. Place them in a single layer on a baking sheet and freeze them for a couple of hours until firm. Then, transfer them to a freezer-safe container or zip-top bag, separating layers with parchment paper, for up to 2 weeks. When ready to enjoy, simply thaw them on the counter or microwave them for about 10-15 seconds to soften.
What should I do if my cookies spread too much while baking?
If your Chocolate Peppermint Blossoms spread too much, it could be due to using too much flour or not chilling the dough enough! Make sure to measure your flour accurately by spooning it into the measuring cup and leveling it off. If the dough feels too soft, chill it in the refrigerator for 30 minutes before baking; this will help them hold their shape better!
Are Chocolate Peppermint Blossoms safe for people with allergies?
These cookies contain common allergens including gluten from the all-purpose flour, dairy from the butter, and eggs. If you’re baking for someone with allergies, consider making some swaps: you can use a gluten-free flour blend or substitute the butter with a plant-based option. Always double-check the ingredient labels for any hidden allergens, especially in the Hershey Kisses you choose.

Irresistibly Chewy Chocolate Peppermint Blossoms Recipe
Equipment
- Mixing Bowl
- Baking sheets
- Parchment Paper
- whisk
- spoon
Ingredients
For the Cookie Dough
- 2 cups All-Purpose Flour Measure accurately to avoid excess flour.
- ¾ cup Cocoa Powder (Dutch process) Regular cocoa powder isn't recommended.
- 1 teaspoon Baking Powder Helps cookies rise.
- ½ teaspoon Baking Soda Works best with Dutch process cocoa.
- ½ teaspoon Salt Enhances overall flavor.
- ½ cup Unsalted Butter (softened) Ensure it’s softened for mixing ease.
- 1 cup Light Brown Sugar Packed tightly in the measuring cup.
- ½ cup Granulated Sugar Used for rolling the dough balls.
- 2 large Egg Yolks Use large eggs at room temperature.
- 1 teaspoon Vanilla Extract Pure extract is recommended.
For the Center
- 34 Candy Cane Hershey Kisses (frozen) Freezing keeps their shape during baking.
Instructions
Cookie Preparation
- Unwrap 34 Candy Cane Hershey Kisses and freeze them for 30 minutes.
- Preheat your oven to 350°F (175°C) and prepare your baking sheets with parchment paper.
- In a bowl, whisk together the all-purpose flour, Dutch process cocoa powder, baking powder, baking soda, and salt.
- In a separate bowl, cream together softened butter, light brown sugar, and granulated sugar until light and fluffy.
- Beat in egg yolks and vanilla extract until combined and fluffy.
- Gradually add the dry ingredients to the wet mixture, stirring until just combined.
- Scoop dough into 34 equal portions, roll them into balls, and coat in granulated sugar before placing on your baking sheets.
- Bake for 7-8 minutes, or until the cookies look set but still soft.
- Immediately after removing from the oven, gently press a frozen Kiss into the center of each cookie.
- Allow cookies to cool until the Kisses are set.

Leave a Reply