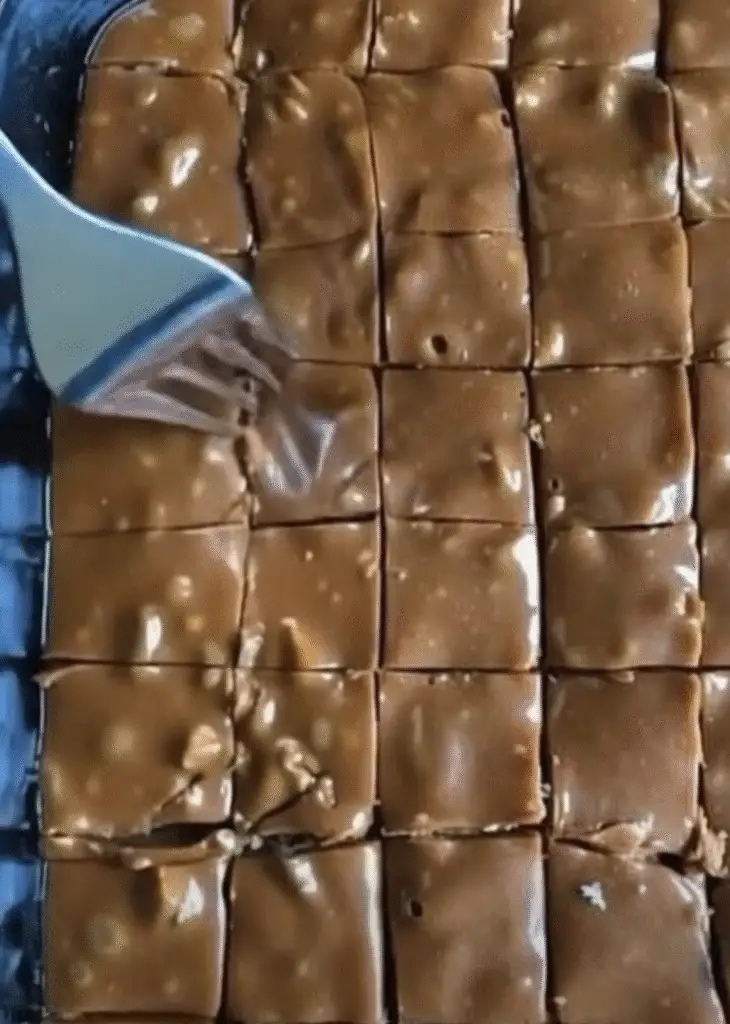
Oklahoma Nut Candy is a classic Southern confection known for its soft, chewy texture, deep caramel flavor, and generous amount of toasted nuts. This old-fashioned candy sits somewhere between a praline and a creamy fudge, making it rich, buttery, and deeply satisfying. Traditionally made for holidays, church gatherings, and gift tins, it has stood the test of time because it relies on simple ingredients and careful technique rather than shortcuts.
I first encountered Oklahoma nut candy during the holiday season when trays of homemade sweets filled every available counter space. There was always one pan that disappeared faster than the rest, cut into neat squares and wrapped in wax paper. The flavor was unmistakable: warm caramel, a hint of vanilla, and toasted nuts in every bite. Over time, this candy became more than a seasonal treat. It became a reminder that patience and attention can turn basic pantry ingredients into something special.
Understanding What Makes Oklahoma Nut Candy Unique
A Candy Rooted in Tradition
Oklahoma nut candy belongs to a family of Southern praline-style candies, but its preparation sets it apart. Instead of cooking everything together from the start, the recipe begins by caramelizing part of the sugar separately. This step deepens the flavor and gives the candy its signature rich, almost toasted caramel taste.
Because the method relies on temperature and timing rather than added syrups, the final texture feels old-fashioned and authentic. The candy firms up enough to slice cleanly while remaining pleasantly chewy rather than brittle.
Texture That Strikes the Right Balance
The goal with Oklahoma nut candy is a soft-set consistency. It should not be grainy or crumbly, nor should it be runny. When done correctly, the candy holds its shape, cuts neatly into squares, and offers a gentle chew that melts slowly as you eat it.
Achieving this texture depends on cooking the mixture to the correct temperature and allowing it to rest undisturbed before stirring. Each phase plays an important role in the final result.
Choosing Ingredients for Best Results
Sugar and Cream as the Foundation
Granulated sugar and heavy cream form the backbone of this candy. Using heavy cream rather than milk is essential because the higher fat content contributes to the smooth texture and rich mouthfeel. The sugar is divided for a reason, with one portion caramelized separately to build depth of flavor.
Because sugar is the primary ingredient, measuring accurately matters. Small variations can affect texture, so leveling cups and following proportions carefully leads to more consistent results.
Butter, Vanilla, and Baking Soda
Unsalted butter adds richness and helps smooth the candy as it cools. Adding it after cooking prevents scorching and preserves its fresh flavor. Vanilla extract rounds out the sweetness and enhances the caramel notes without overpowering them.
Baking soda may seem unusual in candy, but it plays a critical role. When added at the end of cooking, it reacts with the caramelized sugars and introduces tiny air bubbles. This reaction lightens the texture and keeps the candy from becoming too dense.
Equipment
- Heavy-bottom pot
- Candy thermometer
- wooden spoon
Ingredients
- 6 cups granulated sugar, divided
- 2 cups heavy cream
- 1/2 cup unsalted butter
- 1 tsp vanilla extract
- 1/4 tsp baking soda
- 1.5 cups chopped pecans or walnuts
Instructions
- Grease a 9×13-inch baking dish and set aside.
- Melt 2 cups sugar in a heavy saucepan over low heat, stirring constantly, until fully liquefied and amber.
- In a large pot, warm remaining sugar and heavy cream over low heat until sugar dissolves.
- Slowly pour melted sugar into cream mixture while stirring constantly.
- Increase heat to medium and cook until mixture reaches 244°F (softball stage).
- Remove from heat and quickly stir in baking soda.
- Stir in butter and vanilla until smooth. Let rest 20 minutes undisturbed.
- Stir vigorously until thick and matte, fold in nuts, and pour into prepared pan.
- Cool completely, then cut into squares.
Notes
Nutrition
Nuts for Flavor and Texture
Pecans are the traditional choice for Oklahoma nut candy, but walnuts work equally well. Toasting the nuts before adding them intensifies their flavor and prevents them from tasting soft or bland in the finished candy.
Chopping the nuts evenly ensures they distribute throughout the candy. Each piece should be small enough to blend smoothly but large enough to provide a satisfying crunch.
Preparing the Pan and Workspace
Setting Up Before You Start
Candy making moves quickly once it reaches the final stages, so preparation matters. Greasing a 9×13-inch baking dish ahead of time ensures the candy releases easily once set. Having all ingredients measured and ready prevents delays that could affect texture.
Using a heavy-bottom pot is equally important. Thin pots can cause hot spots, leading to scorching and uneven cooking. A sturdy pot helps maintain steady heat and gives you better control throughout the process.
Tools That Make a Difference
A candy thermometer is highly recommended for this recipe. While experienced candy makers may recognize the softball stage by sight or touch, temperature provides accuracy and confidence. Reaching 244°F ensures the sugar concentration is correct for the desired texture.
A wooden spoon or heat-resistant spatula works best for stirring, as it allows you to scrape the bottom of the pot and prevent sticking.
Melting Sugar for Deep Caramel Flavor
Slow and Steady Is Key
The first step involves melting two cups of sugar over low heat until it becomes liquid and amber-colored. This process requires patience. Rushing with high heat can cause the sugar to burn, resulting in bitterness.
Stirring constantly helps the sugar melt evenly. As it liquefies, it will clump and then smooth out. Once fully melted and amber in color, it is ready to be combined with the cream mixture.
Managing Heat Safely
Melted sugar is extremely hot. Pouring it slowly and carefully into the cream mixture while stirring prevents splashing and reduces the risk of burns. This gradual combination also helps the sugar integrate smoothly rather than hardening on contact.
This step builds the candy’s signature flavor, so taking your time here pays off in the final taste.
Cooking the Cream Mixture to the Right Stage
Dissolving Sugar Completely
Before combining with the melted sugar, the remaining four cups of sugar and heavy cream are gently heated until the sugar dissolves. Stirring over low heat ensures a smooth mixture without scorching the cream.
Once dissolved, the mixture can handle higher heat without graininess. Skipping this step can lead to a gritty texture later.
Reaching the Softball Stage
After combining both sugar mixtures, the heat is increased to medium. Cooking continues until the mixture reaches 244°F, known as the softball stage. At this point, the candy will thicken and bubble steadily.
Stirring often prevents sticking and promotes even cooking. Reaching the correct temperature is crucial. Undercooking results in candy that does not set, while overcooking produces a hard, crumbly texture.
Finishing the Candy Properly
Adding Baking Soda at the Right Time
Once the mixture reaches the target temperature, it is removed from heat before adding baking soda. Stirring it in quickly causes the candy to foam and lighten. This reaction should happen off the heat to prevent overflow and maintain control.
This step should be done confidently and quickly, as the mixture begins to set soon afterward.
Butter and Vanilla for Smoothness
Butter and vanilla are stirred in immediately after the baking soda. The butter melts into the mixture, smoothing it out and adding richness. Vanilla enhances the caramel flavor and balances the sweetness.
At this stage, the candy should look glossy and thick but still fluid.
Resting and Beating for Proper Texture
Why the Resting Period Matters
Allowing the candy to rest undisturbed for about 20 minutes is essential. During this time, the temperature drops slightly and the sugar structure begins to form. Stirring too early can disrupt crystallization and lead to a grainy texture.
This resting phase requires patience, but it plays a major role in achieving the correct consistency.
Beating Until Matte
After resting, the mixture is stirred vigorously until it thickens and turns matte rather than glossy. This change signals that the candy is ready for nuts and pouring.
Once the nuts are folded in, the candy must be transferred to the prepared pan immediately. Delaying too long can make it difficult to spread evenly.
Cooling, Cutting, and Serving
Allowing Time to Set
The candy should cool at room temperature for one to two hours or overnight. As it cools, it firms up enough to slice cleanly without losing its chew.
Avoid refrigeration during initial cooling, as it can affect texture. Room temperature setting produces the best results.
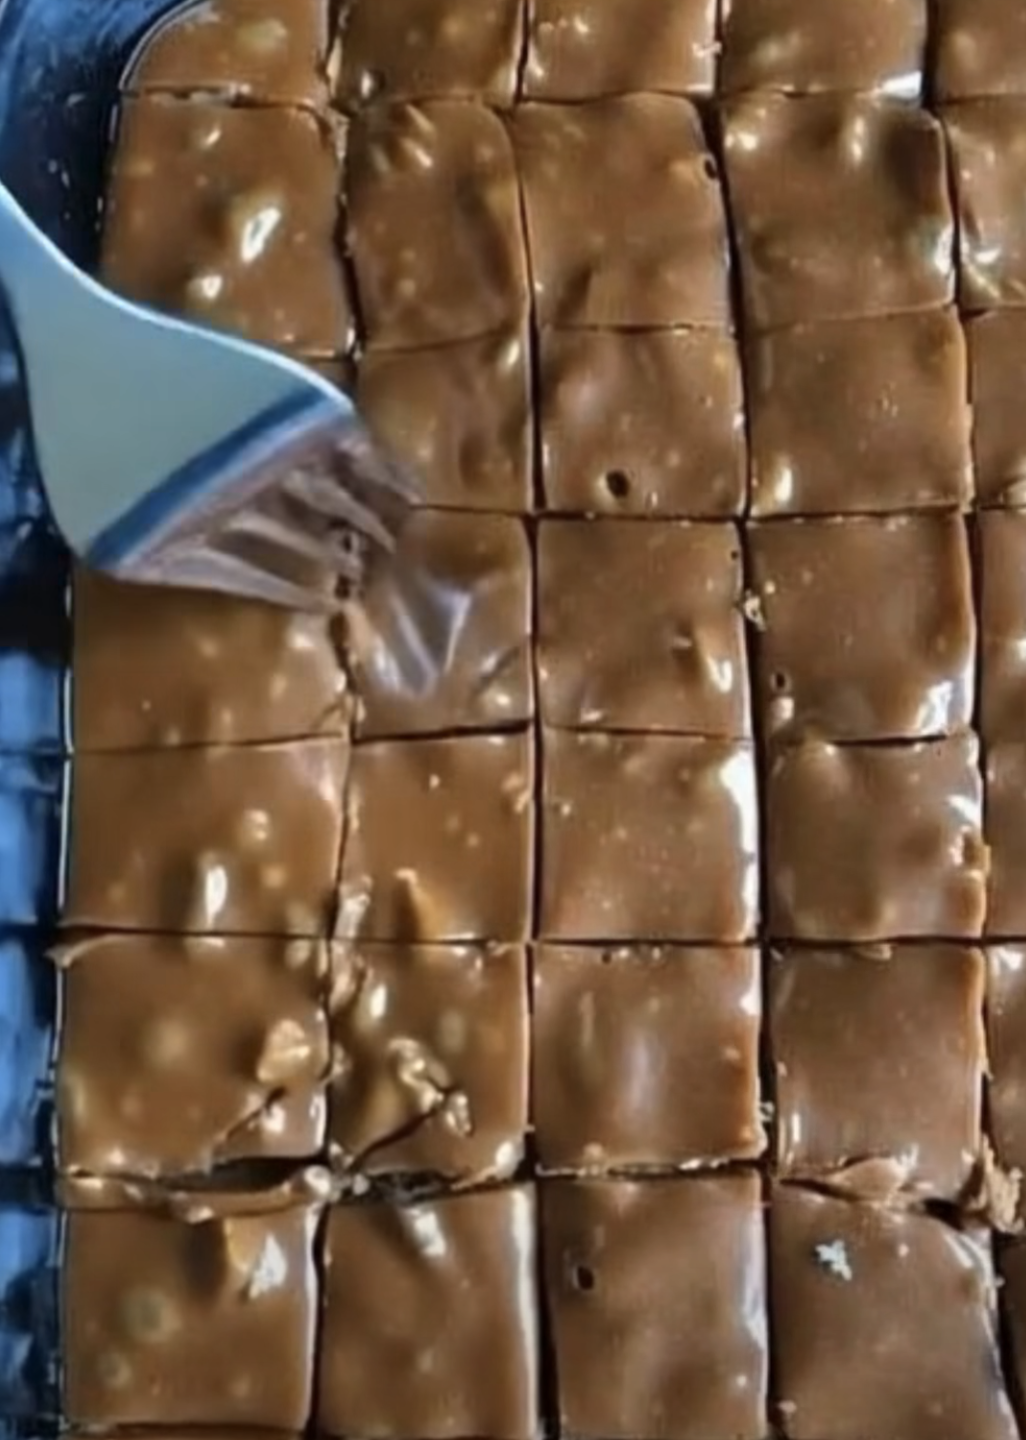
Cutting into Squares
Once fully set, cutting the candy into squares makes it easy to serve and store. Using a lightly buttered knife helps prevent sticking and creates clean edges.
These squares are ideal for holiday trays, gift boxes, or simple snacking.
Storage and Shelf Life
Keeping Candy Fresh
Stored in an airtight container at room temperature, Oklahoma nut candy stays fresh for up to two weeks. Keeping it sealed protects it from humidity, which can soften the texture.
Layering pieces with wax or parchment paper prevents sticking during storage.
Freezing for Long-Term Storage
For longer storage, the candy freezes well for up to three months. Thawing at room temperature preserves texture and flavor without condensation issues.
This makes it easy to prepare batches ahead of busy seasons.
Variations and Custom Ideas
Changing the Nuts or Flavor
Almonds or cashews can replace pecans or walnuts for a different flavor profile. Adding a small amount of almond extract alongside vanilla creates a subtle twist without overpowering the candy.
These variations keep the recipe flexible while maintaining its classic character.
Shaping Options
Instead of pouring into a pan, the candy can be dropped by spoonfuls onto parchment paper to form clusters. This approach works well for gift packaging and portion control.
Both methods deliver the same flavor with different presentation styles.
FAQ
1. Why is my candy grainy?
Graininess usually comes from stirring too early or undissolved sugar. Follow resting times carefully.
2. Can I make this without a thermometer?
Yes, but a thermometer provides more consistent results, especially for beginners.
3. Is humidity really a concern?
Yes, high humidity can affect candy setting and texture.
4. Can I double the recipe?
Yes, but use a very large pot and expect longer cooking times.
5. Does toasting nuts make a difference?
Yes, toasting adds depth and keeps the nuts flavorful in the finished candy.
Conclusion
Oklahoma Nut Candy is a timeless Southern treat that rewards patience and care with rich caramel flavor and a soft, satisfying chew. With simple ingredients and traditional technique, it delivers a candy that feels nostalgic, generous, and perfect for sharing. Whether made for holidays, gifting, or personal enjoyment, this recipe preserves the old-fashioned charm that has made it a favorite for generations.
1️⃣ WP RECIPE MAKER JSON IMPORT BLOCK

Leave a Reply