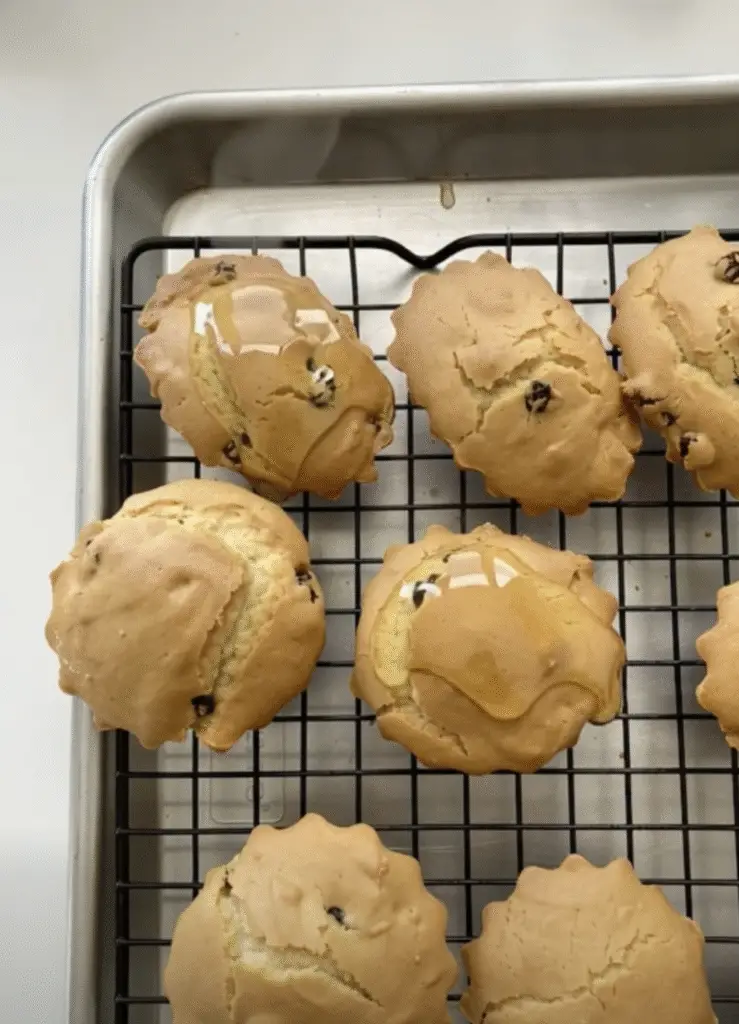
Queen Cakes are one of those timeless treats that feel like they’ve been passed down through generations—because in many cases, they have. Soft, delicately sweet, and speckled with currants, these petite cakes were once a staple in English households, often enjoyed beside a warm pot of tea. Their flavor is nostalgic yet comforting: think buttery sponge, hints of lemon zest, gentle nutmeg warmth, and the subtle aroma of almond.
Though simple in appearance, Queen Cakes have a quiet elegance. They’re dainty enough for tea parties, sturdy enough for lunchbox treats, and charming enough to serve at holiday gatherings. Best of all, they come together easily with basic pantry ingredients—no fancy equipment, no fuss.
If you love classic bakes that feel like home, these tiny cakes will quickly become a favorite.
⭐ Why You’ll Love Queen Cakes
These little cakes may look modest, but they deliver all the charm and softness of a traditional English bake:
- ✔ Tender, buttery crumb
- ✔ Old-fashioned flavors—nutmeg, almond & lemon
- ✔ Studded with sweet currants or raisins
- ✔ Quick to prepare (under 25 minutes)
- ✔ Perfect for mini muffin pans
- ✔ Ideal for tea parties, brunch, gifting & holidays
Whether you’re serving them warm from the oven or dusted with powdered sugar, they never fail to delight.
Ingredients You’ll Need
Here’s your complete list—simple, familiar, and beautifully aromatic:
- 7 tbsp unsalted butter, softened (plus extra for greasing)
- ½ cup granulated sugar
- 2 eggs
- 5 tbsp whole milk
- 1 tbsp brandy or orange juice
- ½ tsp almond extract
- 2 cups self-rising flour
- ¼ tsp ground nutmeg
- Zest of 1 lemon
- Pinch of salt
- 1 cup dried currants (or raisins)
- Powdered sugar for dusting (optional)
🎀 Allergens: Wheat, Gluten, Nuts (almond extract), Citrus
🥄 Diet: Vegetarian
🧈 Why These Ingredients Work So Well
Queen Cakes achieve their signature texture and flavor thanks to the harmony of these key ingredients:
- Unsalted butter → creates tenderness and richness
- Granulated sugar → keeps the crumb delicate
- Eggs & milk → structure + moisture
- Almond extract → soft, floral sweetness
- Nutmeg & lemon zest → classic British flavor combo
- Self-rising flour → ensures light, even rise
- Currants → tiny bursts of fruity sweetness without weighing the cake down
Every ingredient adds character, resulting in a cake that’s both simple and refined.
How to Make Queen Cakes (Step-by-Step)
1. Preheat & Prepare
Preheat your oven to 375°F (190°C).
Grease small patty pans or line a mini muffin tin with paper liners.
2. Cream Butter & Sugar
Cream the butter and sugar together until pale, fluffy, and light—this step gives the cakes their soft, airy texture.
3. Mix the Wet Ingredients
In a small bowl, whisk together:
- Eggs
- Milk
Then beat this mixture into your creamed butter and sugar.
Add the brandy (or orange juice) and almond extract.
4. Combine the Dry Ingredients
In a separate bowl, whisk together:
- Self-rising flour
- Ground nutmeg
- Lemon zest
- Pinch of salt
This keeps the dry ingredients light and evenly distributed.
5. Bring the Batter Together
Add the flour mixture ½ cup at a time, mixing gently after each addition.
Fold in the currants.
The batter should be thick but scoopable.
6. Fill & Bake
Spoon the batter into your tins, filling each cavity about halfway.
Bake 15–20 minutes, until:
- The tops are golden
- A toothpick comes out clean
- The cakes spring back lightly when touched
7. Cool & Dust
Let the cakes cool completely.
Dust with powdered sugar for a classic finish (optional but beautiful).
Yield, Timing & Nutrition
- Yield: 24 mini cakes
- Prep Time: 25 minutes
- Cook Time: 20 minutes
- Calories: ~108 per cake
Baking Tips for Perfect Queen Cakes
Here’s how to get that plush, tender texture every time:
✔ Cream your butter well
This creates tiny air pockets that keep the cakes soft and fluffy.
✔ Don’t skip the lemon + nutmeg
They add old-fashioned depth and warmth.
✔ Don’t overfill the tins
Queen Cakes should be petite and slightly domed—not oversized muffins.
✔ Use currants if you can
They distribute more evenly than raisins.
✔ Let them cool before dusting
Warm cakes make the sugar melt.
Flavor Variations
Queen Cakes are wonderfully adaptable. Try:
💕 Citrus Twist:
Add orange zest instead of lemon.
🍫 Chocolate Chip Mini Cakes:
Replace currants with mini chocolate chips.
🌸 Vanilla Rose Cakes:
Swap almond extract with rose water.
🍒 Cherry Bakewell Style:
Add chopped glacé cherries + extra almond extract.
🌰 Nutty Queen Cakes:
Fold in finely chopped almonds or walnuts.
What to Serve Queen Cakes With
These dainty cakes are perfect for:
- Afternoon tea
- Brunch platters
- Easter, Mother’s Day, or Christmas spreads
- School or office treats
- Picnic baskets
- Gift boxes
Pair with:
- Earl Grey tea
- Lemon herbal tea
- Black coffee
- Hot chocolate
- Fresh berries
How to Store Queen Cakes
They store beautifully!
Room temperature:
3 days in an airtight container
Refrigerator:
Up to 1 week
Freezer:
Up to 2 months (freeze without powdered sugar; dust after thawing)
To thaw:
Let sit at room temperature 1–2 hours.
FAQ
Why are they called Queen Cakes?
They date back to the 18th century and were named in honor of Queen Anne. They were commonly served at tea tables and children’s parties.
Can I use regular flour instead of self-rising?
Yes—use:
- 2 cups all-purpose flour
- 2 tsp baking powder
- ¼ tsp salt
Can I make them full-size?
You can, but they won’t be authentic. Still, they work well in standard muffin tins—bake 20–25 minutes.
Can I substitute the brandy?
Absolutely. Orange juice adds wonderful brightness.
Conclusion
These classic Queen Cakes capture everything we love about traditional British baking: gentle sweetness, fragrant spice, and a texture that’s soft, nostalgic, and utterly comforting. They’re small, elegant, and perfect for sharing—simple enough for everyday baking and special enough for celebrations.
Whether you enjoy them warm with tea or gift them in a pretty tin, these charming little cakes never fail to bring joy.


Leave a Reply