
When the holiday season rolls around, there’s an undeniable charm in creating desserts that not only taste delicious but also look stunning on the table. Picture this: a creamy No Bake Christmas Red Velvet Cheesecake with a rich Oreo crust that captures the essence of festive indulgence in every bite. I discovered this delightful recipe during one of those busy holiday weekends when I wanted something special but also needed to keep things simple. The best part? It impresses guests and family alike without a single minute spent in the oven!
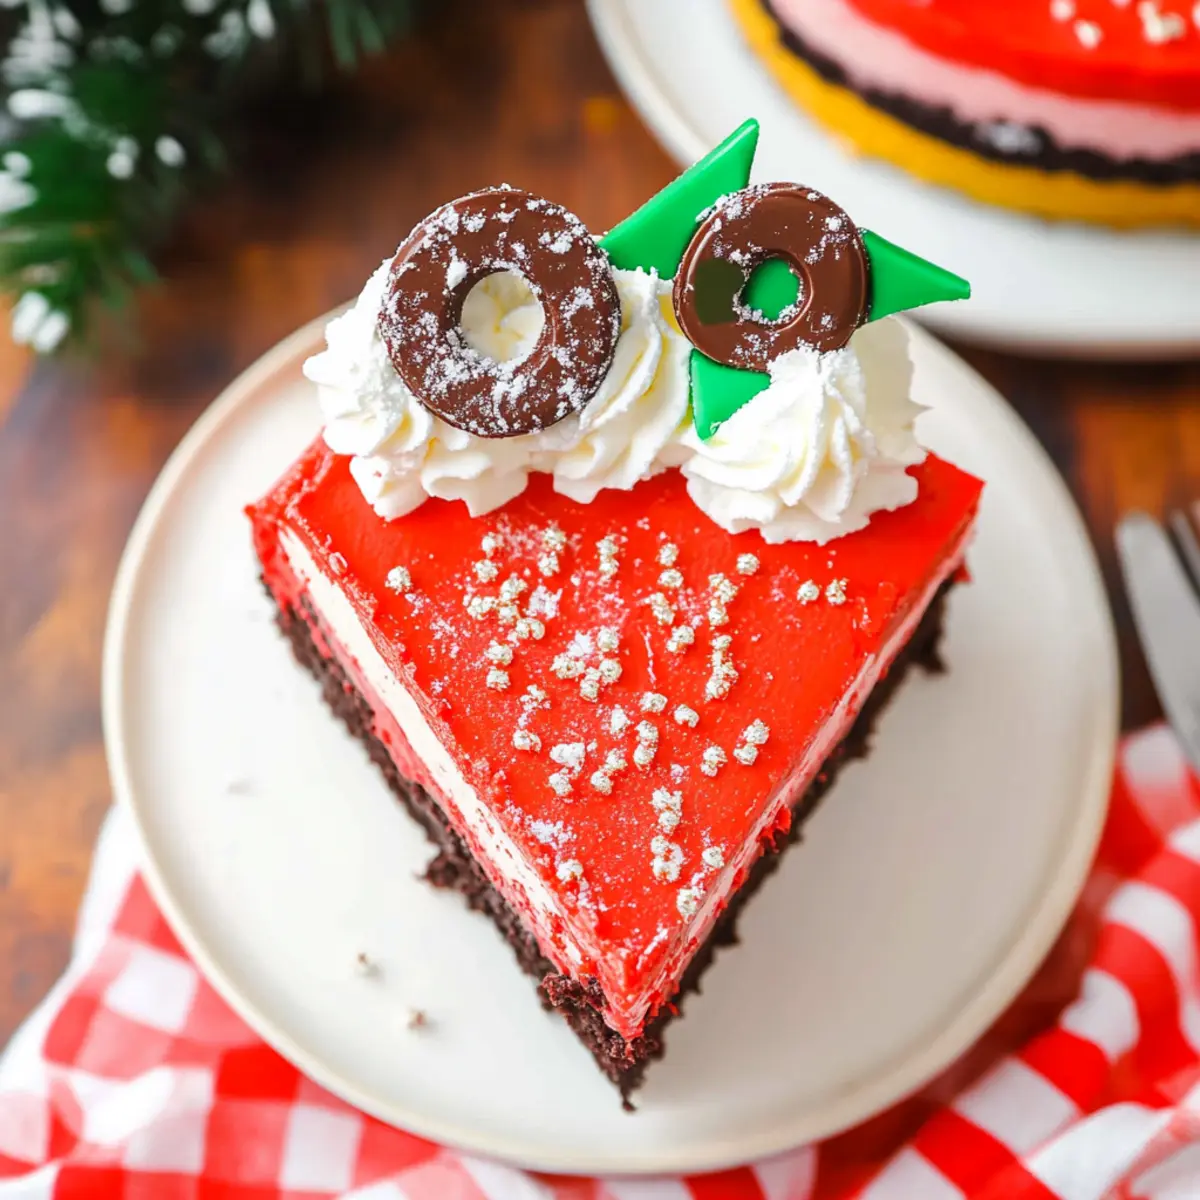
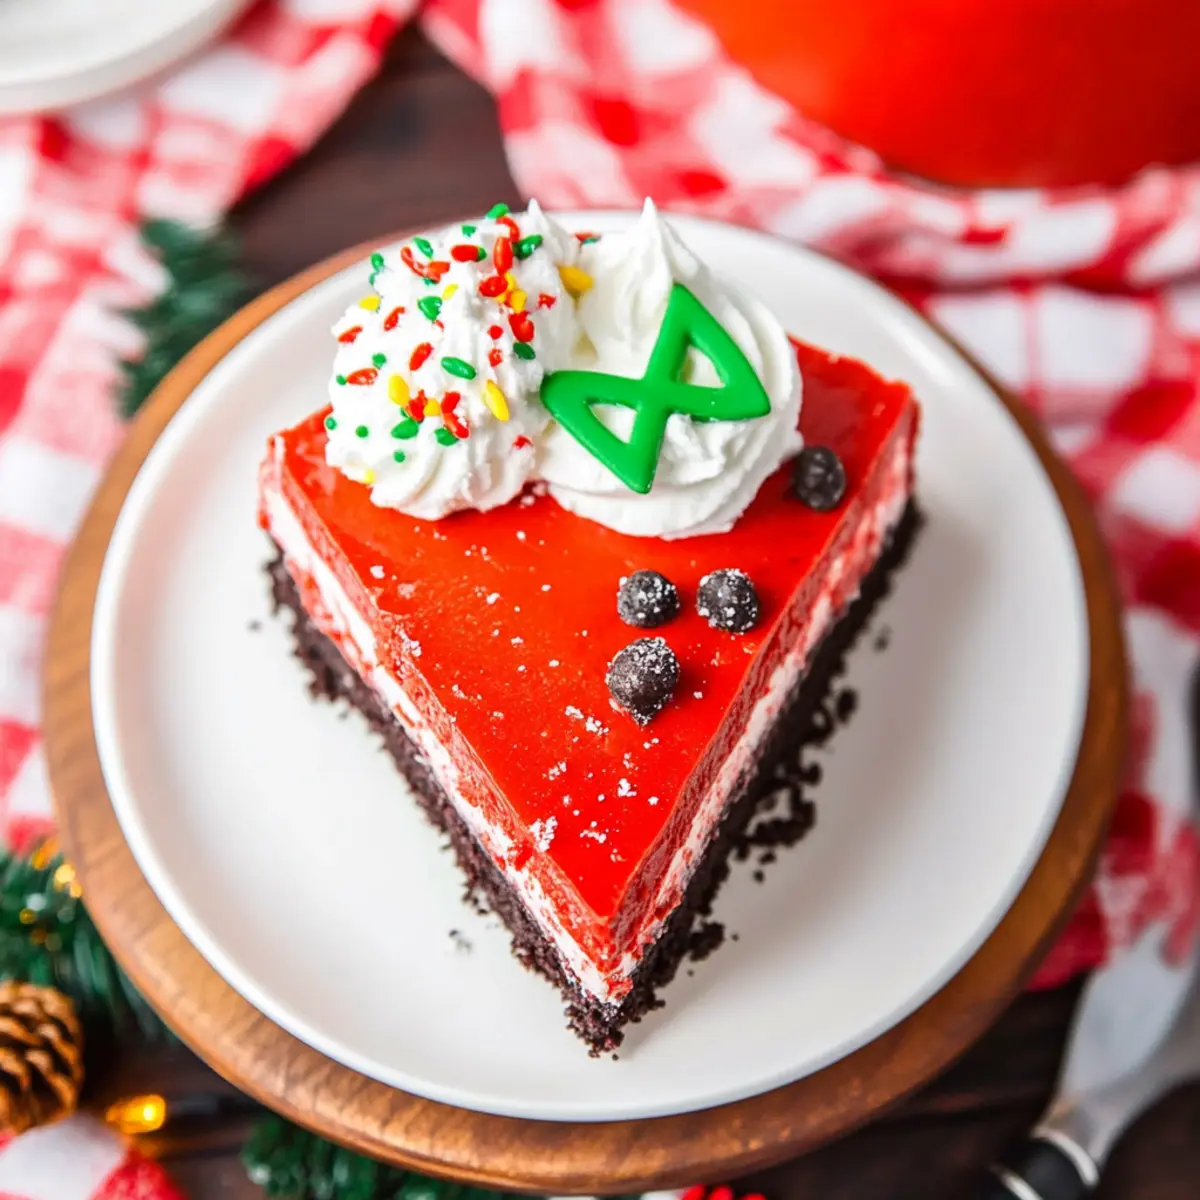
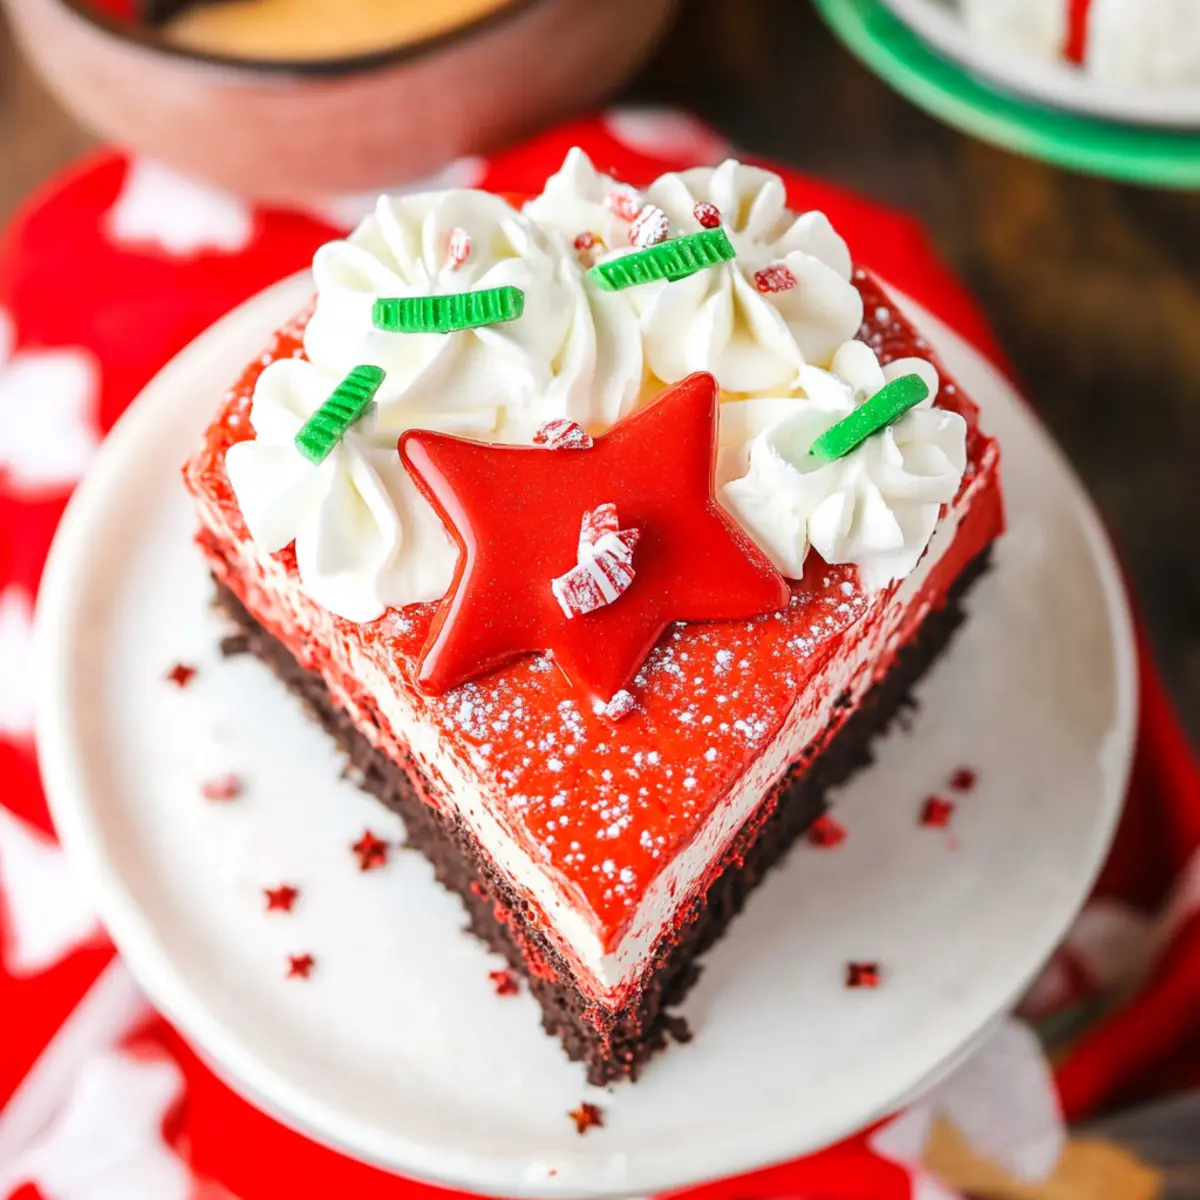
With layers of luscious red velvet and classic vanilla cheesecake swirling together, adorned with whipped cream and colorful Christmas sprinkles, this dessert is a feast for the eyes as well as the palate. It’s the ideal treat to prepare ahead of time, allowing you more precious moments to enjoy with loved ones during bustling holiday gatherings. So let’s dive into this easy Christmas Red Velvet Cheesecake recipe and make your celebrations even sweeter!
Why Love This Easy Christmas Red Velvet Cheesecake?
Easy to make: This no-bake cheesecake eliminates the stress of traditional baking, allowing you to focus on enjoying the holidays.
Visually stunning: The vibrant red hue and layered design create a show-stopping centerpiece that will wow your guests.
Deliciously rich: The combination of creamy cheesecake and chocolatey Oreos offers a decadent flavor experience, perfect for any festive occasion.
Make-ahead friendly: Prepare this treat a day in advance and let it chill, enhancing the flavors while saving you time for more holiday fun.
Kid-approved: Its playful sprinkles and creamy texture are sure to delight both children and adults alike, making it a hit at family gatherings.
Easy Christmas Red Velvet Cheesecake Ingredients
For the Crust
- Oreo Cookies – Provides the rich, chocolatey flavor for the crust. Note: Whole cookies (filling included) yield the best results.
- Butter (melted) – Binds the crust ingredients together, adding a buttery crisp texture. Note: Use unsalted butter for better control over sweetness.
For the Cheesecake Filling
- Cream Cheese (softened) – The primary component of the cheesecake filling, contributing creaminess. Preparation Note: Ensure cream cheese is at room temperature for a smooth mixture.
- White Sugar – Sweetens the cheesecake while maintaining lightness. Substitution: Consider a sugar substitute if desired.
- Heavy Whipping Cream – Whipped to stiff peaks for a light, mousse-like texture in the cheesecake. Note: Can use Cool Whip as a shortcut.
- Vanilla Extract – Enhances the flavor profile by balancing the cream cheese’s tang. Substitution: Almond or peppermint extract for a different flavor.
- Cocoa Powder – Gives the cheesecake its signature red velvet flavor with a touch of chocolate richness. Note: Use unsweetened cocoa powder for authentic taste.
- Red Food Coloring – Achieves the classic red velvet hue; adjust as needed. Note: Gel coloring is recommended for deeper color.
- Christmas Sprinkles – Added into the filling for a festive touch. Substitution: Change sprinkle colors for different occasions.
For the Topping and Garnish
- Whipped Cream – Used for topping, adding a soft, fluffy finish. Note: Homemade is preferred for freshness.
- Mini Oreos – Garnish for added texture and whimsical appearance. Substitution: Crushed Oreos or chocolate curls work well.
How to Make Easy Christmas Red Velvet Cheesecake
-
Prepare the Crust: Start by pulsing the Oreo cookies in a food processor until they resemble fine crumbs. Mix in the melted butter until fully combined, then press the mixture evenly into a springform pan. Chill in the refrigerator while you make the filling.
-
Whip the Cream: In a chilled mixing bowl, whip the heavy cream until stiff peaks form, which should take about 3-5 minutes. Set aside, letting it stay cool while preparing the cheesecake base.
-
Make the Cheesecake Base: In a separate bowl, beat the softened cream cheese and white sugar together until smooth and creamy, about 2-3 minutes. Add in the vanilla extract and mix well.
-
Combine Mixtures: Gently fold the whipped cream into the cream cheese mixture until smooth and fully incorporated. Divide this mixture into two bowls; to one, add cocoa powder and the red food coloring, stirring well.
-
Assemble the Cheesecake: Begin layering by alternating spoonfuls of the red and white batters into the chilled crust. Use a knife or skewer to swirl the colors together, creating a beautiful marbled effect.
-
Chill: Cover the cheesecake with plastic wrap and refrigerate for a minimum of 4 hours, but overnight is best, to allow it to set firmly.
-
Decorate and Serve: Just before serving, top the cheesecake with a generous layer of whipped cream, sprinkle mini Oreos on top, and finish with colorful Christmas sprinkles for that festive touch.
Optional: Add a drizzle of melted white chocolate for extra decadence.
Exact quantities are listed in the recipe card below.
What to Serve with No Bake Christmas Red Velvet Cheesecake?
When it comes to the holidays, pairing your dessert with the right accompaniments enhances the joy of the season and brightens the feast.
-
Hot Cocoa: The deep chocolate notes of rich hot cocoa complement the creamy cheesecake, making each bite warmer and cozier.
-
Festive Fruit Salad: Brighten up the table with a colorful mix of seasonal fruits like pomegranates, oranges, and pears that refresh the palate.
-
Chocolate-Covered Strawberries: A touch of decadence, these add a juicy contrast to the rich flavors of the cheesecake while keeping a festive theme.
-
Coffee or Espresso: The bold aroma and bitter notes of a freshly brewed cup perfectly balance the sweetness of the cheesecake, elevating the entire experience.
-
Nutty Biscotti: Serve crispy, almond-flavored biscotti on the side for a delightful crunch that contrasts the smooth cheesecake texture beautifully.
-
Whipped Cream Topping: Extra dollops of homemade whipped cream not only enhance presentation but provide a fluffy element that emphasizes the dessert’s richness.
Pair any of these delightful options with your Easy Christmas Red Velvet Cheesecake, and watch as they bring smiles and satisfaction around your holiday table!
Expert Tips for Easy Christmas Red Velvet Cheesecake
-
Soften Cream Cheese: Ensure cream cheese is at room temperature before mixing; this prevents lumps and creates a smooth filling.
-
Chill Equipment: For best results when whipping heavy cream, chill your bowl and beaters beforehand to achieve higher volume and texture.
-
Swirling Technique: When layering the red and white mixtures, use a gentle hand with your knife or skewer for a visually stunning marbled effect without overmixing.
-
Chill Time Matters: Allow the Easy Christmas Red Velvet Cheesecake to set overnight for enhanced flavor and a firmer texture that will hold up beautifully when sliced.
-
Customize Sprinkles: Feel free to swap out the colorful Christmas sprinkles for seasonal themes; it’s an easy way to adapt this dessert for any holiday celebration!
Make Ahead Options
These Easy Christmas Red Velvet Cheesecake is a fantastic option for meal prep! You can prepare the crust and filling up to 24 hours in advance, storing them separately in airtight containers. To do this, press the Oreo crust into the pan, chill, and whip the filling ingredients together, then layer the red and white batters. Just ensure to cover the base with plastic wrap to prevent any moisture from affecting its texture. When you’re ready to serve, simply assemble the cheesecake and allow it to chill in the fridge for at least 4 hours (though overnight is ideal), enhancing the flavors for a deliciously festive treat that looks stunning and tastes divine!
Storage Tips for Easy Christmas Red Velvet Cheesecake
Fridge: Store the cheesecake covered in the refrigerator for up to 4 days. This helps maintain its creamy texture and vibrant flavors.
Freezer: For longer storage, freeze the cheesecake without toppings for up to 2 months. Wrap it tightly in plastic wrap and aluminum foil to prevent freezer burn.
Thawing: When ready to enjoy, thaw the cheesecake overnight in the fridge. This ensures a smooth, consistent texture when serving.
Reheating: There’s no need to reheat this easy Christmas red velvet cheesecake; simply slice and enjoy cold, straight from the fridge for a delightful treat!
Easy Christmas Red Velvet Cheesecake Variations
Feel free to elevate your cheesecake experience with these fun twists and substitutions!
-
Peppermint Twist: Add crushed peppermint candy to the cheesecake filling for a delightful holiday minty flavor. It’s the perfect festive contrast!
-
Red Velvet Oreo Bars: Spread the cheesecake mixture into a square pan for a bar-style dessert that’s easy to slice and share. Perfect for potlucks!
-
Layered Dessert Cups: Layer the cheesecake filling and crushed Oreo crust in clear cups for an easy, portable treat that looks charming at any table.
-
Chocolate Ganache Drizzle: Pour warm melted chocolate over the cheesecake before chilling for an added layer of richness that chocolate lovers will adore.
-
Nutty Crunch: Incorporate crushed almonds or pecans into the crust for a delightful crunch that complements the creamy filling beautifully.
-
Spiced Pumpkin Variation: Blend in some pumpkin puree and spices (cinnamon, nutmeg) for a seasonal twist that captures the holiday spirit in each slice!
-
Berry Swirl: Fold in a few tablespoons of your favorite berry puree to the filling for a fruity burst that balances the sweetness beautifully.
-
Alternative Sweeteners: Use maple syrup or agave nectar in place of sugar for a natural sweetness that pairs wonderfully with the rich creaminess.
Exploring these variations can make your No Bake Christmas Red Velvet Cheesecake an even more delightful and personalized dessert for everyone to enjoy!
Easy Christmas Red Velvet Cheesecake Recipe FAQs
What type of Oreos should I use for the crust?
I recommend using regular Oreo cookies with the filling included, as this provides the best chocolatey flavor and texture for the crust.
How long can I store the cheesecake in the fridge?
You can store the Easy Christmas Red Velvet Cheesecake covered in the refrigerator for up to 4 days. Make sure it’s well-wrapped to keep its delicious flavors fresh!
Can I freeze the cheesecake?
Absolutely! You can freeze the cheesecake without toppings for up to 2 months. Just wrap it tightly in plastic wrap, then in aluminum foil to prevent freezer burn. Thaw it overnight in the fridge when you’re ready to enjoy!
What if my cream cheese is lumpy?
To avoid lumps, make sure your cream cheese is softened to room temperature before mixing—it should be creamy and smooth. If you still notice lumps after mixing, you can blend the cheesecake filling a bit longer until it’s fully creamy.
Can this cheesecake be made dairy-free?
Yes, it can! Use dairy-free cream cheese and coconut whipping cream as substitutes for the filling and topping. Be sure to check the cookies used for the crust to ensure they are dairy-free, too.
How can I achieve a perfect swirl with the red and white mixtures?
To create that stunning marbled effect, gently alternate spoonfuls of the red and white batter into the chilled crust. Use a knife or skewer to swirl them together lightly but don’t overmix—this keeps each layer distinct and beautiful!

Irresistibly Easy Christmas Red Velvet Cheesecake Recipe
Equipment
- food processor
- Mixing Bowl
- springform pan
- mixer
Ingredients
For the Crust
- 24 cookies Oreo Cookies Whole cookies (filling included) yield the best results.
- 1/2 cup Butter (melted) Use unsalted butter for better control over sweetness.
For the Cheesecake Filling
- 16 oz Cream Cheese (softened) Ensure cream cheese is at room temperature for a smooth mixture.
- 1 cup White Sugar Consider a sugar substitute if desired.
- 1 cup Heavy Whipping Cream Can use Cool Whip as a shortcut.
- 1 teaspoon Vanilla Extract Almond or peppermint extract for a different flavor.
- 2 tablespoons Cocoa Powder Use unsweetened cocoa powder for authentic taste.
- 1 bottle Red Food Coloring Gel coloring is recommended for deeper color.
- 1/4 cup Christmas Sprinkles Change sprinkle colors for different occasions.
For the Topping and Garnish
- 1 cup Whipped Cream Homemade is preferred for freshness.
- 10 cookies Mini Oreos Crushed Oreos or chocolate curls work well.
Instructions
Make the Cheesecake
- Prepare the Crust: Start by pulsing the Oreo cookies in a food processor until they resemble fine crumbs. Mix in the melted butter until fully combined, then press the mixture evenly into a springform pan. Chill in the refrigerator while you make the filling.
- Whip the Cream: In a chilled mixing bowl, whip the heavy cream until stiff peaks form, which should take about 3-5 minutes. Set aside, letting it stay cool while preparing the cheesecake base.
- Make the Cheesecake Base: In a separate bowl, beat the softened cream cheese and white sugar together until smooth and creamy, about 2-3 minutes. Add in the vanilla extract and mix well.
- Combine Mixtures: Gently fold the whipped cream into the cream cheese mixture until smooth and fully incorporated. Divide this mixture into two bowls; to one, add cocoa powder and the red food coloring, stirring well.
- Assemble the Cheesecake: Begin layering by alternating spoonfuls of the red and white batters into the chilled crust. Use a knife or skewer to swirl the colors together, creating a beautiful marbled effect.
- Chill: Cover the cheesecake with plastic wrap and refrigerate for a minimum of 4 hours, but overnight is best, to allow it to set firmly.
- Decorate and Serve: Just before serving, top the cheesecake with a generous layer of whipped cream, sprinkle mini Oreos on top, and finish with colorful Christmas sprinkles for that festive touch.


Leave a Reply