
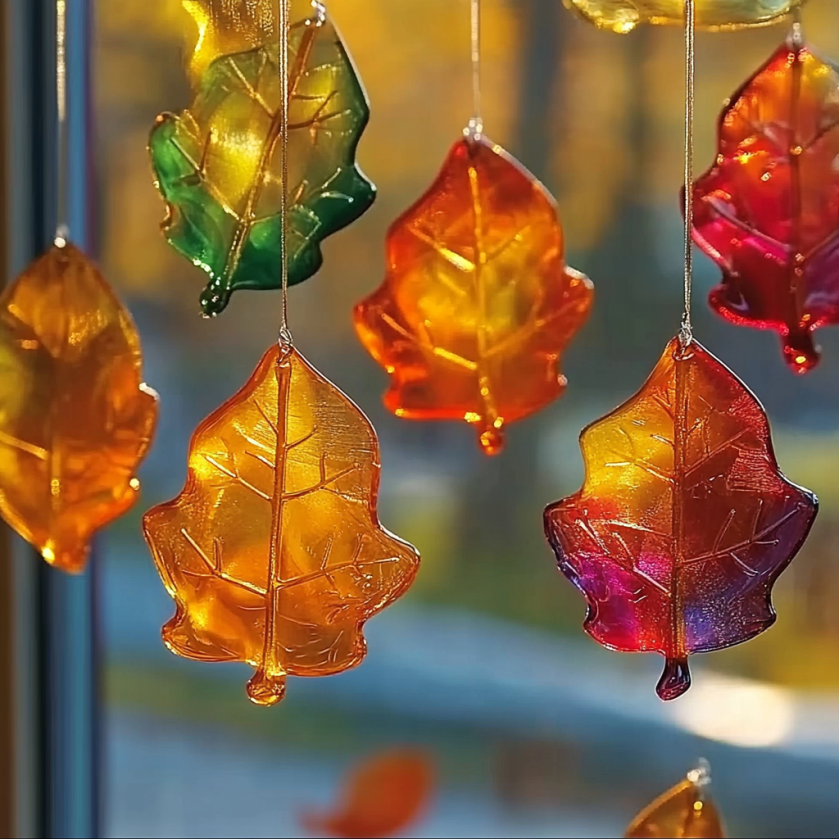
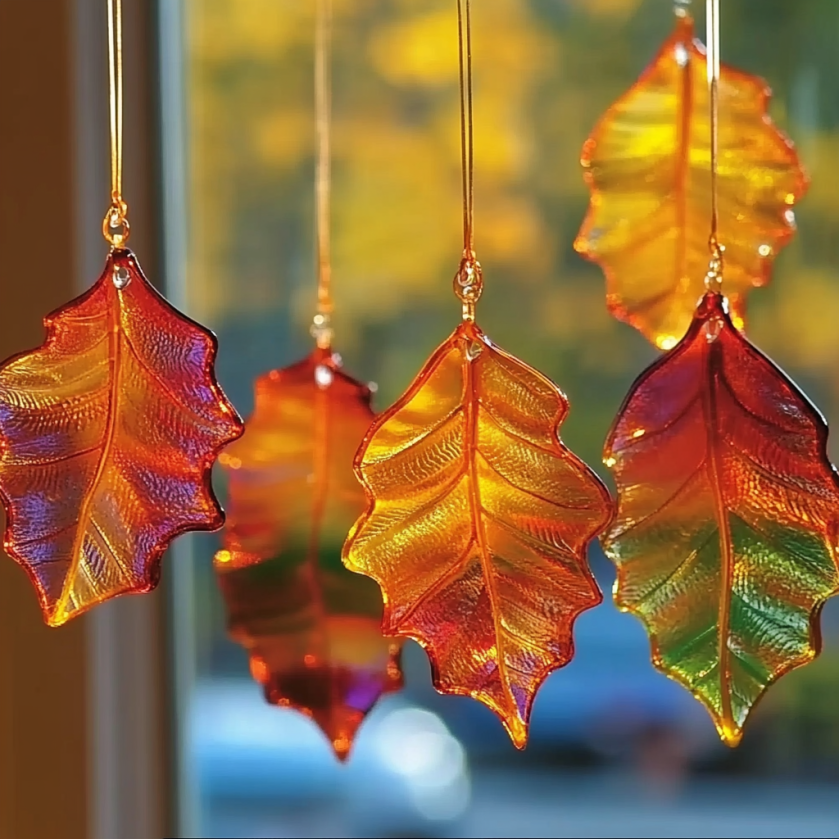
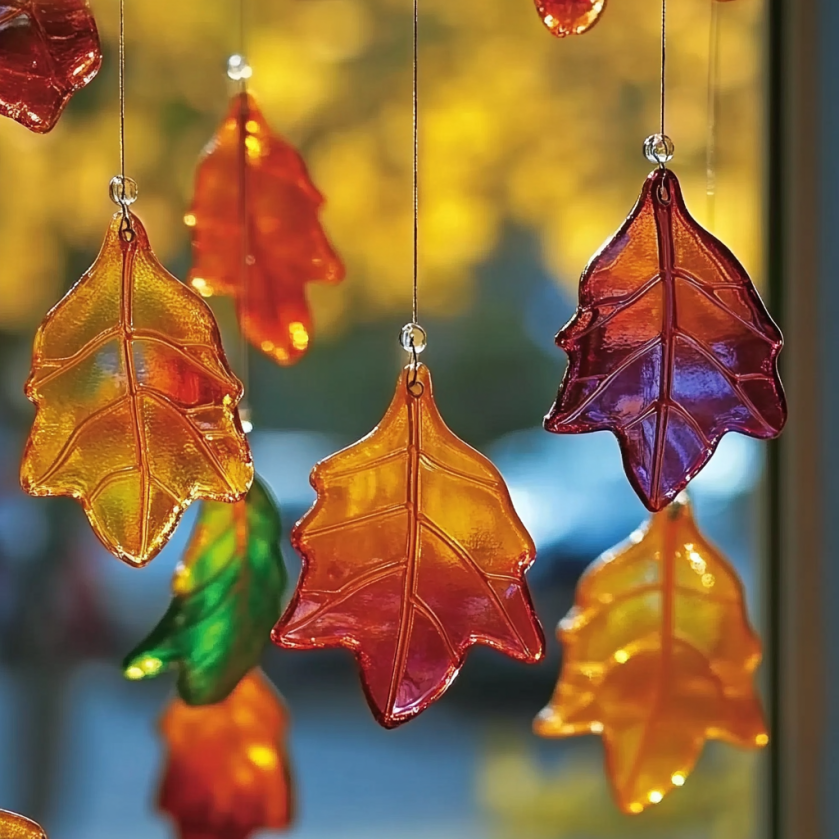
Wax paper sun catchers are a delightful and simple craft project that can brighten up any room. Perfect for kids and adults alike, this DIY activity not only engages creativity but also brings a splash of color to your space. By using wax paper and vibrant hues, you can create stunning sun catchers that dance in the light, casting colorful shadows on walls and floors. This project is an excellent way to foster imaginative play, improve fine motor skills, and encourage an appreciation for art. Whether you’re looking for a fun afternoon activity or a thoughtful gift, these sun catchers are sure to please. So gather your materials, and let’s get crafting!

Why You’ll Love This Wax Paper Sun Catchers
- Easy to Make: Requires minimal materials and steps—perfect for all ages.
- Customizable: Use any colors or designs to suit your style.
- Educational: Teaches children about color mixing and light.
- Affordable: Inexpensive supplies make it a budget-friendly craft.
- Eco-Friendly: Utilize recyclable materials to create stunning art.
Materials
- Wax paper
- Crayons (various colors)
- Cheese grater or sharpener
- Iron
- Parchment paper
- Scissors
- String or ribbon for hanging (optional)
Step-by-Step Instructions
1. Prepare the Workspace
- Find a flat, stable surface to work on.
- Lay out parchment paper and have your materials ready.
2. Shave the Crayons
- Use a cheese grater or crayon sharpener to create crayon shavings.
- Aim for a mix of colors—this will enhance your sun catcher’s appearance.
3. Assemble the Design
- Place a sheet of wax paper on the parchment paper.
- Evenly spread the crayon shavings across the wax paper, leaving a small border.
4. Seal the Layers
- Place another piece of wax paper on top of the shavings.
- Cover the top layer with parchment paper to protect your iron.
5. Heat It Up
- Set your iron to a low heat setting.
- Gently press down on the parchment paper for a few seconds, watching the shavings melt and fuse the wax paper together.
6. Cut and Finish
- Once cooled, carefully peel back the parchment paper.
- Use scissors to cut out shapes from your wax paper sun catcher.
- Optionally, punch a hole for string or ribbon if you wish to hang it.
Tips & Variations
- Use Different Shapes: Experiment with different cut-out shapes like hearts, stars, or animals for variety.
- Add Texture: Incorporate textured papers or tissue alongside crayon shavings for added visual interest.
- Explore Themes: Create seasonal or themed designs, such as leaves for fall or flowers for spring.
- Glow in the Dark: Try using glow-in-the-dark crayons for a fun twist that lights up at night.
Frequently Asked Questions
1. Can I use colored pencils instead of crayons?
While colored pencils can be used, crayons melt more effectively, providing a smoother and more vibrant finish.
2. What if I don’t have an iron?
You can use a hair straightener on low heat as an alternative to seal the layers.
3. How do I hang my sun catcher?
You can use suction cups, tape, or string through punched holes to hang them in windows.
4. Will this craft make a mess?
While crayon shavings can scatter, covering your workspace with newspaper or craft mat can help keep things tidy.
Serving Suggestions or Pairings
For a family craft day, consider pairing this DIY project with a refreshing lemonade or iced tea. A simple platter of fresh fruit or cookies can create a lovely atmosphere and make the crafting session even more enjoyable.
Final Thoughts
Wax paper sun catchers are not only a creative outlet but a beautiful way to enhance the beauty of natural light in your home. Whether made solo or with family, these cheerful decorations offer a personal touch to any space. We hope you enjoy making your sun catchers, and we’d love to see your creations! Please share your versions or leave a comment below to inspire others. Happy crafting!
Wax Paper Sun Catchers
Ingredients
Craft Materials
- 1 sheet Wax paper Use multiple sheets for different sun catchers.
- 3-5 colors Crayons (various colors) Choose vibrant colors for the best effect.
- 1 unit Cheese grater or sharpener For making shavings from crayons.
- 1 unit Iron Set to low heat.
- 1 sheet Parchment paper Used to cover the wax paper while heating.
- 1 pair Scissors For cutting out shapes.
- optional string or ribbon String or ribbon for hanging To hang your finished sun catcher.
Instructions
Preparation
- Find a flat, stable surface to work on.
- Lay out parchment paper and have your materials ready.
Step-by-Step Crafting
- Use a cheese grater or crayon sharpener to create crayon shavings.
- Place a sheet of wax paper on the parchment paper.
- Evenly spread the crayon shavings across the wax paper, leaving a small border.
- Place another piece of wax paper on top of the shavings.
- Cover the top layer with parchment paper to protect your iron.
- Set your iron to a low heat setting.
- Gently press down on the parchment paper for a few seconds, watching the shavings melt and fuse the wax paper together.
- Once cooled, carefully peel back the parchment paper.
- Use scissors to cut out shapes from your wax paper sun catcher.
- Optionally, punch a hole for string or ribbon if you wish to hang it.


Leave a Reply